
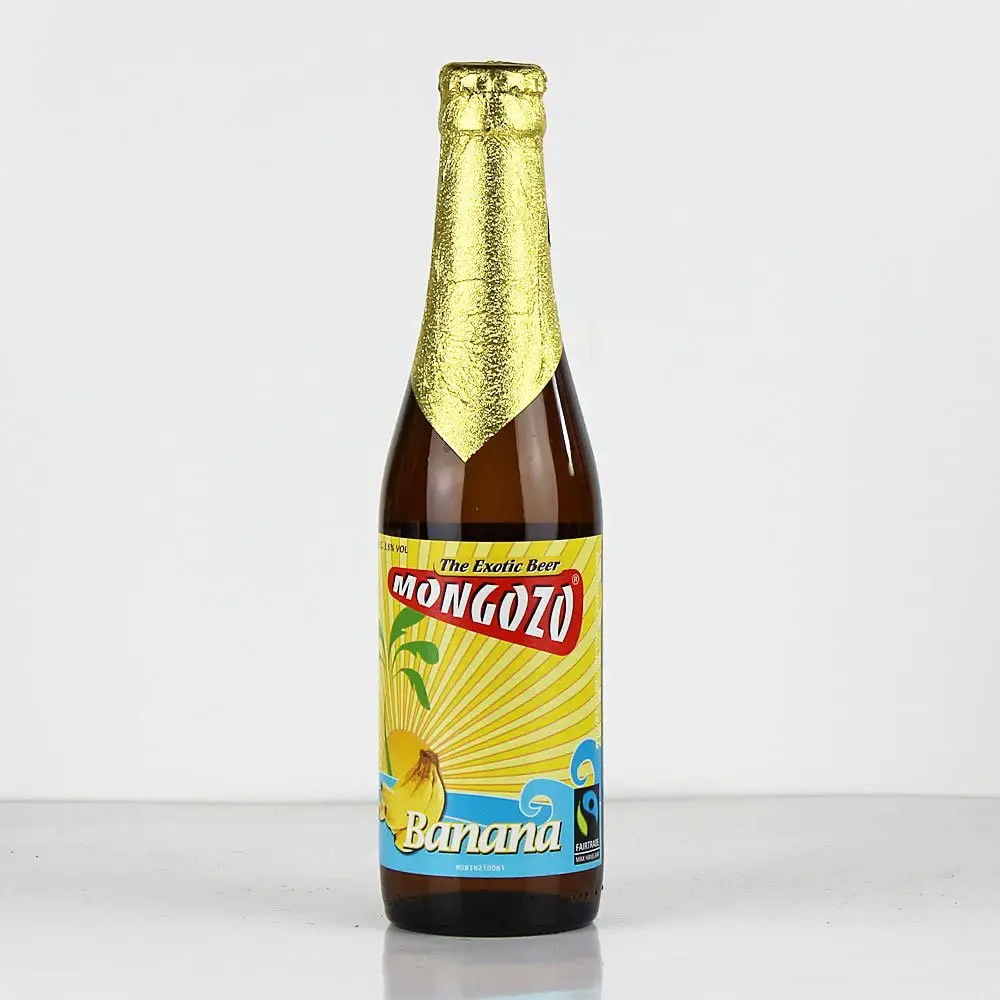
Craft brewers have been revolutionizing the way that beer is made for decades. There have been popular beers made from all types of fruit, vegetables, and even meat products. But beer brewed from bananas? It sounds like a joke! Surprisingly, though, it can be done!
The basic process of brewing banana beer can be done at home and requires a few simple steps:
- Sanitize your materials
- Ripen a batch of bananas
- Extract the banana juice
- Dilute the mixture with water
- Add wild yeast cereal
- Ferment the mixture
- Filter out the solid waste product
- Bottle the final banana beer
Brewing banana beer is a simple process when you look at the directions. But there is a little more to know than just fermenting bananas.
In regions of the world where bananas are a staple food, such as Eastern Africa, banana beer is very common.
Read on to find out more about how you can brew banana beer at home.
What Equipment is Needed to Produce Banana Beer?
Some of the most critical materials for brewing banana beer are listed below:
1. Fermentation containers
Once you have your mixture stirred up and ready to ferment, you need a jug or several jugs to pour it in. Fermentation bottles are specially designed bottles that hold the banana beer mixture and allow it to ferment with a one-way glass valve that releases excess gas from the mixture as it ferments. Store the bottles in a dark, cool place during the fermentation process, which can take anywhere from eighteen to twenty-four hours.

Some of the best fermentation containers are listed below:
- 1 Gal Jug W/Twin Bubble Airlock: The great feature of this one-gallon fermentation bottle is that it can be used for the fermentation of the brew and then has a sealed lid for the storage of the final brew. The twin bubble airlock allows for the excess gases produced during the fermentation process to be released a little bit at a time. You’ve also seen me using this 1-gallon fermentor from Norther Brewers in the picture above that will absolutely do the trick too.
- Ss Brewtech Home Brewing Mini Brew Bucket Fermenter: Stainless steel brew fermenters are the best option for your small-batch beer brewing. The stainless steel is more sanitary than plastic and safer than glass. This fermentation bucket even comes with a spigot to pour out the delicious beer once it is ready for drinking.
- Chapman Brewing Equipment ST07NP Stainless Steel Fermenter: This stainless steel brewing fermenter is an excellent choice if you think you will be making multiple batches of different types of beer. You can even check on the fermentation process with the built in gas release valve at the top.
2. Storage Bottles & Growlers
After you ferment the banana brew, you need to put your beer in something to chill it down. You will bottle most small batches in 12- or 22-ounce glass bottles or larger 64-ounce growlers made of brown glass. The brown color filters out UV light that could cause the beer to become fouled.
Some of the most popular options for beer storage bottles and growlers are listed below:
- Home Brewing Glass Beer Bottle: These glass bottles make home brewing easy because they are swing caps that don’t require any work to bottle. These bottles are also large sixteen-ounce bottles with an airtight rubber seal for secure storage of your homebrew beer.
- Monster Brew Amber Long Neck Bottles: Crown cap bottles are standard with most beer bottles in the U.S. These beer bottles come in dark brown glass for UV protection of your beer and can be capped quite easily with a bottle cap gun.
- Mr. Beer 740ml 2 Gallon Beer Bottling Set: A safer alternative to glass bottles are these BPA free plastic bottles. Plastic is much safer and more convenient to use when storing your brew, and this set comes with the reusable plastic caps.
3. Bottle Capper
When brewing your beer in small batches, you will probably be bottling by hand. One device that will allow you to bottle your beer manually is a bottle capper. Some products do not come with bottle caps, so keep that in mind when shopping for a bottle capper.
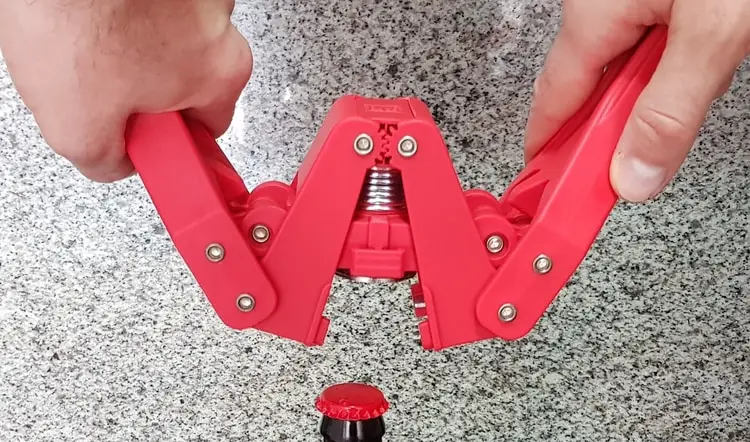
Some of the best beer bottle cappers are listed below:
- Red Baron Bottle Capper: This is a standard wing clamp capper that is much more economical than a full-sized bench capper. Simply place the cap, squeeze the wing clamp, and you will have successfully capped your beer bottle.
- Manual Bottle Capper Tool: The twin lever design of this manual bottle capper is a little easier on the hands. The metal in the lever is coated with rubber for a secure grip. The large size also fits a variety of different bottle sizes.
- Dyrabrest Manual Beer Capping Machine: The quickness and efficiency of this table-top bottle capper can’t be beaten by the handheld manual cappers. This capper device also comes with adjustable height and a non-slip base for the bottle to sit on, ensuring that you get a clean cap every time.
9 Steps to Brew Banana Beer
The recipe for brewing banana beer is pretty simple on the surface.
However, there are many variations that you need to take into consideration before beginning.
This step-by-step guide will walk you through the process of banana beer brewing and provide different options for variations in the recipe that you can try out and experiment with to create the best tasting banana beer for your palate.
The best part about banana beer is the variety of ways that you can smash the banana mash, ripen the bananas, and add wild yeast.
The many ways of making traditional and contemporary versions of banana beer allow you to tweak the recipe to suit your own preferences and tastes.
Use the steps below to make a batch of banana beer and keep in mind that sanitation is the most crucial step and should be maintained throughout all other steps.
1. Sanitize Your Materials
Brewing beer requires several standard materials that need to be sanitized to create your brew mixture and let it ferment.
Banana beer is especially sensitive to the fermentation process.
Make sure that you use sanitation products like chlorinated water to sanitize the jug you will be fermenting and storing your banana beer in, then rinse the bottle with diluted water.
The traditional taste of the Eastern African style of banana beer is made without the use of boiling water.
Because of the particular microbial bacteria already present in the banana, you will not want to boil water or apply heat to the mixture.
Adding boiling water to the mixture will kill the bacteria on the banana and limit the natural taste that makes banana beer different and unique.
2. Ripen a Batch of Bananas
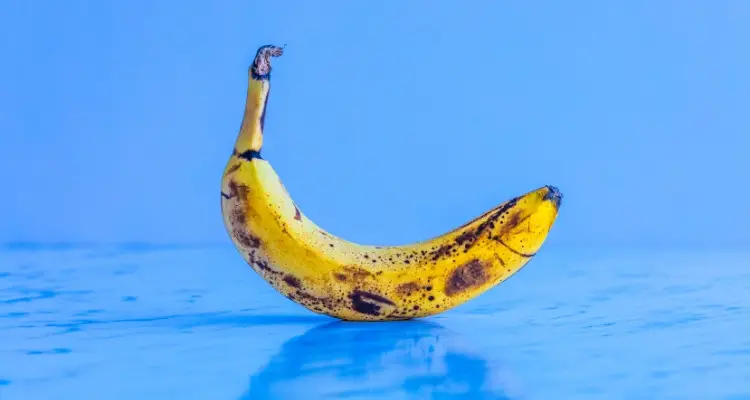
The traditional method of ripening bananas is a time-honored method that requires the brewer to place the unpeeled bananas in an earthen hole during the dry months and allow the batch to ripen surrounded by banana leaves.
In the colder months, heating the bananas over a fire can speed up ripening.
Ripe bananas for beer are best when they are mushy brown and the meat is beginning to liquify because you will need to extract the juice from them.
The only traditional step to ripening bananas is leaving the unpeeled bananas in a dirt pit for several days or heating over the fire.
When you heat over a fire, make sure to keep the heat mild by putting the bananas in a rotisserie or some sort of elevated roast.
Burnt bananas will affect the taste of the final brewed beer negatively.
For a contemporary version, simply wait for the bananas to ripen. You can place them in a bowl or on a plastic sheet, as the bananas will become soft and possibly soggy during this process.
You will know that the batch of bananas are ripened enough to extract the juice from them when the ordinarily yellow or green peel of the bananas turn almost entirely brownish-black.
The fermentation of the bananas has already begun within the peels. Now, it is time to extract the juice.
The banana species most commonly used is the Musa species out of Jamaica because it has the highest sugar content.
Sugar is a necessary ingredient for the fermentation process and will need to be added if you cannot obtain bananas high in sugar content.
Luckily, most banana varieties that you find in the supermarket are of the Musa species.
3. Extract the Banana Juice
You might think that extracting banana juice is a bit difficult.
The bananas that people usually eat are barely ripened and more of a pasty consistency.
However, as the ripening of the banana takes hold, and the peel begins to turn the color brown, the “meat” of the banana loses its pasty consistency and becomes slimy.
The slimy consistency is caused by the breakdown of the banana “meat,” which begins to liquefy into banana juice.
Extracting banana juice in the first step before fermentation will be full of residue.
The residue will deliver more richness of taste and should not be filtered out before fermentation.
After the fermentation step and the beer is ready to be bottled, you can filter out any solid waste from the final brew.
Remember, this is a “hazy” beer with some residue shown in the final beer creating a cloudy appearance.
There are several methods for extracting banana juice from the ripened bananas. Some of the most popular, along with the traditional method, are listed below:
Traditional grass method
Using any stiff grass will be suitable for this step.
The grass should be several inches to a foot in length minimum for the process of kneading to work correctly and efficiently.
Kneading the ripened bananas into the stiff grass will produce a clear liquid juice.
The juice residue will also remain in the grass.
- Find stiff, tall grass for kneading into the bananas. This can be any stiff grass, as long as the length is appropriate for kneading, which will need to be continuously handled. A length of a foot or more is most comfortable to handle for kneading.
- Place the bananas in a waterproof container or plastic basin that can catch the banana juice, which will be used for the fermentation process.
- Place the grass over the bananas and either stomp with bare sanitized feet or knead the grass into the bananas with your hands. Stomping or kneading the banana mixture into the stiff grass releases the clear banana juice that will be used in the fermentation process to brew the beer.
- Place the pasty banana container full into a cheesecloth and squeeze out the juice into a catch jar.
Blender method
Using a blender can also achieve the release of the clear banana juice to be extracted for the brewing of banana beer.
The steps are much easier and less messy than the traditional method and can be seen below:
- After the bananas have ripened, peel and slice the bananas into small pieces.
- Add the bananas to a blender and create a blended banana “smoothie.”
- The “smoothie” should be a liquid consistency. If the bananas are too pasty, they may not have been ripened enough. A small amount of water can be added to remove the banana paste from the blender.
- Place the pasty banana container full into a cheesecloth and squeeze out the juice into a catch jar.
Tenderizer method
This method of banana juice extraction requires that the bananas be smashed so that the juice is more readily available and easier to remove from the banana meat.
Using several cheesecloths and a tenderizer can produce the required effect.
The following steps are for those that may not want to completely puree their bananas and risk an abundance of unfiltered solids in their final banana beer product.
- Place the ripened bananas in a waterproof container and cover with a layer of cheesecloth.
- Using a metal or smooth wood tenderizer, smash the bananas for several minutes under the cheesecloth. This replicates the traditional method with less mess.
- Place the ripened banana mash into the cheesecloth and squeeze out the juice into a catch jar.
4. Dilute the Mixture with Water
Diluting the mixture is essential to get correct.
A watered down mixture may not ferment correctly.
To get enough of the banana beer mixture for a batch and to make the taste more refreshing, you need to dilute the fermented banana mash with water.
This is a critical step in how you prepare the water and also how you store the brew.
Both the water and the storage container need to be sterilized entirely with a mixture of bleach and water and then rinsed with diluted water.
If you do not thoroughly sterilize your storage containers or bottles, you could end up with a batch of beer bottles with mold growing inside the caps on the bottle walls.
The tenderized banana juice should be added to a solution of water that has been sterilized by boiling and left to cool.
Do not add hot or boiling water to your banana mash because this will kill the naturally occurring microbial bacteria in the banana, which is crucial for the fermentation process and the traditional taste of the banana beer brew.
The ratio is three parts banana juice to one part water (3:1).
So, if you are putting this in a 4-gallon fermentation jug, you would want to add three gallons of banana mash to one gallon of water.
The high concentration of banana mash in the mixture ensures that the fermentation process will take no more than twenty-four hours to complete.
5. Add Wild Yeast Cereal
Most brewing recipes require some kind of yeast product.
Yeast is a living organism that eats the sugar in the mixture of whatever it is that you are fermenting.
The waste byproduct of the yeast is alcohol.
So, whatever is supplying the sugar for the yeast to feed off of is what is going to give the beer its unique taste.
In this case, the sugar comes from the banana mixture.
The method of adding the wild yeast to the banana and water mixture is done by following the directions below:
- Grind the wild yeast product. Keep in mind that a finer wild yeast powder will produce a cloudier residue in the final beer product but will also provide a bolder nutty flavor.
- Roast the yeast cereal product over a fire.
- Add it to the banana and water mixture at 1 part yeast cereal to 12 parts liquid banana water.
There are several different types of wild yeast to use when brewing banana beer. The best wild yeast cereals for banana beer are listed below:
Sorghum
This grain cereal from grass is a staple of the diet for people and cattle. It gives the banana beer a distinct flavor and helps with the yeast fermentation process.
Some of the most popular brands of sorghum are listed below:
- Gerbs Sorghum Flour: This organic sorghum grain is guaranteed allergen-free. This is a high-quality ground sorghum flour that does not need to be roasted for very long before being mixed into the banana beer mixture.
- Muddy Pond Sorghum Mill Sorghum Syrup: Another great option for experimenting with flavor is to use a reduced sorghum syrup that will dilute quickly and cleanly into your banana beer mixture.
- Oberholtzer’s Kentucky Sorghum: This all-natural sorghum is not a blend and is very potent. This jar can last for several batches of banana beer.
Millet
Millet is a larger kernel grain that can also supply the nutty flavor for your banana beer.
The highest quality whole grain and ground millet are shown below:
- Arrowhead Mills Organic Whole Millet: Even though this is whole millet, the roasting process for the yeast cereal can be done much more easily than with the ground flour. The wholesome organic taste is very similar to other grains.
- Bob’s Red Mill Millet: This whole grain millet is high quality and hulled, leaving little work for you to do with it other than roast and add it to your banana beer mixture.
- Hulled Millet (3 lb) by Pure Organic: This organically farmed millet is high in fiber and guaranteed to be allergen-free.
6. Ferment the Mixture
The fermentation process is reasonably straightforward.
As long as you have your fermentation container, you simply leave the banana brew mixture in the fermentation container for 18 to 24 hours in a dark warm place.
If you have a gas valve release, you should hear burping about once every fifteen minutes when the batch is done.
Some people like to cover the jugs they are fermenting their beer in to make sure that no unwanted sunlight UV rays get on the batch and kill the yeast before it is done with the complete fermentation process.
UV rays will kill the bacteria creating the fermentation process and slow or even halt the entire process.
If you hear your gas valve release stop burping, you have a problem.
The wild yeast and naturally occurring microbial bacteria of the banana beer fermentation batch are incredibly sensitive.
To remember when storing your banana brew
Here are some of the most important things to remember when storing your banana brew for fermentation:
- Store your jugs or fermentation containers in a warm place.
- Do not allow the room temperature to fluctuate more than a few degrees while fermentation is taking place.
- Covering your fermentation containers will protect the batch from temperature shifts and UV light damage.
- Direct sunlight is not recommended.
7. Filter Out the Solid Waste Product
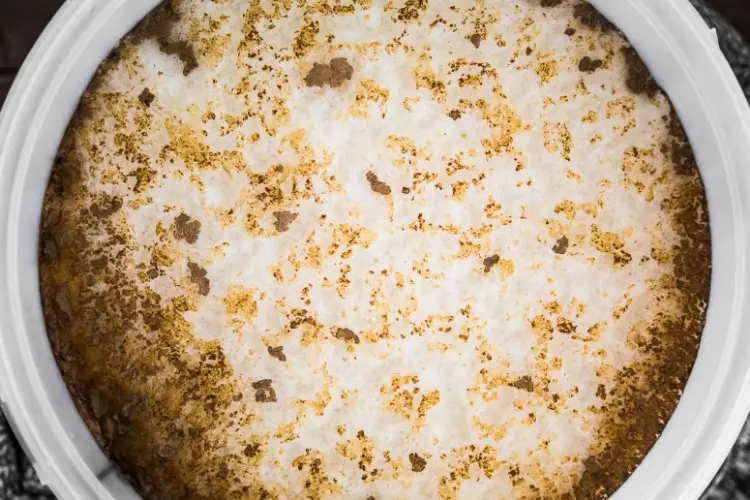
The final step before bottling the banana beer is filtering out any solid waste that is left behind in the fermented mixture.
There may be residue at the top and bottom of the fermented mixture.
Also, you will want to filter out any of the millet flour kernels and residue.
To filter out solid waste byproduct, use a clean cloth and pour the banana beer mixture through the cloth into another large container.
This will be the container that you bottle from, so make sure not to allow any residue or solid waste to makes its way around the catch cloth.
The solid waste from the fermented mixture can be dried as an additive to later batches of banana beer, which can add an oaky taste and result in a full-bodied beer.
However, this is not a required step for traditional banana beer.
8. Bottle the Final Banana Beer
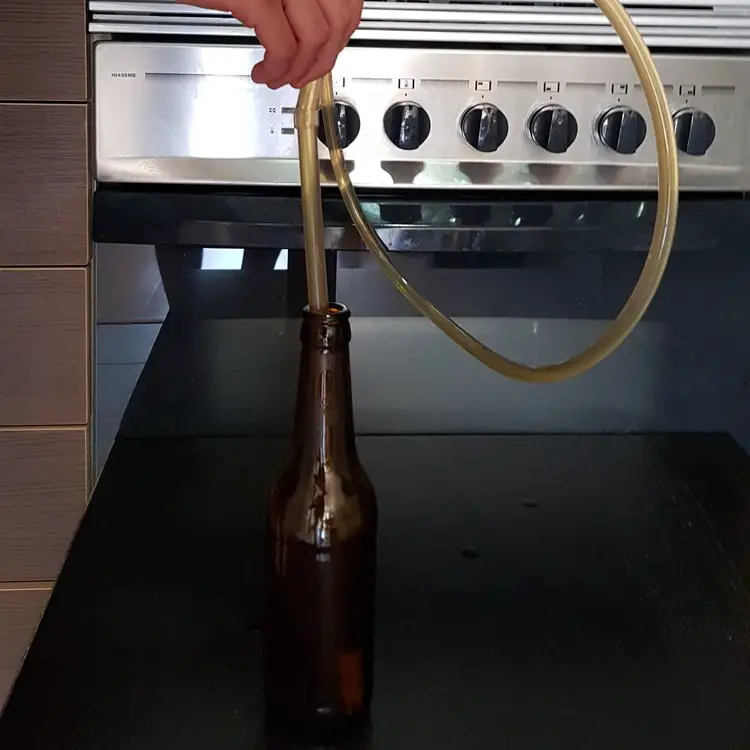
Bottling individual bottles can be a bit tedious if you do not have a built-in spigot on your fermentation container.
The best way to fill individual bottles without a spigot is to siphon the beer from the fermentation container into each bottle.
Let the banana brew mixture sit for a while to allow unwanted sediment to settle down to the bottle of the fermentation container before beginning the siphoning process.
The steps for bottling the final banana beer are listed below:
- Get a quarter-inch food-grade rubber tubing and place it into the fermentation container. Try not to place it down to the bottom of the container to avoid sediment.
- Using athletic or duct tape, secure the tubing to the side of the fermentation container.
- Begin to siphon the banana beer out of the fermentation container. To siphon, simply begin to suck on the end of the tube until gravity begins to pull the banana beer into the tube.
- Place the tube into the empty bottle.
- Keep the tube pouring the beer into the bottle at an angle to avoid foaming and overflow.
- When the bottle is full, remove the tube and place it in the next empty beer bottle.
- Continue this process until all of the banana beer has been siphoned out of the fermentation container.
- Next, you will need to cap each bottle. If you did not purchase the wire tightening cap bottle, you would need to use a capper tool.
- If you have a handheld capper, manually insert the bottle cap into the capper and then place it in the open position over the bottle. Place the capper tool over the mouth of the bottle and squeeze until you feel a pop. The bottle should be tightly capped.
- If you have a table-top capper, the process is similar, except you do not need to fuss with holding the bottle while you cap it. Simply place the bottle to be capped under the capper and pull down on the lever. The pressure will cap the bottle securely.
In Conclusion
Banana beer is a traditional Eastern African drink that can be fun and unique to try to brew yourself.
If you follow the instructions in this guide, you can make banana beer in the comfort of your home all year long.
As long as you sanitize very thoroughly and find fresh ingredients, the banana beer should have a unique and nutty flavor with a golden milky color.
Even if you don’t get the perfect banana beer, you can always revisit this post and try again to follow these instructions step-by-step or put your own twist on the banana beer recipe.
The following Youtube recipe shows you more or less the steps that should be followed, except that in that recipe beer extract is added :