
An early question but major step for any brewer is, how Can I make my own beer recipe? Home brewing beer consists of multi-leveled challenges. It is easy to learn and difficult to master. One could easily spend 10 years or more learning all there is to know, and still have things to discover.
Making your own recipe is as simple as the four ingredients of the Reinheitsgebot – the German purity law of 1516. Barley, hops, yeast, and water, know them, know them well, and the recipe making is a cinch.
How I Started Out
Nearly every home brewer starts with a canned kit.
We use two cans, or God forbid one can plus three pounds of dextrose (corn sugar) and trust the hop oil in the can is enough.
Buy a package of brewer’s yeast and go to town.
Brew with a friend
My first beer all those many moons ago I brewed with a buddy, Bo.
He was no master but knew the moves so there was a comfort level.
He wanted to throw in some extra hops, more than the 2 ounces agreed upon, I was like, “Whoah, whoah, whoah, are you sure we can do that?!”
“Don’t worry man, it’ll be fine.”
And it was, we brewed a simple English bitter with amber extract and 3 ounces plus of pellet hops, about 4% alpha, could not say which.
The beer was light about 3.5% alcohol, but it was good and tasted like beer.
Going Solo – The First Steps to Making Your Own Beer Recipe
You have a little pamphlet provided by your beer shop owner or if you were like me, bought the homebrewers Bible, Charlie Papazian’s “The Complete Joy of Homebrewing,” vol. 2.
Follow the instructions the best you can, make a mess and if you are lucky turn out with something resembling beer.
Let’s start with an assumption. You have brewed five batches of beer with moderate success and are ready for more. The next steps will take you to a new level.
- Use unhopped extract. Light or extra light is recommended.
- Choose low-alpha hop pellets you like. If you are not sure, a ½ hour of research will help you or ask a knowledgeable home-brew shop owner.
- Prepare to add some adjunct grain: used for flavor and color.
- Switch to liquid yeast yesterday. You will see the light!
Choosing the Recipe
The center pages of Papazian had an org chart full of beer styles.
I used it to get the feel of what beer recipes should look like.
The left column had the names of perhaps 20 beer styles. The top row had the names of all the malts, by flavor, by pound, suggested bitterness level of hops, target original and final gravity of beer.
You simply picked a style you liked in the left hand side, followed the row all the way to the right, it detailed the ingredients, target gravity, alcohol percent, everything you needed to brew it.
Hops are measured in HBUs, an extremely simplified method of measuring bitterness.
This chart works on one assumption. You understand the fundamentals of process and can execute a successful brew. When you arrive at this point, very quickly the entire repertoire of world beer culture is open to you.
Formulating Your Own Recipe: Step by Step Explained
Part 1: Move to lighter unhopped extract
The reason here is simple, start with a neutral base.
All you want is fermentable sugars and malt flavor.
This is appropriate for amber ales and lighter, even dark ales, depending on the style.
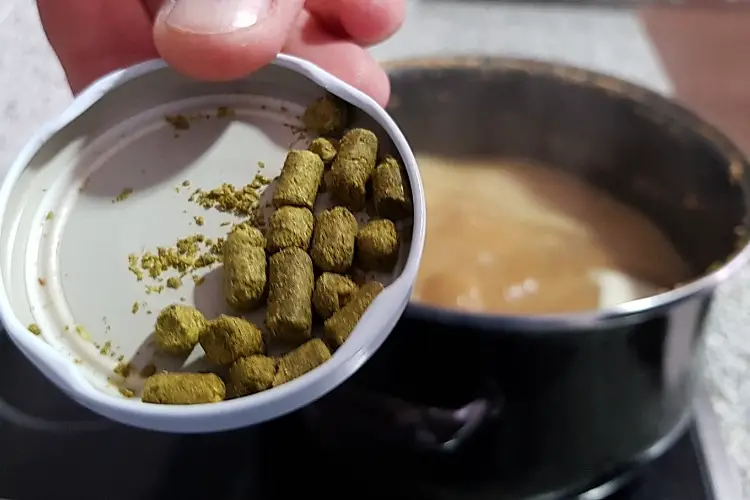
Part 2: Hops and staging
This is extremely easy and enjoyable.
Hops are flowers that grow on long vines. Shaped like small soft light green pine cones, they hold small yellow pollen-like pods called lupulin glands, in which the hop oil resides.
Your first hop staging (time at which you add) is bittering, the second is for flavor and the third for aroma.
Imagining a 40-minute boil – an average for beginning / early intermediate homebrewers – you add at 30m., 8m. and 1m. from the end, respectively.
They each add different quality at these stages.
There are dozens of hop varieties, maybe hundreds, how do you choose?
Brewer friends and shop owners are the first and best resource. Another way is to think of a commercial beer you like and do a little research. They will often reveal the hops they use, the amount and staging however will be up to you.
I recommend learning and experimenting with low alpha hops first, 3-5% alpha.
They are more subtle and the flavors often more distinct.
Once you add your own hops, you control the flavor profile at another level, varied bitterness, spicy organic flavors, and floral fragrant bouquets all become accessible to you.
Your game is quickly rising.
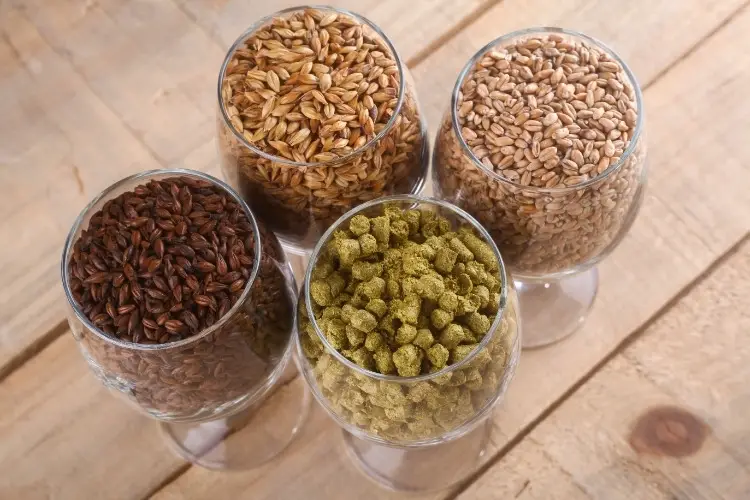
Part 3: Using adjunct grains and learning to flavor with raw malt
This up your game considerably.
The point here is we begin to add (steep) adjunct (additional) malts to the wort.
You must crack the grain.
Your shop can do it, or you can buy a countertop Corona Grain mill for about $40. Homebrew shops have several options like this one or this one.
Once you crack the grain, you do NOT boil it, but place it in cheesecloth or a muslin bag, and steep it in the wort, only until it begins to simmer, perhaps 205° F / 96° C. Then take it out!
If you brew a Pale ale, you may add ½ lb. of Crystal (Caramel) 60, 2 ounces of Biscuit or Munich 10, and perhaps 1-2 ounces of Chocolate Malt, for just the slightest hint of color and flavor.
A Pale Ale is most noted for its hop profile and color, an amber to red hue.
Even light extracts will give an orange hue to your beer. The crystal malt will add a nice red color and even the little chocolate (a deeply kilned, dark brown malt) will add to the base color.
The adjunct malts will not add sugar to you brew, although the crystal may add just a little, but even so, mostly to the flavor. They add color and flavor profile only. Most importantly, they allow you to control the characteristics and subtlety of your beer, without the flavor being overwhelmed by a heavy cloyingly sweet malt extract flavor.
Part 4: Yeast
Yeast is not the least of beer making and, in my opinion, the most important.
Many kit makers, kit brewers, and even shop owners, bless them, consider yeast an afterthought.
True enough, dry yeast has improved dramatically in the last 10-15 years and there is some variety of flavors.
It is quite easy to use.
Change to liquid yeast right now.
Brewing English beer, use a liquid yeast. Belgian, German Weisse Bier, American Ale, find a yeast designed for that style.
Liquid yeast will most closely approximate the flavors enjoyed is store-bought beer.
More importantly, it is designed to specifically interact with, metabolize, and enhance the other ingredients in the recipe profile.
In cannot be overstated, yeast also adds immense flavor to beer.
Dry yeast is quite neutral in flavor and for certain styles, pale ales, golden ales, lager, this is fine.
If you want a pronounced flavor such as a German Kolsch or Belgian Abbey beer, you must use their yeast to successfully execute the style.
Single pitch vials are readily available. They are more expensive and worth every cent, full stop.
A Quick Note on Water
Well water is often OK.
If you can drink it, use it, I did.
Spring water from the store is good.
Do not use distilled water, it has been deionized and is unhealthy for the yeast.
It is often recommended to use say ¼ teaspoon of gypsum, CaSO4, Calcium Sulfate. A bit of CaCl2, Calcium Chloride, is good for lagers. MgSO4, Epsom salt may be added if you want to harden the water to English Pale Ale levels.
I preferred soft water, minimal minerals, as that is what the Belgians use.
Tap water may be OK IF it is filtered and de-chlorinated.
If you live near the coast, the water can be very heavy, having and exceptionally high mineral content and even smell like sulfur. In this case, it is better to buy water.
I do not have strong opinions about water. Do be aware of it.
Learn the Malt and Hop Flavors
Homebrewers fail.
Something goes wrong and you either force your friends to endure bad beer or you dump it.
Failure is good and nothing will teach you faster.
Study, read, even work with a master brewer for a year. On our own, we fail, and it makes us better.
Bouncing back from mistakes led me quickly to experiment.
In the early days, I wanted to guzzle some beer, ASAP, but I also wanted to learn.
My failures had reasons and I needed to get to the bottom of it.
If you have time and patience, scale down your ops.
I had a bunch of one-gallon cider jugs laying around and began experimenting and brewing off these tiny batches of beers in rapid succession, maybe 3-4 per week.
The scale was so small, it was fast and clean, maybe 30 minutes, start to finish.
I had some initial success which built my confidence every time. I yielded about 10 bottles each time, so before long, I had a small but nice little stash going on, like a homebrew Costco Mixed Case.
Learning the flavors, more experimentation
I discovered I could buy extract cheaply by the pound at the local whole foods store.
It was, as I later found out, grade B- baker grade, lower than beer malt grade but I was saving a lot of money, so did not care.
For one US gallon, maybe a 1.5 pounds of syrup in the pot, a dash of Kent Goldings to bitter, a dash of Tettnanger to flavor, a few ounces of Crystal malt for color and flavor, just a touch of black malt; I took good notes all the way through.
After 6-8 micro-batches like this, I began to have an firm grasp of what the flavors were.
It taught me more than just flavor. It gave me an intrinsic understanding, a visceral feeling of what elements this hop style and shade of that toasted malt would bring to the beer.
It was wrapped up in a small enough package, so I had negligible risk and multi- layered benefits.
I remember exactly the time I really grasped the dark malts. I wanted to make an American Brown Ale with a floral hop profile. So, I dug out the dull yellow Tupperware cylinder with all the odds and ends of malts I had used, but no chocolate malt! But that is what I needed; no brown ale is complete without it.
What to do? I had Black malt and Roasted malt, surely, I thought, these will make a good substitute.
And a substitute they made, but not in the way intended.
The beer came out nice and ruby brown which was OK.
But the flavor was a tad astringent, falling flat, not at all warming like a chocolate malt. The roasted malt added robustness, but more of a baked flavor than the bittersweet Chocolate profile.
The hops turned out fine, quite bitter, too floral, but the malt profile missed the mark by a mile.
Was I disappointed? Absolutely not. I was in fact thrilled, because I gained exactly what I needed, empirical perspective into the nature of the malt.
A distinct success
One such experimental beer that turned out somethin’ better ‘n nice was a blueberry beer.
It started simply as one of my one-gallon batches.
It started as a Brown Ale, more English style, less hoppy. A little crystal, munich, and finally a little chocolate malt, soft hop profile, and I looked in the fridge and there they were, a ½ pint or so of blueberries, a bit unusual in our house, but they somehow called out to me.
I washed them up good, clean cold well-water. And when I cooled the beer, I dumped them straight in the old cider jug whole, bacteria, wild yeast, stems, and all, at least what the cold-water rinse didn’t catch.
It felt right at the time. Nothing but gut feel on this one.
It took off quickly, bubbling away, burping reverberantly out of the wide mouth.
Two or three other jars accompanied the chorus of CO2 off-gassing: the irony of a chemical by-product, rather smelly, with the symbolism of hope and anticipation of future pleasure.
Two weeks passed as I racked and bottled the blueberry brown neatly.
And what did I find after waiting another 2 long weeks? A tasty brown ale with berry overtones, undertones, and innertones.
It had no pretension of an exquisitely crafted beer, nor the balance and age of a cellared European treasure. It simply held the title of real beer with a small r and a small b.
And that, as I came to find out after many years, was the final destination in which I was heading, no glamour, no glory, just a fine glass of beer.
There is a time for musings, explications des saveurs, and debate on the finer point of craft.
The blueberry beer for me was not one of them, but in fact just beer, a much-needed tick in the success column and good beer to share with friends.
Out on a Limb – Going with your Gut
You have learned the finer points of malts and 6-8 of your favorite hop flavors.
You have a grasp of what they do and do not, how they enhance or subdue, make sweeter or bitter.
The next step to recipe formulation is to make anything possible.
Let the Day Decide
One of my most successful commercial beers was a beer I affectionately called Flanders Abbey Ale.
I had ordered my Abbey yeast which had arrived the day before, and that was the only thing I was sure of, regarding my recipe that day.
The Flanders was to be a Spring Special at our brewery.
I made sure I had a malt variety: 2-row pale malt, Crystal 60, Munich 10, Briess Victory (biscuit), Wheat, Flaked Barley, Oats, Honey, Chocolate, Black, Roasted, Oats, Rye, and 30 lbs. of amber Candi Sugar.
I heated the Hot Liquor Tank (hot water reservoir), preheated the Mash/ Lauter a little and looked at my grain pallet, clipboard in hand, started jotting down what came to my mind. 800 pale, 5 Chocolate, 10 Crystal, Sugar, strike 50 of pale, add 50 of White wheat.
I did not mineralize the water. My city water was filtered and exceptionally soft, perhaps 35 ppm of mineral content, perfect, similar to Belgian water.
I had my grain bill. I mashed in with a low strike temp, 168° F / 75 °C.
I hoped to hit 150-151° F / 65° C, activate the lower end of the mash spectrum, and extract as much sugar as possible.
I mashed and hit 152°, acceptable.
It ran 90 minutes and dropped by one degree.
The Mash Tun was a Double-walled insulated steel vessel and lost little heat.
I did not test for starch-to-sugar conversion. I rarely if ever did. I just knew what worked and what did not.
For hops I had Styrian Goldings, Kent Goldings, Tettnanger, Hersbrucker, and Saaz, all European varieties.
During the sparge (washing of the mash for complete sugar extraction) I did a few calculations and decided I wanted my bitterness to be only about 18-20 IBUs. This was a malt driven beer, depending on a moderately high starting gravity and colored only through kettle caramelization and just a touch by the specialty malts and sugar.
I chose Styrian to bitter and Saaz hops for flavor. I had to use rather large amounts as they were low alpha hops, but that was my goal, a subtle character to accent to malt and yeast flavor with the light heat of the alcohol.
As a Belgian-style beer, I fermented and aged it for about 5 weeks before packaging.
The yeast cooperated and flocculated out naturally, so no filtering nor clarifying was needed.
The result was one of my finest beers, home or professional, conceived and created on the spot, formulated by my mood and thought at the exact moment of execution.
I made sure I had the things I might need, and when the time came, I followed my instincts and chose well.
I had been brewing for some years.
Do not try this one on your first venture into formulation. It is an example of where your journey will take you.
In Summation
Consider well when formulating your own recipes.
Take these first four steps when expanding your brew experience.
- Use unhopped extract.
- Choose low-alpha hop pellets
- Add some adjunct grain for flavor and color.
- Switch to liquid yeast
Learn the malts and hop flavors. You need not know them all at the same time. Just start with ones that appeal to you, know them well and branch out from there.
Once you have partially or wholly embraced the four steps and gotten to know instinctively what flavors your ingredients will yield, you will be ready to improvise. This is just one approach or just an aspect of recipe formulation.
There is software and a plentitude of resources to use as reference now. There were not so many resources available back in the day when I got started.
Finally, you need to do this all at once. Evolve your beer in stages. Try not to change more than one or two things at the same time, batch to batch.
Finally, I took this approach because for me it was playful experimentation, a demonstration of heart.
I did not seek to analyze beer, nor be rigid in its execution.
One thing the American and Belgian brewers have in common is flexibility. We are not constrained by style or rules.
When you are ready, your creative constraints will fall away, and you decide what your beer will be.
Congratulations, you are a brewer.
[email-subscribers-form id=”2″]