Brewing beer is a craft. Who knows what kind of opportunities it may lead to? Whether it’s going to be a hobby or business venture, you want to make sure that your beer isn’t flat.
These are six common reasons why your beer has no carbonation. And I am going to dig into these reasons to try and get to the bottom of why your beer is flat. Hopefully, I can guide you and troubleshoot the situation so that next time your fire up that brewing process, your going to be left with a nice, tasty beer with the perfect carbonation. You will be impressed and so will your friends.
1) Not Enough Fermentation Time
This one should be fairly simple to accommodate.
I get it; you’re excited to try your new beer and want to enjoy it.
But patience is a virtue in these situations, and without it, you can be left with a flat beer that doesn’t taste awesome.
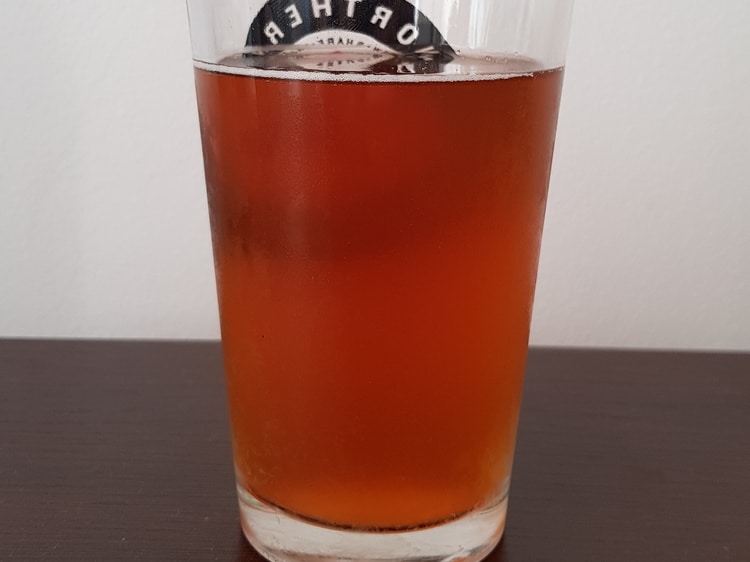
Another problem with a beer that ends up flat is that it’s not going to feel right going in, but it also alters the taste of the beer.
So, now the beer is flat with a bad taste. Yuck.
So, be sure to let your beer ferment for the right amount of time.
And yes, you can let your beer ferment too long and kill it that way too.
For now, let’s determine the proper amount of time that you want to let your beer do its thing before enjoying it.
With some set parameters, you can time the process perfectly to leave you with an amazing beer and a perfect process for every time you brew a new batch.
And then you can get more experimental too!
The typical amount of time that is going to be perfect for fermenting that beer is going to be three to four weeks.
A lot of homebrewers will actually let their beer ferment two weeks, bottle their product, and then let the brew sit for another two, even three weeks.
That is going to be right around the maximum length of time you want your batch to sit, five weeks.
I recommend four, but it’s not going to kill your batch if you leave it for five.
After a couple weeks of fermenting, then you can bottle up your beer and get those caps on.
I’m going to touch on room temperature next, but make sure that the room you’re keeping the beer fermenting provides the right environment to give you the best chance at success. Brewing beer can be a finicky situation, but I’m going to put my best foot forward to guide you.
2) The Room Temperature isn’t Warm Enough or is too Warm
Temperature is a huge factor in the fermenting of your beer.
You have to get it just right, or the beer will not carbonate.
Plain and simple.
It also depends what type of beer you are brewing as well.
An ale is going to require a different temperature than say, a lager.
So, getting the temps right is going to be a must.
But I will make sure to set you up for success so that you get your room just right and beer proceeds to ferment.
Having an environment that isn’t warm enough can cause the yeast that you brew the beer with to become “sluggish.”
Meaning that the fermentation process will never complete.
It will try its best, but without the right temperature, it won’t go the distance.
For an ale, you want your temperature to be right around 68° to 72° F (20° to 22° C). That’s a small window! For a lager, it’s 45° to 55° F (7° to 12° C).
You get a little more leeway with a lager since it has a bigger temperature window, but keep in mind the room has to be much cooler.
If you end up trying to ferment your beer in a room that’s too warm, you will end up with a beer that isn’t great either.
What happens in this situation is that fusel alcohols are produced.
These are heavier alcohols that you don’t want in your beer because they have a solvent-like flavor.
Not awesome.
Diacetyl can also be produced from a room that’s too warm, so this needs to be avoided.
Just make sure you have the right equipment to keep tabs on your room’s temperature, and you should be good to go!
3) Not Enough Priming Sugar
The reaction between your priming sugar and yeast and everything else that goes into the concoction is what leaves you with an amazing beer.
The process has to be just right and be performed with the utmost care and attention.
Mixing in a little passion with your beer making endeavor is going to give you an even better opportunity to make your next amazing batch.
This problem is an easy one to alleviate; you simply follow the proper instructions.
It’s just like carpentry, measure twice and cut once.
Double-check your ingredient measurements to ensure that you are hitting the amounts right on the money.
Any fluctuation in the ingredient amounts can serve to mess up the product, so be sure that you have everything measured properly.
Especially the priming sugar.
That proper chemical reaction is what is going to give you exactly what you’re looking for.
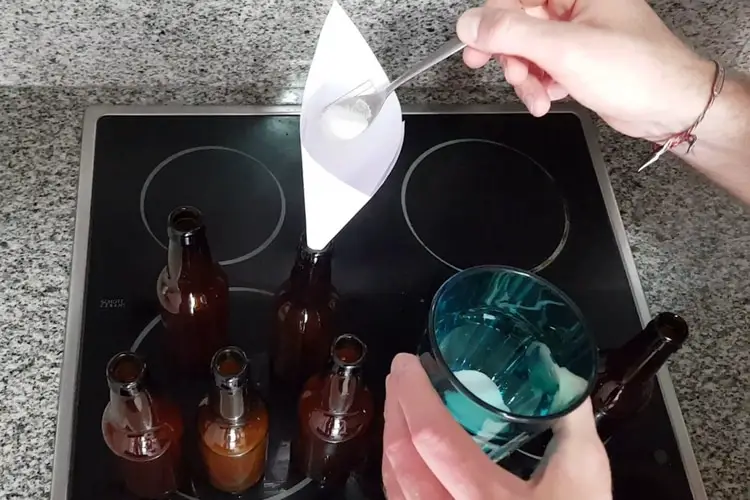
Another point to make in relation to the priming sugar is making double sure that it gets mixed well.
This is also a point that sometimes needs to be fixed.
If the sugar doesn’t get mixed in well enough, the beer will end up flat in the end.
The best way to make sure everything gets mixed around properly is to pour the sugar/water mix into the bottling bucket first.
Then siphon the beer into the mixture after.
This will serve to automatically mix everything properly as the beer is added.
4) Non-Fermentable or Slowly Fermenting Priming Sugar
Not all sugars will work as priming sugars, plain and simple.
That makes this issue one that’s pretty easy to rectify.
There are specific choices that can be used as a priming sugar, so your beer carbonates properly and leaves you satisfied in the end.
One type of sugar to avoid is called lactose sugar.
If you use lactose sugar as a priming sugar for your beer, you are going to be SOL.
It simply will not work as a priming sugar, and your beer is doomed to be flat.
Another type of sugar that can essentially work, but should probably still be avoided are complex sugars.
Yes, they can properly ferment your beer to success.
The only hang-up is that the process will be a longer one and if you aren’t experienced with the beer brewing, it can be difficult to determine just what the timeframe should be.
It’s best to stick to what we know will work just right.
The types of sugars that have always been the go-to for beer fermentation are cane sugar, corn sugar and dried malt extract.
Any one of these options are perfect for a priming sugar and you can rely on the aforementioned timeframe, so you know how long to let your beer ferment before completing the process.
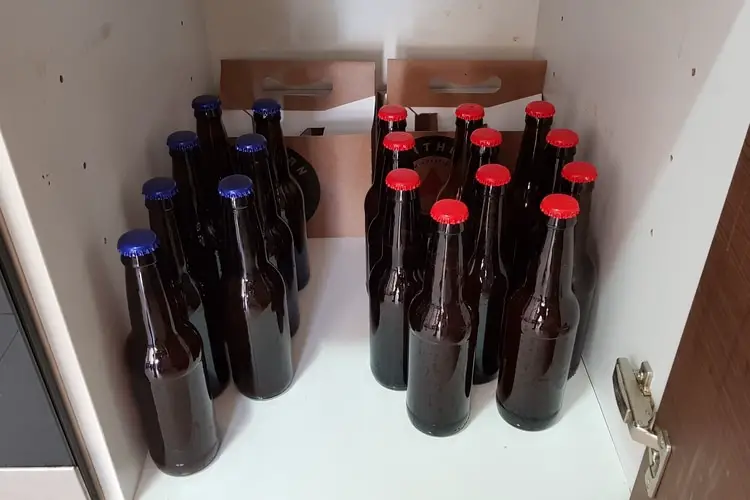
5) Bad Bottle Seal
This one seems like a no-brainer, but rest assured if you run into this problem, you are not the only one.
It can be easy to end up with some bad seals that leave bottles with a way to let the outside air in. But if it gets in there, game over. Making certain that the bottle seals are good and tight is going to allow your beer to complete its process.
It’s basically a living organism since there is yeast involved in the brewing process.
So, providing the proper environment to allow the ingredients to react together has to be accomplished.
This includes sealing the bottles right.
One of the ways in which this happens is if you decided to go with twist-off caps.
I get it, it’s easier, and you don’t have to hunt down a bottle open to get into that bottle of sweet, carbonated nectar.
But if I had to make a judgment call, go with pop-off style caps.
You will thank me later.
When you grab a popular beer out of the fridge, and it has a twist-off cap, that cap was meticulously placed by an industrial machine calibrated to the perfect specifications to get the job done.
My guess is that just maybe you don’t have that luxury, and that’s okay!
It’s actually more enjoyable to get yourself a nice bottle capper (because you love this craft so much and are passionate about it), which will provide the proper seal.
There are some amazing options to choose from, too, when it comes to bottle cappers.
You can find nice, handheld cappers that can effectively get the job done like this one every homebrewer owns on Amazon.
Or you can bring out the big guns and get a bench capper.
Basically, it’s a hardware tool that’s installed onto a bench just like you would an adjustable vice clamp. Check it out here on Amazon.
Except now, you can get your bottles moving like a conveyor belt if you like to brew bigger batches and give yourself plenty of bottles to share.
Whichever option you choose to go with, make sure it’s a good one.
6) The Yeast Has Been Killed Off
Yeast is a delicate organism.
It has to be treated with tender loving care, or you can kill it.
If the yeast gets killed in the brewing process, you will end up with a flat beer.
Yeast is essential in the brewing process, and the finite window of success means that being meticulous with the process is the best way to get amazing results in the end.
Part of the brewing process is the sanitation of your equipment and bottles, which it should be!
You always want to make sure to properly sanitize equipment and containers because it is beer that you will drink.
Best not to let anything like bacteria get in the way of the process, so sanitation is a requirement.
And proper sanitation is something that needs to also be done in a detail-oriented manner, or you’ll kill the yeast and end up with a flat beer.
A lot of brewers like to use what’s called “no-rinse sanitizer” lile this one from Amazon largely used by homebrewers.
This means you have a sanitizer that is perfectly fine to be left to dry on the equipment and containers.
It is formulated to not harm you (obviously), but you also don’t have to worry about leaving any sanitizer behind that will kill the yeast.
That’s right, certain types of sanitizers will kill your yeast if you leave it behind on your equipment or bottles.
Be certain to pick the right type of sanitizer.
It’s common even to rinse off the no-rinse sanitizers just to be safe.
Other brewers leave the sanitizer to dry without rinsing and still have great results.
It’s a matter of opinion as to which route to use, but the fact is that either is perfectly fine.
If you do decide to go with a sanitizer that needs to be rinsed because perhaps you appreciate that process a little more, have at it!
But make double sure that you rinse off every bit of the sanitizer, especially from the bottles and fermentation containers.
Treat the yeast as it is, a delicate, living organism.
Once put into place, the yeast becomes active so it can have a reaction with the other ingredients and start leading the beer to carbonation success.
Treat the yeast with care; it is your best friend in the brewing process.
Quick Tips to Fix a Flat Beer that Won’t Carbonate
Still, having some trouble?
Not to worry.
I took the liberty of compiling a few additional tips to help you along the way.
Follow these points to help alleviate any trouble and get you back on track to a delicious, homebrewed beer.
You Must Play the Waiting Game Right
It’s a big part of the game to be patient and wait, then wait even more.
That’s okay, as long as you have the patience, you’re golden.
But if you know for a fact that you’ve been waiting long enough for your beer to ferment and carbonate properly, there are a couple more things you can do.
Place the beer in a warmer room, perhaps 70° to 75° F (21-24° C).
This will typically solve the problem.
And remember, higher altitudes are going to require a longer fermentation time.
Add More Sugar
Be careful with this one.
It can certainly solve the problem, but you have to do this with care.
If you’re going to remove the caps to add some more sugar, make sure it’s just a pinch.
Any more than that and you can end up with bottle bombs.
That’s right; too much sugar can cause the glass bottles to lose their integrity, leading them to explode.
So, make sure the bottles are in a safe place away from people, just in case.
Keg It
This one is interesting because if you had had a keg, you probably wouldn’t be bottling.
But who knows?
Maybe you like to have options, and you love the bottling process over the kegging process.
Either way, if your bottles just aren’t cutting it and end up flat, try the keg.
You can prime or force carbonate by using Co2 and adding it to the keg.
Add More Beer Yeast
This tips is one you have to be even more careful with.
Some bottlers will use just a grain of yeast to get the beer to carbonate, but this can be an even bigger recipe for bottle bombs.
Some brewers do not recommend this route, so proceed with caution.
If nothing else works and you just can’t figure out why your beer keeps coming out flat, give this a try.
But as a last resort.
Conclusion
Homebrewing beer can be amazingly rewarding. The process is difficult, and detail-oriented steps must be taken in order to leave you with an excellent beer in the end. Sometimes it takes trial and error, but if you want it bad enough, you will figure out exactly how to give yourself what you want in the end.
Happy brewing!