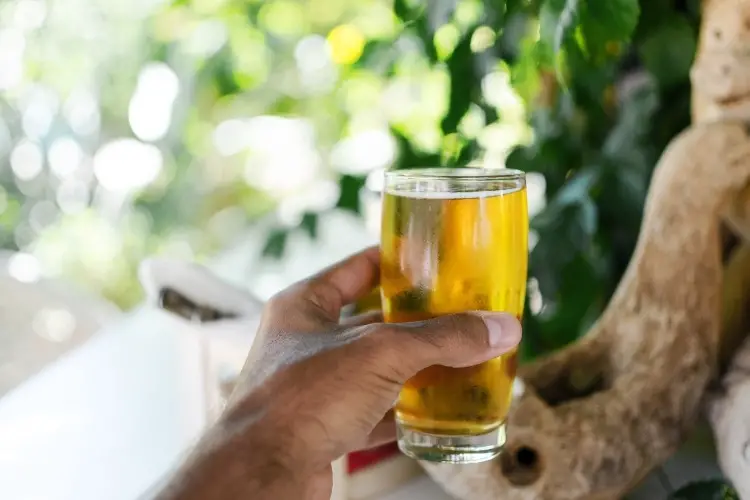
Filtering homebrew beer is a much different practice than the filtration processes undertaken by most commercial breweries. In homebrew, mechanical filtration and kegs are often overshadowed by microbrews and bottle conditioning.
Homebrew is filtered by following these steps:
- Adding fining agents to the kettle
- Performing a secondary fermentation
- Performing a cold crash
- Racking the beer before bottle conditioning
Adding fining agents at each step of the brewing process and controlling temperature is crucial for the final clarity of the brew.
Filtering homebrew before you bottle it might seem complicated if you haven’t done it before, but once you know the process, it’s easy enough to refine.
Read on to find out more about how to filter your next batch of homebrew before bottling.
Chemical Homebrew Filtration – Step-by-Step
Chemical homebrew filtration, or fining, is the most popular process of filtration and clarification used by homebrewers since it allows the beer to be added directly to individual bottles rather than having to be stored in a keg and force-carbonated like beer that has been mechanically filtered.
Here is the step-by-step process of filtering beer through the process of fining:
- Use fining agents in the kettle. With kettle fining, the fining agent is added to the boiling wort around fifteen to twenty minutes before the boil is completed. The most popular type of fining agent used during the kettle stage of brewing is Irish moss, a type of seaweed that helps coagulate particles and force it to settle to the bottom of the wort as sediment.
- Perform a secondary fermentation. Secondary fermentation is an aging period where the homebrew is racked and siphoned off into a secondary container to continue fermenting. Secondary fermentation is a type of conditioning where there is little yeast activity left, but the final flavors of the beer are still being developed.
- Use fining agents during secondary fermentation. Secondary fermentation is the best time to add a second round of fining agents to the brew to help any residual yeast or particles to drop out of suspension in the beer and collect on the bottom of the fermenter as sediment. Using fining at this stage can help reduce the amount of sediment that ends up in your bottled product.
- Perform a cold crash. After or during the secondary fermentation, dropping the temperature of the wort by chilling can help force any remaining live yeast to flocculate, making it easier for fining agents to force it to the bottom of the fermenter as sediment. Using a cold crash and fining agents before the final racking and bottling can help get the most sediment possible out before the beer is bottled.
- Perform bottle conditioning and cold storage. Once chemical filtration has been completed, the brew is ready for bottling and storage. To condition each bottle, priming sugar must be added so that the residual yeast can generate carbon dioxide that carbonates the beer. Without this yeast, beer has to be force carbonated with pressurized air.
How to Introduce Fining Agents to the Kettle During a Homebrew
During the process of boiling the beer wort, fining agents can be added towards the last fifteen to twenty minutes of the boil.
Finings that are added during the boiling part of the homebrew process (which results in a hot break or a scum of sediment being removed from the wort) help to filter beer by adhering to yeast and other particles in the brew, forcing them to fall out of suspension.
The most popular fining agent used during the hot part of processing wort is Irish moss.
This red marine alga is negatively charged and attracts positively charged protein ions to it, causing them to gather from the beer solution and fall to the bottom of the fermenter as sediment.
The amount of kettle fining agent depends on the amount of beer being brewed at once, but a good rule to go by is approximately a teaspoon of Irish moss per five gallons of brew.
Irish moss is very effective in even small amounts, so you don’t need much.
For bigger beers with higher specific gravity, slightly more fining agent may be needed than usual to compensate and remove the most suspended particles possible.
How to Perform Secondary Fermentation with Fining Agents
The next step in chemical filtration or forced clarification through fining agents is during the secondary fermentation process.
After the primary fermentation, the beer is racked and added to a secondary fermenter along with post-fermentation fining agents.
These agents remain in the beer even after bottling and can ultimately be considered additives.
Here are some of the fining agents that are used during the secondary fermentation process:
- Isinglass: Isinglass is a fining and clarifying agent that is created from the swim bladders of fish and is used to collect any residual particles that are left suspended in the beer after it has been boiled and racked. Once isinglass is added, it forces any remaining yeast to fall out of suspension and collect on the bottom of the beer bottle as sediment.
- Gelatin: Gelatin performs the same function in beer brewing as isinglass and is created from the hooves of horses. Gelatin binds to yeast and other suspended particles in the beer and clarifies the beer by forcing this sediment to fall to the bottom of the bottle. Gelatin is naturally odorless, tasteless, and transparent, so it adds no quality to the beer other than clarity and a smooth mouthfeel.
- Lactose: Rather than acting as strictly a filtration agent, lactose is added as a fining agent during the secondary fermentation process or right at the end of the wort boil to add a smooth, creamy texture to milk stouts. Lactose is also increasingly used in IPAs to add sweeter, more nuanced notes to their flavor profiles.
Most post-fermentation fining agents added during racking and secondary fermentation work best in a chilled environment, so it’s a good idea to keep your secondary fermenter in a refrigerated location during the conditioning and aging process.
Note: Vegan beers typically forego the second round of fining or chemical filtration during secondary fermentation because it involves the use of animal products. For this reason, an unfiltered or hazy phenotype is typically embraced in vegan brewing.
How to Perform a Cold Crash on a Homebrew
Cold crashing a beer involves dropping the temperature of the beer significantly during or right after the secondary fermentation process.
This chill period forces the last of any suspended particles to drop out of the beer and turn into sediment.
While this process might occur naturally even without lowered temperatures, chilling the beer dramatically accelerates this process, almost allowing you to age the beer in fast forward.
For those who prefer to chemically filter a beer without the use of isinglass or gelatin, cold crashing also offers a method of filtering the beer that doesn’t involve using fining agents.
Benefits of Fining and Chemical Filtration
A significant advantage of fining is that it allows the beer to be naturally filtered throughout the brewing process, rather than putting it through an agitating mechanical process that requires force-carbonating the beer once the brewing process is complete.
Fining is also much easier for the layman to perform than in-line filtering and forced carbonation, which can be intimidating with its use of pressurized CO2 and other equipment.
Another benefit of chemical filtration rather than mechanical filtration is that it preserves taste and aroma.
In contrast, mechanical filtration has a reputation for stripping these qualities from the final beer, resulting in more muted flavors.
Mechanical Homebrew Filtration – Step-by-Step
There are two types of mechanical filtration in homebrewing beer—depth filtration and surface filtration.
- Depth filtration is when particles are caught in a submerged filter medium.
- Surface filtration is where the beer is passed through a membrane that catches any sediment during the bottling process.
The steps for mechanically filtering homebrew are as follows:
- Choose a filter size. The mechanical filter used should be small enough that the majority of large sediment and yeast particles are filtered out, but the taste of the finished beer isn’t significantly altered by the mechanical filtration process. The size of the filter should be around 1 micron, as larger filters will leave behind yeast sediment, and smaller filters can remove compounds that contribute to the flavor and aroma of the beer.
- Finish primary and secondary fermentation. Ideally, your beer batch should sit in your secondary fermenter for several weeks following primary fermentation to allow it to age and mellow before inducing mechanical filtration. Mechanical filtration is performed at the very end of the brewing process after secondary fermentation and conditioning have already occurred.
- Run an in-line filter between two kegs. This is the easiest method for filtering homebrew beer after it has been removed from the secondary fermenter. Using an in-line filter is the best way to add mechanical filtration to remove trubs, hops, and other sediments without introducing aeration (and oxidation) to the brew.
- In the final keg, force carbonation using a gas cylinder, a beer gas regulator, and a chart to determine the proper levels of carbonation for the amount of beer being stored. For bottling, use a counter-pressure bottle filler to force-carbonate individual bottles.
Mechanical filtration is the most popular form of filtration used among commercial brewers to ensure the highest levels of clarity and sanitation, but some homebrewers also use mechanical filtration to filter their beer before bottling.
Here are some of the reasons why a homebrewer might endure the expense and added work of mechanical filtration:
- Competition: Mechanical filtration is the only way to get the absolute smallest particles of sediment out of a brew for competition lagers, weiss beers, and other beers where clarity is a major distinguishing factor. Not many homebrewers operate at the competition level, but if you do, mechanical filtration may be up your alley.
- Authenticity: The levels of brilliance and clarity found in some types of beer is almost impossible to obtain without a mechanical filtration process. To recreate the beer correctly, most homebrewers will have to filtrate mechanically as a result.
- Keg storage: For homebrewers who plan to keep their beer in kegs for storage rather than bottles, mechanical filtration can be useful. But when bottling homebrew, mechanical filtration removes the yeast necessary for priming carbonation.
- Stabilization: Beer that has been filtered is much more shelf-stable than unfiltered beer and can last a lot longer without going off or spoiling. Stabilized beer also avoids biological haze and remains clear for longer after brewing.
- Flavor: In some types of beer, mechanical filtration is said to create a cleaner, drier flavor than in beers that are chemically filtered. However, the same mechanical filtration process that creates pale, dry lagers is also avoided in India pale ales and other hops-forward craft beers.
However, there are a few good reasons why mechanical filtration isn’t as popular with homebrewers as fining or chemical filtration.
The primary reason is that mechanical filtration requires several other additional pieces of brewing equipment, such as kegs and gas cylinders.
Another major drawback of the force carbonation that is required by mechanical filtration in homebrewing is that force carbonating a bottle must be done very carefully to avoid breaking or shattering it.
Too much pressure from introduced gas can lead to the bottle exploding, which is not that great for your reputation as a homebrewer during a tasting.
Most homebrewers who use mechanical filtration also use forced carbonation with a keg system and then serve their homebrew out in bottles while it has been freshly carbonated from the keg.
It’s a lot simpler than trying to carbonate each bottle individually and much safer, too.
Advantages and Disadvantages of Beer Filtration
While most of the commercial beer world performs mechanical filtration to remove all possible traces of sediment, in the homebrewing world, beer filtration is a little more complicated.
New trends have favored cloudy or hazy beers, and the industrial filtration methods that commercial brewers use to create crystal clear lagers are rarely available to homebrewers at a price they can reasonably afford.
There are several advantages to filtering beer:
- It makes it more bright and attractive.
- It removes sediment from the final brew.
- It can improve the mouthfeel of the beer.
- It can give the beer a smoother, more mellow flavor.
However, there are a couple of disadvantages of refining beer through chemical filtration, too, such as:
- It often involves animal products such as isinglass or gelatin (making it unsuitable for vegan beers).
- Adding fining agents does somewhat complicate the overall brewing process.
The disadvantages of mechanical filtration for homebrewers are numerous:
- The equipment is expensive and can be tricky to use.
- Mechanical filtration necessitates the use of kegs and forced carbonation.
- Bottle conditioning becomes almost impossible after mechanical filtration since it removes any yeast that would otherwise be used to generate carbon dioxide with priming sugars.
- Racking and mechanical filtration methods introduce the chance of foreign bacteria or oxidation being introduced to the brew as well.
Fining Versus Filtration in Homebrewing Beer
In homebrewing, the chemical filtration system that homebrewers use to strip yeast particles and other suspended particles out of the brew is known as fining.
While fining can’t typically remove as fine of particles out of a beer as mechanical filtration can, it is much better suited to bottle conditioning beer than mechanical filtration, which necessitates the need for forced carbonation and keg storage.
The reason chemical filtration (fining) is used in homebrewing beer the majority of the time rather than mechanical filtration is that mechanical filtration strips out all of the yeast in the brew that is necessary to add carbon dioxide to each bottle of beer via sugar priming.
Without yeast, there is no carbonation added to the bottle, and the resulting beers will be flat.
The major differentiating factor between fining and filtration is that fining involves much more chemistry, while mechanical filtration involves more engineering and physics.
Which filtration method you choose will depend mainly on how much homebrewing equipment you’re willing to invest in and how much you’re willing to learn about how chemical fining agents work during the brewing process.
Racking and Filtering Homebrew
While racking is somewhat controversial in the homebrewing world, there’s no denying that if you do go through the trouble to rack your beer, you’ll ultimately end up with a clearer, brighter finished product as a result.
The reason that beer is racked and added to a secondary fermenter is that if beer is left to ferment on the yeast cake, this can ultimately lead to burnt and rubbery off-flavors being introduced as the result of dead yeast.
Racking is also a method of filtering and clarifying homebrew before the addition of secondary ingredients such as fruit, dry hops, or spices.
Racking should only be undertaken once the fermentation process is complete and the beer has stopped bubbling, which means the yeast is starting to become less active.
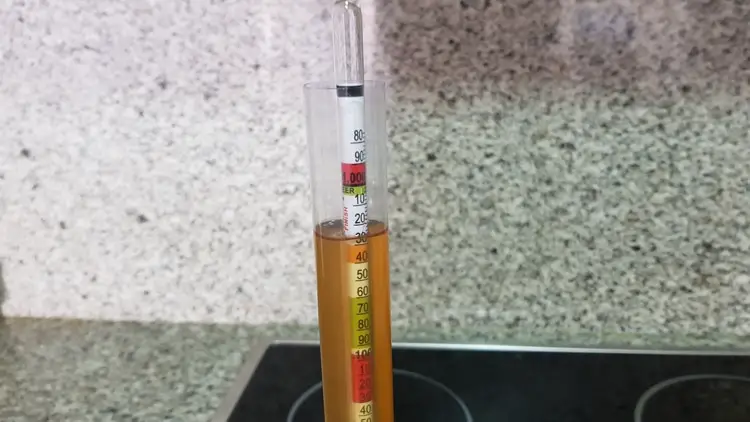
One surefire way to determine whether homebrew is finished fermenting and is ready to be racked and filtered is by using a hydrometer to measure the liquid density of the brew.
If it remains the same for several days in a row, the beer is ready to be racked and transferred.
Can You Filter Homebrew That Is Already Carbonated?
You can technically filter homebrew that has already been carbonated, but it’s generally a bad idea to do so.
The agitation involved with filtering homebrew at this stage in the brewing process will aerate and flatten the beer, defeating the purpose of carbonating it in the first place.
Tips for Filtering Homebrew
Regardless of whether you undergo chemical filtration or mechanical filtration while filtering your homebrew, there are several tips you can use to help make the process a little bit easier.
Here are some tips for filtering homebrew:
- Make sure that all filtration equipment is adequately sanitized or sterile. The process of racking and moving beer from one fermentation location to another is a prime chance for bacteria and wild yeasts to be introduced to the brew, so sanitize any filtration equipment used, including spoons and other small tools.
- Use multiple methods of filtration. Nobody says you can’t use Irish moss and isinglass in the same batch, and these two clarifiers attack sediment in the brew at different points of fermentation and different temperatures, allowing them to collect and filter different off-tasting compounds and textures out of the beer.
- Take the time to rack for secondary fermentation. While racking and the aging/secondary fermentation process may add several weeks to your overall brewing schedule, the result is a much more mellow, smoother tasting beer. The secondary fermentation process also provides a good point in the brew to include secondary flavors.
- Use multiple fining agents. Different types of fining agents attack different particulates that cause haziness, so if you want to trap them all, experiment with a variety of fining agents to find the best combination for your batch.
- Be sure to refrigerate. Lowering the temperature of the brew after fermentation is one of the key elements to making sure that fining agents can work effectively to remove particulates from the brew. The cooler the beer is without inducing chill haze, the better off you’ll be.
Ending up with a successful homebrew is dependent on many small secondary factors, so it can be a good idea to keep a journal of your brew to mark down dates when tasks were performed or observations on how the beer looks, smells, or tastes.
Writing down both successes and mistakes can help you refine your processes for future batches of beer.
When to Opt Out of Filtering Homebrew
Strictly speaking, filtering beer isn’t necessary for it to be drinkable.
There are plenty of beers in the world that pride themselves on their hazy appearance (looking at you IPAs).
But there may be some brewers who won’t have a set-up that is suited to mechanical filtration.
Here are some people who may want to give mechanical filtration a pass and stick with chemical filtration only (or none at all):
- You’re brewing a Belgian wheat beer, a New England IPA, or a hefeweizen. These beers have a naturally cloudy appearance, so there’s not much point in going through a ton of trouble to try and clarify them since clarity is not a desired trait in these beer types. If you’re showing these beers in a competition, haze or cloudiness will be expected as part of the beer standard.
- You don’t have the budget or the desire to manage forced carbonation. If you’re just looking to fill some growlers with an artisan microbrew, you may not be willing to invest in the amounts of equipment necessary to pull of mechanical filtration.
- You want to bottle your beer. Bottling homebrew usually involves primed bottle conditioning, which gives the yeast a bit of sugar solution to feed on to carbonate the bottle after it has already been sealed. Since mechanical filtration removes this yeast, it also means you need other methods to carbonate the beer before it can be bottled, and these sometimes aren’t easy for homebrewers to pull off.
- You don’t need your beer to be shelf-stable. If you’re not planning on putting up your beer for several months, there’s no reason to filter it except for cosmetic purposes—it won’t be around long enough to go bad. Since filtering can significantly add to the work and time necessary to finish off a batch of homebrew, skipping filtration can be an excellent way to get a beer out in a hurry for a special occasion.
- You want your beer to be vegan. If you want to brew a vegan beer, you’ll need to opt out of chemical clarifying agents such as isinglass and gelatin (though Irish moss is still on the table if you want to clarify during the boiling process).
If you’re just starting with brewing, it can be worth your while to brew a few different batches of beer—some filtered, some not—and do a tasting to compare the two and see which you prefer.
Depending on the type of beer, you may not be able to taste much difference, but the difference in appearance will be distinct.
Filtration Is an Important Part of the Science of Homebrewing
While filtering beer can greatly improve its clarity, it doesn’t improve the flavor of a beer and can potentially dilute or muddle it, so choosing whether to undergo filtration is a choice that each brewer has to make.
If you’re just starting out homebrewing beers, you can start with chemical filtration (which is significantly cheaper) and move into mechanical filtration later after you’ve developed some experience in the craft.
Like many other hobbies, homebrewing beer is a hobby where you can start with the bare minimum supplies and equipment, then slowly build your way up as budget and resources permit.