
Keeping a homebrew log can be incredibly helpful for any brewer looking to brew more efficiently and produce better beers. By carefully logging your methods and recipes, you’ll be able to identify the trends that lead to success, as well as flag those that lead to less than ideal results.
How do you keep a homebrew log and improve at beer-making? Determine what metrics you want to record for each brew. Most homebrew logs will include some combination of the following: brew goals, recipe notes, water data, process plans, brew-day data/notes, scheduling, bottling/kegging information, tasting notes, and notes for the next batch.
Depending on your brewing methods, you may choose to keep track of certain details that are more valuable to improving your process.
Some homebrewers keep very minimalistic logs, only recording the raw data that they plan to modify in future brews.
Other brewers will religiously record every nuance of the process in order to be able to tweak and perfect each subsequent brew.
A homebrew log should be personalized to work best for your brewing process.
You only need to keep track of the factors you plan to actually control in your brews.
By logging the specifics involved with your brew, you can start to identify the elements that can work for or against your brewing.
Novice brewers can definitely benefit from keeping a homebrew log.
If you are just starting out, keeping a homebrew log can help you make sense of recipes, stay on task, and learn from each brew you make, even if the brew doesn’t turn out exactly how you planned it.
If you want to learn more about the specific elements that make for a good homebrew log, read on to find out how to start keeping your own log.
Elements of a Successful Homebrew Log
If you’re wondering what exactly makes up a homebrew log, the basic idea is it keeps track of metrics that you can alter and modify to make a better brew, or so that you can successfully repeat the recipe and process that led to a favorable outcome.
Depending on your set-up and goals, you may choose to log particular details.
We’ll outline here some of the more popular metrics that homebrewers like to track, along with reasons why they might be important.
1) A Description of the Intended Beer or Goal Beer
Most homebrewers won’t start brewing without some idea of what they want to brew.
While you may not know the exact specifics of the beer, you will at least need to decide what type of beer you want your efforts to result in.
The process and ingredients involved in brewing a pilsner vary significantly from those required for a hearty stout.
If you set yourself a goal in your beer log, you will be able to draft a clear path to what you are trying to accomplish.
If you know you want your beer to taste, smell, and feel a certain way, you can start to consider the types of ingredients that will best lead you to these goals.
Some brewers will take this point to determine more specific metrics that will produce the intended beer, such as the target temperature of the mash or water additions.
Some brewing software, like BeerSmith, will allow you to enter your predicted ingredients, temperature ranges, and equipment and it will build a recipe for you.
Software like this also helps determine how minor variations in temperature and pH can affect the final product.
2) Recipe Information
Whether you’ve decided to use software to build your own recipe or you’ve selected an established recipe, it can be helpful to write it down in your homebrew log.
This can help you keep track of the type of ingredients you intend to use and the quantities needed.
Any modifications you are making to a recipe can also be noted here.
If you are deciding to change a certain aspect of the recipe, it can be helpful to also log why you are making this intentional change.
When you consult your homebrew log a few months later, you may not remember the specific reasons why you decided to tweak a step, so it can be useful to make specific notes.
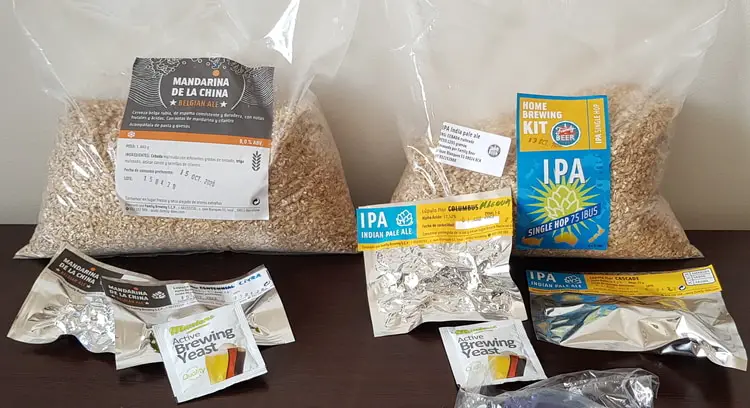
3) Ingredients
Keeping track of ingredients in your homebrew log is fairly straightforward.
You’ll want to keep track of the specific types of hops, grains, malt extracts, and yeasts used, in addition to the quantities called for.
If you are using an established recipe, these quantities will already be determined. However, if you are using a brewing software to build your recipe, you should take careful note to accurately record these amounts.
Some homebrewers take an extra step to record a few more specific details about the ingredients used. For example, alpha acid levels can vary from crop to crop of hops, so it can be useful to record the exact percentage for the crop you are using.
The alpha acids are the component of hops responsible for imparting the beer with bitterness. So, if the alpha acid levels of hops vary, you may need to adjust the amount of hops used to achieve the correct bitterness.
It can also be helpful to note the supplier of certain ingredients, such as the grain or malt.
This can be useful in the future, as the resulting flavors can vary based on the source of the ingredients.
If a certain maltster provided a malt that produced a favorable result, you will want to know the exact details of the malt so you can reproduce these results in later brews.
Yeast is an important component in every beer, and a slight variation can drastically change the style and quality of your brew. Because of this, it can be useful to keep detailed notes about the type of yeast you are using.
You can use your homebrew log to also record your calculations for how much yeast to pitch in order to achieve a healthy fermentation.
You can use online tools like a yeast starter calculator to help determine your quantities needed.
It can also be helpful to keep track of the temperature range of the yeast.
This will help you determine later in the brewing process what the ideal temperature to cool your wort to should be in order to have the best chance of a successful fermentation.
Also, if you know the ambient temperature is much warmer or cooler than what the yeast prefers, it may affect the yeast’s performance.
4) Water Type or Any Water Adjustments

If you’re a novice homebrewer, you might just be using filtered tap water from your kitchen sink in order to brew your beer.
There’s nothing necessarily wrong with this, but if you want to have improved control over the taste and quality of your beer, it may be worth taking the time to adjust your water.
The pH, mineral content, and impurities in the water can have an effect on the taste of your final product.
Before you start adjusting your water, you need to determine the baseline information for your water supply.
Is it alkaline? Acidic? Hard? Often, you can look up reports for your neighborhood online, usually through the municipal water authority.
If you aren’t able to acquire a report, you can acquire a home test kit or schedule a free water test from companies like this one.
Certain beers work best with particular mineral content and water pH, so depending on your baseline measurements, you may need to adjust your water before you start brewing.
Some important minerals that affect your beer’s taste are calcium, magnesium, sodium, sulfate, chloride, and bicarbonate.
Some websites such as Bru’n Water can help you determine how to achieve the exact mineral and pH you need for your brew.
If you want to see some great tables that highlight how the major minerals you find in water can specifically affect your beer, morebeer.com has some excellent ones, as well as tips for how to adjust the mineral content in your source water before you brew.
If you do decide to make any adjustments to your source water, be sure to take careful note of it in your log. Record any additions, including the quantities, and also the final pH and mineral content before you begin brewing.
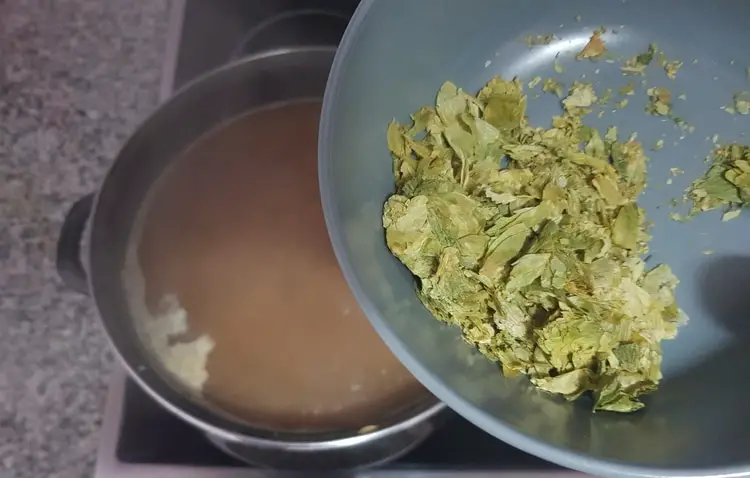
5) Process Plans and Steps
At this point in your log, it is very helpful to make a guide for the entire brewing process.
Some homebrewers simply make a checklist, while others may create a detailed timeline.
The difference comes down to personal preference. Whether you want to go into precise detail or just give a general overview, it is useful to take the time to write out the plan for the brewing day.
One main reason it can be helpful to write down a plan is because it is easy to get distracted during the brewing process.
Since brewing beer usually takes a couple of hours, at least, and involves long stretches of time when you are simply letting the wort simmer on its own, it’s very easy to wander off or get distracted by something else while you are waiting for your brew to boil.
Keep yourself on task by outlining a brewing plan. This will help keep you from forgetting a critical step in the process, as well as give you a general time frame so you know when you will need to perform particular tasks, such as adding certain aromatic hops.
Write out each step in the process, as well as any information that is specific to the brew you are making, such as the target temperature or the times to add particular hops or flavorings.
The process may vary for each type of beer you make, so it can be useful to note any divergences from your normal process.
6) Brew Day Data
When you decide to start brewing, you’ll want to still have your homebrew log at the ready.
There are several significant bits of data you will want to record on brew day.
You may have already outlined your ideal target metrics on an earlier day, but now you will need to record whether those numbers actually hit the target.
Depending on your preferences, the data you decide to record may vary from what other homebrewers decide to track.
You do not need to log every single metric if you don’t want to.
Keep track of the data that you think you can have control over or that you think will affect the final result of your beer. This is usually the most important information for you to log.
Some useful metrics to log can be your water volume and specific gravity before you start boiling.
By knowing these numbers, you can have a good idea about whether you are going to be able to achieve your desired final gravity and volume targets.
If you need a little more explanation of how pre-boil gravity and volume can be important, how to calculate target measurements, and how to make adjustments, there is a great step by step explanation here.
The temperature and pH of the mash are also fairly useful bits of data to keep track of in your log.
The pH of your mash can have a significant effect on multiple factors of the beer brewing process, including yeast health during fermentation, beer clarity, flavor stability, and hop extraction rates.
7) Brew Day Notes
The previous section of Brew Day Data is a log of raw numbers from the day you brew.
The section of your log for Brew Day Notes is simply a space where you can write how the actual process went on the day of brewing.
Were you able to follow your brew plan or did you have to make adjustments on the day of?
Were there any hiccoughs in the brewing process that might affect the final beer result?
Keep track of anything you think went well, as well as anything that might not have gone to plan and needs to be adjusted for future brews.
The point of this section is to note anything that may not be shown in the raw data but which may have an effect on the final beer product.
8) Fermentation Schedule
Just as you wrote out a plan for the actual brewing day, it can be helpful to jot down a quick outline of your fermentation schedule.
Most beer will require a certain amount of time to ferment properly, so it can be helpful to write down the exact dates so you can plan accordingly for bottling or kegging.
Another useful piece of data for this section is to write down any significant temperature fluctuations that may affect the fermentation of your beer.
If you decide to adjust your fermentation schedule based on temperature changes, be sure to write it in your log so you know for future brewing how to replicate the beer.
9) Bottling Information and Kegging Information
Whether you are bottling or kegging your brew, it is useful to have a section of your homebrew log dedicated to this stage in the process.
Write down the date that you packaged your beer, as well as important data like the final gravity and the final volume.
It may also be useful to write down your target carbonation levels and how long you intend to let the keg or bottles rest in order to achieve that level.
In this section, write down any variations to the normal bottling or kegging routine that may be important, such as if you decide to split the brew between two kegs, or add elements to increase carbonation, or if you run into any difficulties during the process that may affect the final product.
10) Tasting Notes

Once your beer is finally ready to taste, be sure to have your homebrew log at the ready.
The whole purpose of a homebrew log is to keep track of metrics that will allow you to improve or replicate a beer the next time you brew it, so it is critical to document whether the beer actually came out how you intended!
Depending on your experience, your notes in this section may be as simple as just “tastes good, would definitely make again” or as complex as a detailed evaluation of the aroma, mouthfeel, taste, and appearance.
The more specifics you can provide, the more likely you’ll be able to successfully modify future brews to improve any areas that are falling short.
It can also be useful to note the initial taste of the beer, as well as after it has sat for some time.
Does the beer’s taste change as the carbonation is lost? Does the first bottle taste different from a bottle enjoyed three weeks later?
This information can help you determine if you need to make modifications to improve the flavor longevity of the beer in the next batch.
11) Notes for the Next Batch
In this section, you can review all the data and information you have logged for your brew and write down any suggestions for the next batch.
Did the beer turn out exactly as you wanted? Great! Then you don’t need to add anything to this section. However, more likely than not, you have noted at least one or two tweaks you would like to make in order to improve the next batch.
This section will serve as a helpful guide for the next time you want to brew this particular type of beer.
Help yourself avoid committing the same perpetual mistakes by outlining what needs to change in your process, whether it be the boil times, the starting pH, the type of hops used, or any number of other factors.
Conclusion
If you want to get better at brewing beer at home, the purpose of a homebrew log is to help you recognize areas where you may need to tweak or adjust your process.
You can highlight successful steps and be sure to replicate them for future brews, as well as modify factors that may have resulted in a less than ideal final product.
Homebrewers who want to improve the consistency and quality of their brews should definitely start keeping a homebrew log.
With a little extra effort and patience, you can start brewing your best beers in no time.