If you’re interested in starting to brew at home, you may have run into some confusion about how much yeast you need to make a successful brew. Using an insufficient amount of yeast can result in suboptimal beer flavors. If you look online, you might find incredibly complicated calculations, opinions, and recommendations that are overwhelming to most beginner homebrewers. So, what is the easiest, best way to determine how much yeast to use?
For homebrew, the amount of yeast you use can be estimated by considering the following factors:
- How strong your wort is (i.e., the gravity of the brew)
- What type of beer you are making
- How big of a batch you are making
Take the gravity points of the wort and multiply it by either 0.007 (for ales) or 0.015 (for lagers) and then multiply by the total batch size in gallons.
If you find yourself confused about how much yeast is required for your batch of beer, you’re not alone.
A lot of homebrewers find themselves wondering just how much yeast is needed in order to make a tasty brew. Since the quality and style of beer can vary drastically based on the type and amount of yeast used, there is no single quantity of yeast that will work for all types of beer.
Instead, the amount of yeast you use will depend on the type of beer you are planning to make.
Yeast is responsible for the fermentation of your brew, and different strains of yeast will perform better for certain beer types and starting ingredients.
As a general rule, the higher the gravity of your desired beer, the more yeast you will need to use.
If you still feel a little unsure of how to calculate the amount of yeast you require for your brew, or you simply want to learn more about why yeast is so darn important when it comes to creating alcohol, read on below.
How to estimate the amount of yeast you need to brew?
There are a number of online resources available for determining the precise amount of yeast needed for a batch of beer, but sometimes this information can be confusing and overwhelming to the novice homebrewer.
Some homebrewers recommend using yeast calculators like this one, but again these calculators can often be over complicated for the casual weekend homebrewer.
How to calculate the number of gravity points for your beer
In order to estimate the total yeast you will need to pitch, you will need to determine the number of gravity points for your beer.
When you buy a grain for brewing, it will often list the specific gravity or the information will be available from the retailer’s website. If you come up with your own recipe, you can calculate the original gravity.
You can convert the specific gravity into gravity points in two ways.
First, you can take the specific gravity and multiply by 1000 and then subtract 1000. So, if you have a malt with a specific gravity of 1.025, the calculation will be 1.025 x 1000= 1025, then 1025-1000= 25 gravity points.
Another potentially easier way to determine the gravity points is simply to look at the specific gravity and use the last two digits.
So, a malt with a specific gravity of 1.036 will have 36 gravity points, because these are the last two digits of the specific gravity.
Determine what type of beer you are brewing
In order to arrive at an accurate estimate for how much yeast to pitch, you will need to consider what type of beer you are brewing.
Different yeast strains will have different fermentation requirements.
The two main brewing categories for most homebrewers are ales and lagers.
In general, lager strains will require more yeast than ale strains.
Lager brews require a cooler fermentation temperature than ale brews, and yeast does not function as well when it is a bit chilly. Because of this, lagers need more yeast in order to accomplish the same amount of fermentation as a warmer temperature ale fermentation.
According to beerandbrewing.com, a good rule of thumb is:
- 0.007 yeast vials or packs per gallon per gravity point for ales
- 0.015 yeast vials or packs per gallon per gravity point for lagers
This means that lagers will require over twice the amount of yeast as ales!
This can be an important consideration in regard to the type of beer you make, as yeast can be expensive, and the increased quantities required for lagers may cause some homebrewers to focus their efforts on ales instead.
Use your gravity points and the determined yeast multiplier to estimate the amount of yeast needed
Once you have determined your yeast multiplier based on the type of beer you are brewing, you will need to multiply this by the gravity points of your beer and the batch size in gallons.
For example, if you are brewing a 5 gallon batch of a 1.050 gravity ale, you will calculate the needed yeast as follows:
- 0.007 (because you are brewing an ale) x 50 gravity points x 5 gallons = 1.75 yeast packs
For another example, imagine you are brewing a 5 gallon batch of a Czech 1.060 gravity lager:
- 0.015 (because you are brewing a lager) x 60 gravity points x 5 gallons = 4.5 yeast packs
As it may become apparent as you brew more beer, brews that have a higher specific gravity will require much more yeast.
Brewersfriend.com has a helpful chart of the ranges of gravity of various types of beer, which can give you an idea before you even start brewing of how much yeast you may need for particular batches.
Why is yeast important for brewing beer?
One reason that homebrewers may get confused about the amount of yeast needed is that they may not understand the role of yeast in brewing.
If you realize why yeast is important and what it does for your brew, it may help you understand why pitching a sufficient amount is so critical in the process.
Yeast is a tiny, single-celled fungus, so small that it takes 20 billion individual cells of cake yeast to weigh one gram.
Yeast digests any available sugars and produces carbon dioxide and ethyl alcohol as a by-product. This is what results in fermentation, taking an ordinary mash of water and grains and turning it into the desired alcohol.
There are over 500 different types of yeast that can be used for brewing. Each strain of yeast can produce a drastically different tasting beer, so the choice of yeast is often a very important step of the brewing process.
Certain types of yeast prefer to ferment at different temperatures, which can also contribute to the flavor profile of the resulting brew.
Ale yeasts, for example, tend to perform better in warm temperatures (55-70F / 12-21C), while lager yeasts are better in cooler temperatures (40-54F / 4-12C).
Without yeast, we wouldn’t have the incredible variation in types of beer, and the process would result in a lot less flavorful (and a lot less alcoholic) final product.
Is there a difference between using dry or liquid yeast?

When you start to homebrew, you may discover there are different types of yeasts available.
Anyone who has ever baked bread or dinner rolls is probably familiar with dry yeast, but a lot of brewers actually use liquid yeast.
There are some notable advantages and disadvantages to using a liquid yeast when homebrewing compared to standard dry yeast.
One of the main advantages of using a liquid yeast is simply that there is a lot more variety when it comes to the strains available. If you’re looking to make specialty beers or seasonal variations, liquid yeast is the best option. Liquid yeast also has high purity rates and higher flocculation rates, making it easier to use and assuring a remarkably flavorful batch of beer.
While dry yeast may not offer the same strain varieties as liquid yeast, it still has some notable benefits. Dry yeast tends to be sold in larger portion sizes than liquid yeast. This means that a single packet of dry yeast may be enough for an entire batch of beer. Dry yeast also has a longer shelf life than liquid yeast, and with proper storage, it can last for up to a year.
Liquid yeast also tends to be more expensive than dry yeast, but some particular beers can only be produced with the strains available with liquid yeast.
Overall yeast required, however, does not need to be modified based on whether you are using dry or liquid yeast. Simply use the same calculation method as above to determine the necessary quantities.
What are the advantages of making a yeast starter for homebrewing?
If you prefer to make low-gravity ales, you may find that you don’t need much yeast to get the job done. However, if you like to make lagers or high-gravity brews, you may find yourself needing several yeast packs per batch. After a time, this can get to be fairly expensive, and you might discover you often run out of yeast. One solution is to make a yeast starter.
By creating a yeast starter, you can build up your own supply of yeast cells to use when brewing, which can save you money and assure you that you always have an amount of yeast on hand.
A starter is essentially a small amount of wort that is used solely for letting yeast replicate and grow.
How to make a yeast starter for homebrewing
Making a yeast starter for homebrewing doesn’t need to be intimidating. To create a starter, all you need is:
- A small vessel to house the starter, such as a mason jar or growler jug
- Dry malt extract
- Your intended yeast
- A saucepan with a lid
- Soap and Sanitizer
The steps:
- Clean and sanitize everything that will come in contact with your yeast, such as the storage vessel, the saucepan, and any spoons or bowls you will use.
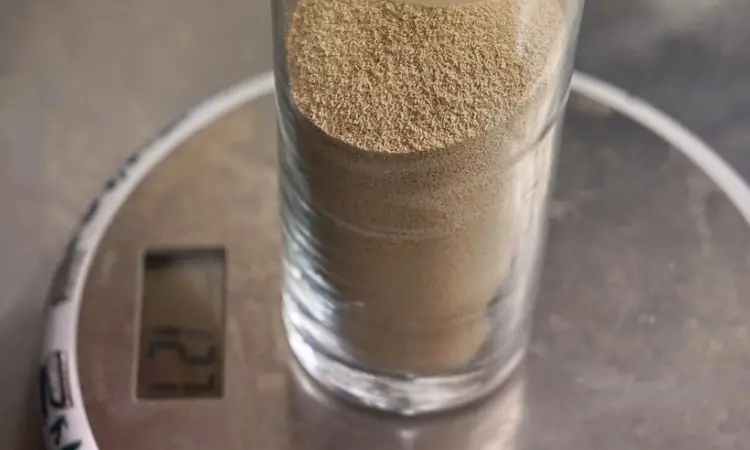
- Measure out one gram of dry malt extract for every 10 milliliters of starter wort.
- Put the measured amount of dry malt extract into a bowl, then add enough filtered water to create a total volume of one liter (this recipe will create a 1-liter starter size.)
- Put the malt and water mixture into the saucepan and heat to a boil.
- Boil for ten minutes, then place the lid on the pan and place the pan in an ice bath to chill until it is cool enough to touch.
- Transfer the chilled wort into the clean storage vessel.
- Add the liquid yeast into the vessel and mix well.
- Store in a location that is 65-70°F (18-21° C), or roughly room temperature, and leave for 24 hours.
How do I use a yeast starter?
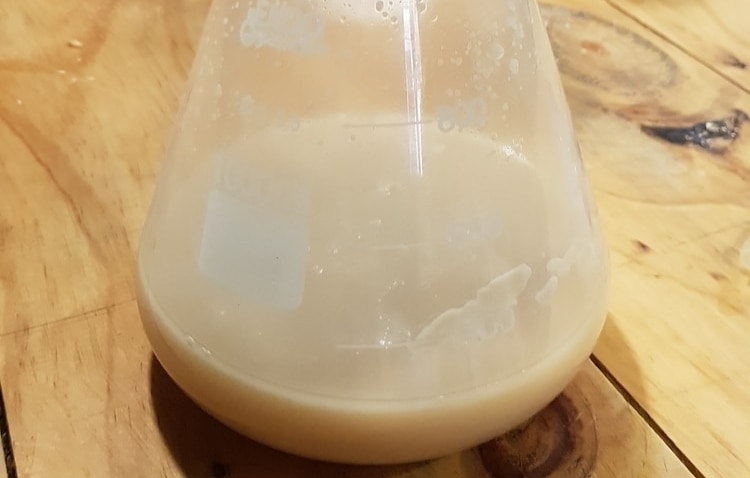
Once you have a yeast starter made and it has set for at least 24 hours, you are ready to use it in a batch of beer.
You can use the starter in two main fashions:
- Throw the entire starter, including the liquid, into the cooled wort. This is best for any starters that were created 24-48 hours before brew day, which are usually still fermenting at this point
- Or, alternatively, once the starter has stopped fermenting, chill it in a refrigerator for at least 24 hours. When you are ready to brew, take out the starter and toss away most of the liquid, then swish the yeast in the remaining liquid to re-activate it and pour it into your fresh wort.
The choice of which method you use will often simply depend on personal preference, as well as when you created the yeast starter.
Some brewers don’t like any spent starter ending up in the beer, while for other brewers, this is not a concern.
What are the consequences of not using enough yeast in a batch of beer?
Some beginning brewers make the easy mistake of assuming a single vial or packet of yeast is all that is necessary for brewing a batch of beer.
While a single packet of yeast may be enough to produce a decent beer, the yeast may be overstressed during the brewing process.
When you don’t use enough yeast, or “underpitch” your yeast in homebrewer’s lingo, it lengthens the budding phase of yeast.
This stage is where esters are created, and if you have too many esters in your beer, it can create undesirable flavors to develop in your brew.
Additionally, yeast acts to break down the fermentable components available in a brew, like oxygen and sugar.
If you don’t have enough yeast to properly break down all of these components, your fermentation may not be able to be completed (meaning less alcohol content), and there is an increased risk of unwanted contaminates spoiling your brew.
Are there any times where a brewer might intentionally underpitch the yeast?
Most beer styles are dependent upon a clean, balanced presentation, which can be spoiled by an overstressed, insufficient amount of yeast.
However, not all beers are created equal, and some beers are actually defined by the flavors created by overworked yeast colonies.
Hefeweizens, for example, are known for hints of clove (due to excessive phenols) and banana flavors (from excessive esters.)
Because of this, if your goal is to create a beer that has a strong, yeasty profile with the flavor components that come through with extra esters and phenols, underpitching your yeast may not necessarily be a bad idea.
However, the results may be less predictable, and this may take some trial and error to get right.
Most novice homebrewers would probably be better served by selecting an appropriate yeast strain and calculating yeast needed, as described above.
Why do some brewers smack their yeast before using it?
You may be wondering if you need to aggravate your yeast before using it.
The answer is: not necessarily.
When homebrewers are discussing smacking their yeast, it is likely because they are using yeast that comes in a “smack pack.”
Most smack packs are produced by Wyeast Labs.
This packaging requires brewers to break an inner seal of the package in order to expose the yeast to a sterile nutrient and wort. This lets the yeast start to become metabolically active before you add it to your brew.
After breaking the pouch, you let the smack pack sit for 3 to 5 hours, during which time the package will swell.
The yeast essentially is given a jump-start in the fermentation process, giving you a leg up on the brewing process.
If your yeast is not in one of these smack packs, there is no need for you to slap or pop your yeast before you use it.
Conclusion
Don’t be intimidated by confusing calculators or opinionated brewers when it comes to estimating the amount of yeast you need in your homebrew.
By taking a few simple steps to calculate your desired yeast quantity, you can stop stressing and start producing better, more flavorful beers today.