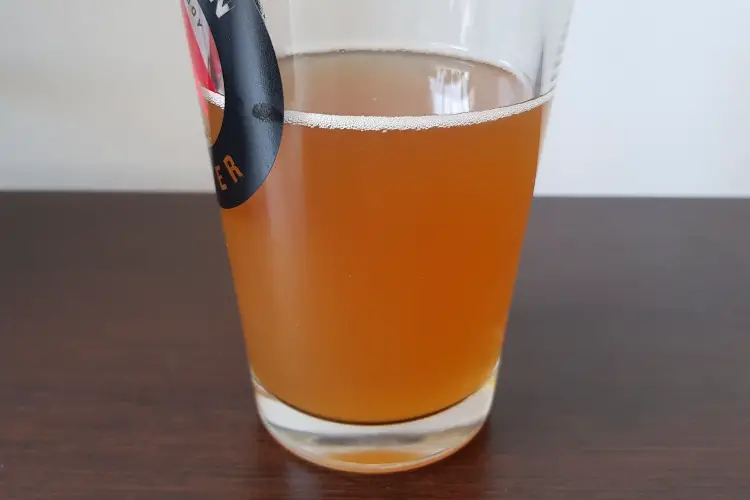

Cloudiness may not affect the flavor, just the look or aesthetic of the beer. Cloudy beer is caused by several factors. Luckily most can be avoided with good brewing practices.
There are 3-4 main culprits causing cloudy beer. The two main ones are chill haze and yeast. A more troubling one is bacterial infection. With patience, a bit of aging, and good habits, cloudy beer will be the least of your worries.
Yeast Activity
Extract beers will have less protein problems and more yeast or bacterial issues.
Extract beer making takes a lot of the work out of brewing for you.
Producers have already extracted and condensed your sugars for you.
Mashing raw barley malt is an exciting yet labor-intensive practice. I hope you may pursue it in your future brewing adventures.
Tip 1 – Yeast in the bottle? Decant your Beer
Meaning, you have to pour it out of the bottle gently and with a minimum of agitation and release of carbonation.
Too much yeast in a bottle causes cloudy beer.
A properly handled homebrew should have about 1 mm of yeast on the bottom.
Not only that, but if handled and aged properly, you can enjoy straight from the bottle without much disturbing the yeast. Even so, this small amount could enhance, not detract from the flavor.
That said, it is normal for a homebrewer to decant beer into a glass or pitcher, whether for themselves or for their guests.
The primary reason is to get the beer off of the yeast in the bottom of the bottle. Yeast can be a bit bitter and though pure yeast strains are vitamin rich and enhance flavor, they can be too much of a good thing.
Tip 2 – Racking
To see the beer fermenting is a joy, and four weeks later, it’s still as cloudy as day six, hmmmm, what is going on???
Many beginning brewers, egged on by poor instructions on kits, or forgive me, less experienced shop owners, will ferment once in a plastic bucket and then bottle straight from it or rack (move to another vessel) it once on bottling day and proceed to bottling.
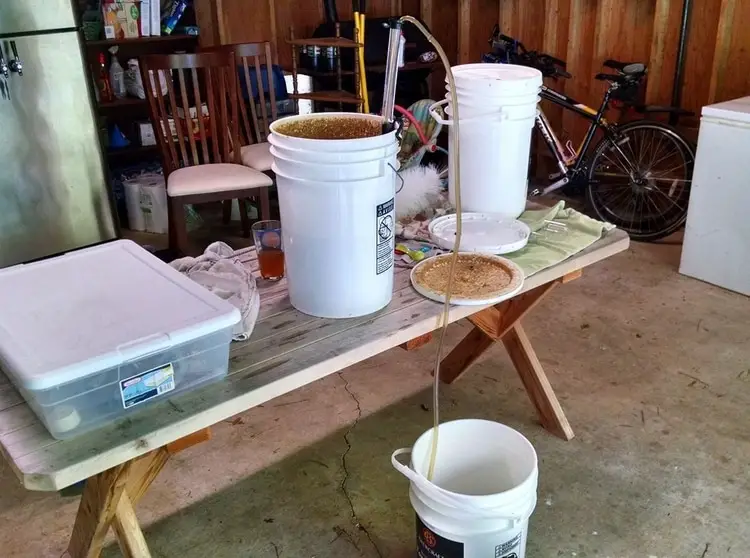
Yeast needs a clean healthy environment. Therefore, it is best to move your beer at least once after 7-10 days.
Primary fermentation has completed and 80% of your yeast has flocculated (fallen to the bottom, some dying off).
Healthy cells stay in suspension and slowly work on the remaining sugars, albeit at a much slower pace.
Dead yeast cells stay behind. They have spent themselves. After 2 weeks or more, the yeast may begin to autolyze (the cells break open).
In beer left on the primary yeast for too long, enzymes are released and tertiary fermentation may occur. They can cause rancid, meaty flavors, cause instability, and cloudiness.
After another week in secondary fermentation (the finishing process wherein the beer slowly attenuates down to final gravity) you can consider bottling.
Depending on your yeast, you could age it in the secondary fermenter 2-3 more weeks (only if it is glass) and then bottle.
For bottling, have a dedicated bucket used for nothing else.
You may install a plastic faucet for filling.
Make sure you break it down, scrub and soak it thoroughly after each use.
So you have racked your beer two times. Each time you leave behind solids, hop remnants, trub, proteins and dead yeast cells, clarifying it.
In the end, your beer will have a 1mm or less layer of yeast on the bottom, very firm, and unlikely to cloud your beer, decanted or not.
Tip 3 – Do not Over Pitch your Yeast
When it comes to pitching yeast, more is not better.
You may think, “Why not 2 packets, it will go faster?”
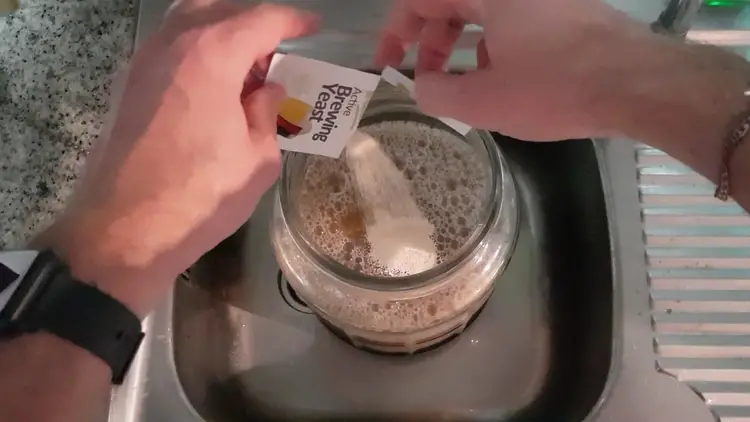
Some brewers have learned how to reuse their yeast once or twice, and they may pitch a larger slurry (liquid form) than is necessary.
At home, counting cells or gauging the health and integrity of the yeast is a guessing game, so it may be overdone.
This overpitching will initially show vigorous primary fermentation and indicate no issues. However, after 2-3 days the yeast has multiplied 2-3 times its necessary population and is all dressed up with nowhere to go. In this case, it will start breaking up. Autolysis is the same as self-destruct.
Then comes the yeast bite.
This creates a hot bitter taste with lunch meat and sulphury overtones caused by amino acids and enzymatic release.
These compounds can raise the pH of the beer and alter its acidity, flavor, and clarity.
Tip 4 – Use a Highly-Flocculent Yeast
Some yeast is finished and ready to sleep within a week.
It flocculates (falls and rests) on the bottom leaving modestly clear beer within a week.
Rack the beer once, wait 4-7 days and bottle. Just enough is left in solution to carbonate your primed (add sugar as yeast food for CO2 formation) beer on bottling day.
Two weeks later, you have sparkling clear beer, ready for enjoyment. Once such yeast I had used was London #3, by White Labs. Even on a commercial level, this yeast had regularly put away its things and gone to bed after fermentation. We did not even need to filter it as it was so amazingly flocculant.
That said, it was exceedingly difficult to repitch (reuse for a second batch). It was so virile, energetic and forceful, and as we were not cell counting at the time, we ran into overpitching problems as detailed above. This will less likely be a problem as a homebrewer.
Low flocculating Yeasts
Some yeasts settle in their own time, taking 2, 4, even 6 weeks to finish their work and have a nice rest.
Belgian strains certainly are, even though primary fermentation is done in three days.
Even so, follow your normal schedule, take hydrometer readings to check attenuation.
Rack it at least twice, bottle and age it. The yeast will finish and settle in the bottle. You can decant or not, when you are ready to enjoy.
Serving Belgian Beer
When visiting Belgium, a server or barkeep will serve you a bottle with its own unique glass. It is thrilling to enter a bar with 100 different beers with a wall of 100 different glasses to match.
They will wet the glass. The water creates friction on the glass causing the beer to foam less. They decant the beer and leave about 1 centimeter in the bottle. This leaves the beer sur lies (on lees- slurry) in the bottle.
I would usually just drink this first or pour it in at the very end. I like yeast, the point being they give you the option of drinking your beer cloudy or not.
Protein Haze
Cloudy beer may have what is referred to as chill haze. Chill haze occurs when malt-tannins, amino acids and proteins stay in suspension when the beer is cooled. They may or may not affect the flavor of the beer, but simply seem odd to an inexperienced drinker.

The homebrewer seeks to perfect his craft and produce a beer as enjoyable as packaged premium beer and put their best foot forward in social circles. Even if your party guest is technically uninformed about beer, you wouldn’t want him walking away with a bad impression.
Chill haze can dissipate as beer warms. However, most enjoy a cool beer, so it is best to resolve the problem before it starts.
Tip 5 – Get your Mash Temperature Correct
Chill haze primarily occurs in all-grain beers, brewed with raw malted barley.
It is caused by incorrect mash temperatures and mashes which are not fully converted.
A successful mash depends on precise strike temperatures (the hot liquor – water– used to begin the mash) and a precise and stable mash temperature (the temp in which you want to mash your grain from starch to sugar conversion)
If you miss your strike temperature and come in too high, 71°C/160°F and above, you will get a quick mash, which finishes within 30 minutes.
There is some conversion, but it begins leaching out harsh flavors from the husk, and unfermentable proteins from the malt. If you come in too low 64°C/148°F or less, your sugars may over- convert, convert, and continue to do so. You run the risk of converting too much, and your wort is thin with little malt body.
If you strike too low, and in turn sparge (washing of the barley malt to extract sugar) at too low a temperature, again your mash remains partially unconverted, and continues to convert for hours as you prepare your kettle. In this case, unwanted malt proteins, compounds and amino acids make it into your wort.
Tip 6 – Use the Lightest Extracts you can Find
While mashing is a concern for advanced brewers, chill haze can affect extract brewers as well.
Extract beers, especially Amber or Dark mixes heavy in coloring and flavor malts can have heavy amounts of melanoidins.
These are browning proteins naturally existing in beer caused by concentrated boiling and the concentration of barley malt during the extract process.
These very same proteins that give color – black, brown, burnt orange, ruby – to our beers, can also cause a bit of extract bite (a bit of cloying sweet aftertaste) as well as a bit of haze in the finished product.
One way to control this in extract beers is to use as light an extract as possible, extra light if possible. Back in the day, I would use Britain’s John Bull, extra light liquid extract. I also used Premier Extra Light liquid, an American malt.
I do find that liquid extracts have less of this extract bite than the powdered ones. Others like the malty fullness of dried extracts. It depends on your personal taste.
Infection
All brewers have had infected beer. Anyone who hasn’t is extremely lucky, insupportably fastidious or tells a little white lie now and again.
Kidding aside, contaminates get into our beer and ruin it from time to time.
This may make you feel better. In addition to being a passionate homebrewer, I was a professional brewer for 10 years.
Back in the early days, we were all-grain brewing twice a month at the time, 10 gallons each, in my backyard, porch and only using the kitchen for racking, as it was an intensive and at times messy process.
We’d brewed three batches on three consecutive Saturdays. By the third Saturday we were ready to rack the first batch which had gone through primary fermentation as was ready for aging and clarification. We used an American Ale yeast at the time, sharp, tart, fruity and dry. I preferred to drink my beers after about 5 weeks.
After two weeks, it had stopped fermentation but we noticed that it still had a peculiar opaque haze to it. We tasted it and sure enough, acidic, hot on the tongue, spoiled cider smell, it was infected. We then realized we’d brewed all three batches the same way – 30 gallons down the tubes. At least 30 hours of work and the money, we were young so even $50 – $75. was a lot. OH MY… WHAT HAVE I DONE!
We grabbed some beers out of the fridge, and I tried not to be angry and in a bad mood. I said to my brewing partner, “Let’s forget it until tomorrow.”
Tip 7 – Problems usually hide in plain sight
I thought hard about those three delightful batches, down the tubes. I had a 20 pound bucket of liquid malt extract stored in the back room. It had been opened and used as I needed it.
I only really used it for yeast starters, and replaced the lid when finished. They did not have pitchable slurries in those days. I cracked it open and on the surface of the malt and sides of the bucket, white mold and green fuzz was thriving.
I’d had brilliant brewing sessions, mashing, boiling, hopping, so time and labor intensive and so fun… and it was ruined by infected yeast starters. Even though I boiled the yeast starter for 10 minutes, it was not enough to kill everything.
The worst contaminants are lactobacillus and pediococcus.
The former will emerge once the beer goes anaerobic (oxygen-free).
Pediococcus needs O2 to survive and will begin to assert itself (if present) as soon as respiration and primary fermentation begin.
They both produce lactic acid driving down the pH and souring your wort.
A clean exacting brew process means little if we overlook the simple things, like proper storage or cleaning of one tiny piece of hardware. A bacterial bottleneck of sorts.
If unintended and uncontrolled it could be disastrous to your brewing efforts. Acetobacter is the by-product, creating cidery, sour, green apple and even buttery (diacetyl) flavors.
In almost all cases, just dump it and move on.
Tip 8- Use Clarifiers
Lastly, there is one simple technique that may help; use clarifiers.
This may seem obvious yet they may only be effective if your brewing process is clean and sound.
Irish moss is the easiest to use. Just toss a small amount into your kettle for the last 5-10 minutes of the boil. Made of seaweed, it bonds to the proteins and helps the cold-break fall out. It is best if you first hydrate it with a small amount of water.
Isinglass is a second I’ve used but only commercially. Made of fish swim-bladders, it undermines the vegan properties of your efforts. You need to hydrate it with sanitary water, and mix it into the beer at the end of secondary fermentation. I circulated it for 5 minutes before racking into a seven-barrel (217 US gal.) serving tank. The beer becomes crystal clear within 3 days or so.
In Conclusion
As in all things, sound, sanitary and precise brewing practices will prevent chill haze. The above methods are logical, practical solutions to cloudy beer and may be seamlessly incorporated into your process with little effort.
Cloudy beer is largely an aesthetic issue, and short of outright spoilage, will usually not detract from a nice taste and meaningful enjoyment.
[email-subscribers-form id=”2″]