
Beer infection and contamination is a frustrating reality. Good brewing habits help avoid it. Also, there are must-don’ts during the process wherein the beer is not purely infected but affected where off-flavors take away all pleasure and enjoyment. Our hopes, so promising at first, are dashed!
Beer infection happens to homebrewers at every skill level. It is inevitable and with proper cleaning habits and brewing regimens, any brewer will quickly overcome the problem and learn from it. Avoiding infection is a process. The beer itself, that is the art.
Homebrewing gives beauteous rewards, tastes, and experiences. On a bad day, it creates emotional pain and a literal infection that ruins everything! Small avoidable mistakes we make flaw an otherwise drinkable beer.
How do I know if my beer is infected?
- Unmistakable black olive nose
- Grassy, barnyard, cheesy off-flavors
- Papery mouthfeel
- Dry and astringent
- Carrots, peas or corn flavor
- Cider-vinegar flavors
- Cloudy after fermentation, or in bottle
- Overpowering fruity sour, green apple aroma
- Exploding bottles
Your beer may experience one or more of these traits.
Don’t panic!
It may not be infected. Let’s hope for the best and review our methods for comprehensive brewing methodology and sound cleaning practices.
Method 1: Proper Cleaning and Sanitizing
A Sound and Thorough Cleaning Process
There are three golden rules for restaurants, location, location, location.
We propose three golden rules for successful beer making, clean, clean again, sanitize.
Beer making is a tolerant process… to a degree.
Pre-Boil and pre-cooling, you have a lot of leeway.
Any miss-steps or modest mistakes can be sorted out in the boil.
Once it is cooled and hits plastic or glass for fermentation, your window for error shrinks dramatically.
Plastic can never be completely sanitary as there will be micro-abrasions and scratches that may harbor bacteria.
A little is OK, even normal for homebrewers. Most beers are produced and drunk within 30-50 days and no apparent problems persist.
Your yeast is the dominant species in the brew. Once it is introduced, it dominates the environment and takes the food and nutrients for itself.
If there are tiny, modest bacteria present which sneak into your beer, it is not a short-term problem.
That said, for pre-intermediate to advanced brewers, we strongly recommend using glass carboys (5 US gal. 18.95 liters) exclusively.
They are impermeable to oxygen and scratch resistant, therefore will reduce hidden bacteria.
Brewing is 90% Cleaning Implementation and 10% Artistic Creation
One thing we must understand.
Clean means free of dirt.
Sanitary means free of harmful bacteria.
Therefore, when fresh cooled wort hits your fermenter, or fermented beer is racked off in glass for aging, you must be absolutely sure your vessel is sanitary.
Scrub, rinse and soak your vessels in a sanitary solution. There are several choices.
- Bleach is good, cheap but slow. It takes 20 minutes to effectively kill. It must be rinsed thoroughly. Some are worried the rinse water is not clean. In my experience, city water is sanitary, and I have even used well water.
- B-Brite is a product I used. It is fast, maybe 15-30 seconds. It is a carbonate cleaner and requires rinsing also.
- Iodophor (an iodine-based cleaner) is a highly effective, broad spectrum killer. It kills in 30-60 seconds, but a good soaking is recommended. It needs rinsing and will stain plastic items.
- Isopropyl Alcohol is handy for little spot cleanings. Examples: wipe the mouth of a bottle, clean the cap and exterior of a yeast vial or packet
Cleaner to water ratios will vary. Check instructions carefully.
Improperly rinsed containers or bottles can cause off-flavors or not be strong enough to sanitize.
Method 2: Open versus Closed fermentation, Closed Wins Out
Open fermentation
Let us back up a second. A carboy is impermeable to oxygen.
Does that mean a plastic bucket is not? Correct, a plastic bucket if left too long, will allow oxygen to pass through.
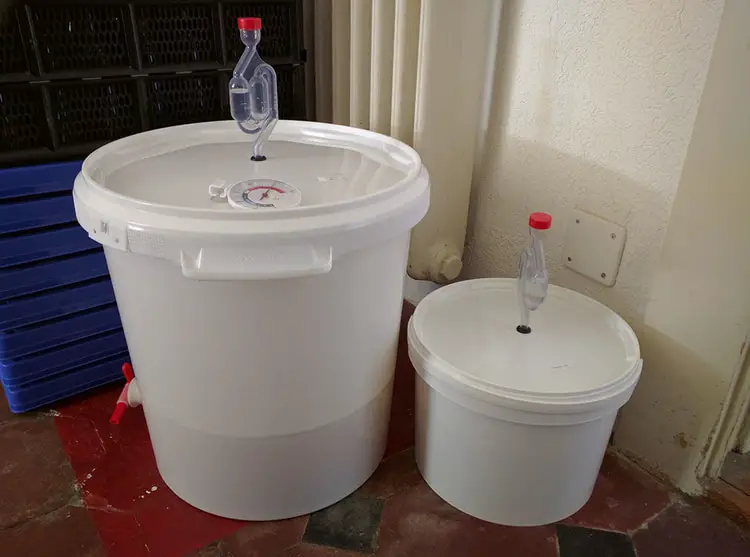
Plastic fermenters are technically Open-Fermentation. Interlocking lids or no, they are not air-tight, so process within an open atmosphere. They also allow for a large head space within the bucket itself.
This allows for high-krausen– pronounced /croy-sǝn/ (foam and activity created by primary fermentation) in the vessel with only an airlock attached. This is usually not a problem as beer is rarely aged in plastic. Some beer can be aged for 3-6 weeks or longer in secondary fermentation if you use glass carboys. If you have no glass fermenters, or choose not to use them, age your beer in the bottles.
Also, as previously mentioned, we must clean thoroughly and with determination. If cleaning plastic, a firm kitchen sponge- dedicated to brewing only! – is a good choice.
Beware, if you use green kitchen pot-scrubbers, you will begin to scratch your vessel and quickly create fissures for dirt and bacteria to hide in.
Do not use soap as it is very hard to rinse out.
Again, plastic is porous and can absorb chemical agents, oxygen and odors.
I always scrubbed with hot water until visibly clean.
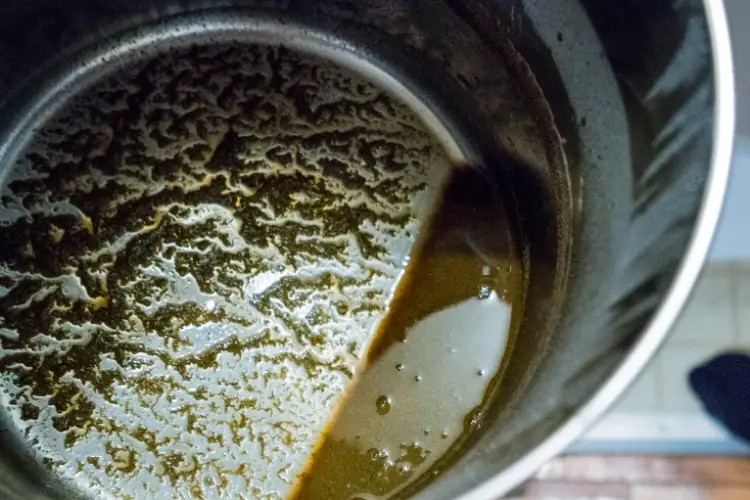
Looking at the plastic fermenter in figure, there is one thing that troubles me.
It is the plastic spigot that is attached at the bottom.
This is very convenient for racking or for bottling. However, it is also a good place for wild Pediococcus or lactobacillus bacteria to enter. This is a household brand of bacteria.
There is a rubber gasket here to seal the spigot and a lot of surface area for bacteria to ride.
Absent minded brewers will not dismantle the spigot after usage, may just soak it in bleach and call it good.
This may work for a few brews but build up will occur that could lead to trouble.
Common off-flavors include but are not limited to:
- a black-olive bouquet
- high-astringency
- lactic acidity (acetobacter)
- extreme dryness
- grassy and barnyard flavors
- canned vegetable medley.
It is wise to never attempt lagers when using plastic. Ale yeast and ale production often yield components of desired off-flavors (light butterscotch, fruity esters). Lagers must be pristine and cannot hide problems.
Move Toward Closed Fermentation
One must remember. Sanitizers do not clean dirt.
So, if there are chunks, stains, or residues of any sort in your beer vessels, they must be scrubbed clean first.
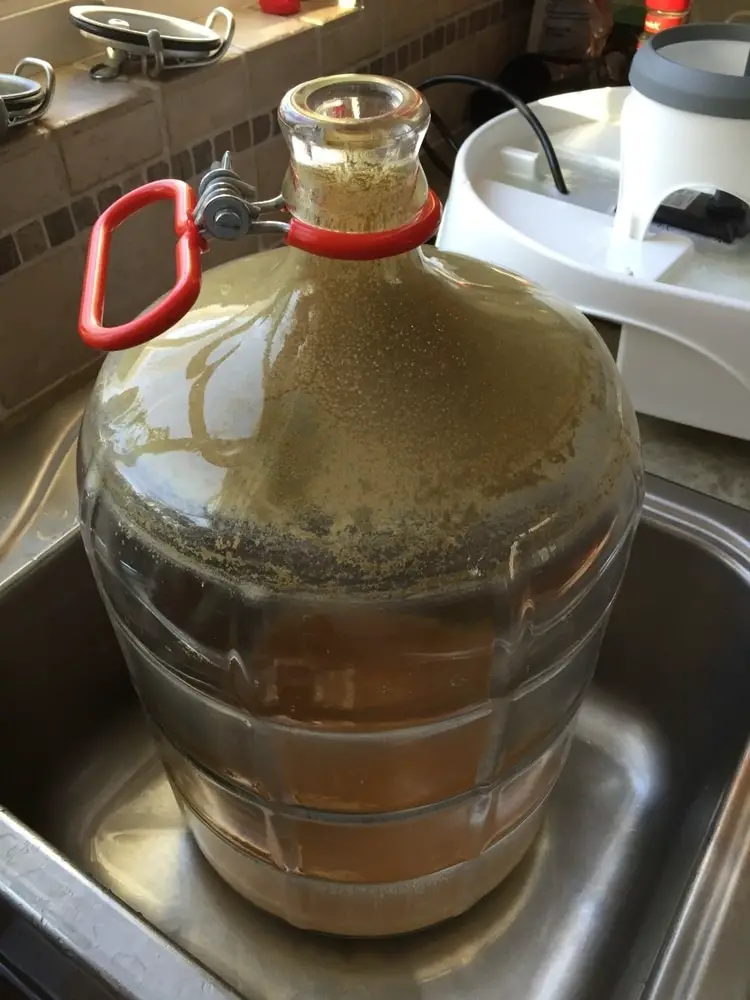
The carboy in figure 3 has been through fermentation and coated in proteins and spent yeast. It must be cleaned spotlessly for proper sanitation to occur. Buy a stiff bristled brush made expressly for carboy cleaning.
Soaking alone will not loosen all the hard organic residue.
This requires the most elbow grease and stamina of home-brewery cleaning.
They do have nifty CIP (clean in place) carboy cleaners now. They could be pricey and the chemicals so strong, they could burn you.
Carboys are considered closed-fermentation.
They most closely mimic a professional brewing environment. The primary reason being is they have smooth low-friction surfaces and are not open to the ambient atmosphere.
Once the beer is moved to them, whether in primary or secondary fermentation, the yeast quickly begins working, producing CO2 and expelling all O2 from the vessel.
This is optimal for clean, successful brewing.
Sanitizer works optimally on clean smooth surfaces.
Cleaning and sanitizing in beer making is partially a leap of faith.
We are killing microscopic organisms and cannot see if the job is done.
Build your regimen and use common sense.
Your recipes and brewing experience will naturally evolve, and dirty beer will be the least of your worries.
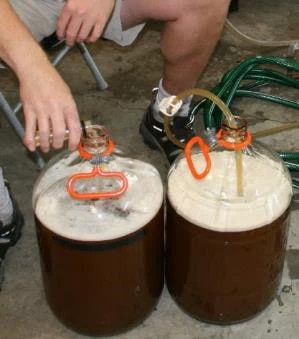
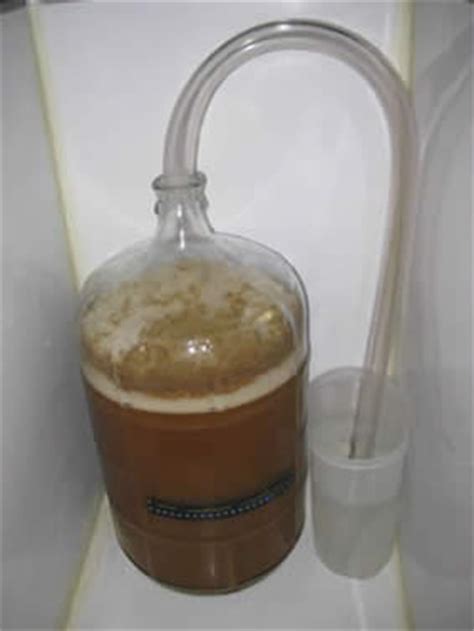
If you decide to go closed fermentation and use carboys, you are taking a step in your brewing evolution. With this step comes more responsibility. As you can see, there is truly little head space and a vigorous ale fermentation will create a high krausen and blow off.
As yeasts and proteins can get pretty chunky as well as hop residues, you may need a thick blow off tube.
The outside diameter of your vinyl hose will be the same as the inside diameter of your carboy mouth. Make a sanitary water trap for the dummy end of the blow-off hose.
Method 3: Gentle and deliberate handling
Issue 1 – Oxidation
Oxidation is not infection per se but it will certainly ruin your day and your beer. The end result, while not technically infected has the distinct taste of cardboard, literally paper. It is not a pleasant experience.
This happens when you introduce O2 into the beer after fermentation has begun. Directly after your yeast is pitched, your yeast respires, breathes and multiplies by the millions. The beer is in an aerobic state, that is oxygenated, as O2 folded into the wort during your boil. One should always aspire to a medium heavy rolling boil.
After respiration, the fermentation begins and the beer then transforms into an anaerobic state, oxygen free. It stays this way for the reminder of its life, and the yeast does not need it to live nor do its job.
The most common way to oxidize is to splash the beer too much while transferring or packaging. Always rack your homebrew calmly, avoid any splashing, always submerging your sanitary transfer tube into the next vessel.
This goes for bottling also. You need to add priming sugar (a little sugar to produce CO2 in the bottle) to your finished beer. I would add the sugar and gently re-stir the beer every 8 beers or so to redistribute the sugar.
If you get carried away, stir a lot, thinking to wake up the yeast or simply being a little careless, you may get O2, then that nice papery mouthfeel, dry and astringent. Even though there is minimal exposure to oxygen during racking and bottling, it is smart to work quickly and efficiently to reduce the exposure.
Method 4 – Proper Cooling
DMS – Dimethyl sulfide
This is a chemical bi-product of malt proteins formed directly after boiling. Your critical action post-boil- get your wort cooled within 30 minutes. For homebrewers, most of us started with just 1.5 – 2 gallons of concentrated wort in our kitchen kettle.
The most handy trick is to pick up a bag of ice at the convenience store before your brew session and make an ice-water bath for immediate post boil.
Set the kettle down in the ice bath and stir.
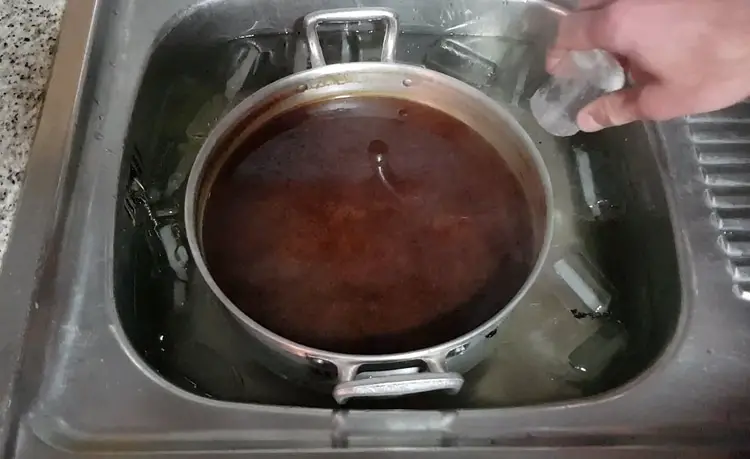
In 20-30 minutes, it will be cooled off, down to about 60-70° F / 15-21° C.
You mix it with cool water and pitch your yeast.
The trouble comes when people leave the kettle on the stove top for ambient cooling, or let it cool overnight. DMS forms. Carrots, green peas, corn chowder: these are some flavors you can look forward to.
They will dominate your taste profile, and nothing can bring it back.
Not even your yeast will absorb them for you, as it does so many other off-flavors.
Method 5 – Using Quality Yeast
Choose fresh
Many a good recipe and sound brewing process has been upended by the improper yeast.
Novice brewers invariably begin by using hopped-beer kits. They are easy, and everything you need is already in the can.
They often come with a package of generic yeast under the plastic lid affixed to the top of the can. It may have the weight on it, for example, 10 grams, but otherwise no labelling or marking.
It could look exactly like this image taken from a popular brewing kit. You do not know what you are getting.
Use fresh, clearly labelled yeast.

Go Liquid Young Man, Go Liquid!
Isn’t that a famous quote!?
There are many liquid yeasts available in pitchable vials.
These are often cultured (grown, not sent to prep school) from popular breweries themselves.
Their benefit is that you will most closely emulate your target style.
Dry yeasts can be quality and yield clean results yet tend to have a neutral taste profile. Liquid yeasts are living cultures of a very specific strain, not just of style but of origin:
| Germany: Pilsner, Bock, Weizen, Alt, Lager
Belgium: Abbey, Ale, Wit, Lambic |
UK: London, ESB, Scottish, Mid-Lands
The US: Ale, Lager, California, Steam, Wild |
I cannot emphasize enough how they will up your brewing game, opening up a new world for you.
Gram for gram pitchable liquid yeast containing is the most expensive component in homebrewing.
However, the quality and control gained is well worth the cost.
Method 6: Pitch Properly
Underpitching your Yeast
It is easy to get forgetful, lazy, or carried away.
You may be tempted to split your yeast vial, or pull slurry from a previous batch, except it had less healthy slurry than you thought.
Once or twice I forgot to make my yeast starter.
This was before the days of pitchable liquid yeast vials. You had to start your yeast the day before. Making starters was a chore.
The day-long all-grain brew session had gone brilliantly. Mash, sparge, boil, cooling – this was going to be one special ale. I pitched and waited a day, nothing but slurry formed on the bottom. Ok, no problem, sometimes it takes a little time. It never blew-off, never really krausened, I could see yeast slowly and lackadaisically swimming around. It steadily bubbled, about one blurp every 3-5 seconds.
A week went by and I tasted it. It had fermented down about 50% attenuation and had a lemony mouth-feel with a strictly acidic finish. This is indicative of acetaldehyde (a fermentation by-product, usually reabsorbed by healthy yeast).
It tasted like mild sweetened cider-vinegar. I cursed and carried it straight out into the yard and poured it into the grass. A tear ran down my left cheek.
Overpitching your Yeast
This most commonly occurs with ale yeast. Ale yeast is resilient and hardy.
It can withstand temperature changes and work well within a 13.3- 21.1° C (56-70° F).
On occasion, you will over-pitch.
The main reason is inexperience or absent-mindedness.
You might pitch 2 packets of dry yeast. You may have saved some slurry from a previous batch and made a larger-than-life yeast starter. First, you’ll notice that off-gassing begins within 1-2 hours. Primary fermentation registers on the Richter scale, and ends within 36 hours.
However, you will notice that the yeast fails to flocculate (settle on the bottom). You rack the beer into a secondary fermenter and wait for one, two, three weeks. Slurry does form on the bottom, but the beer is still cloudy.
You overpitched.
The yeast over-multiplies and creates an unhealthy environment. It consumes the sugar very quickly and starts cannibalizing itself. The cell walls start breaking down and dead yeast accumulates quickly. The dead yeast imparts off-flavors and the broken, stressed yeast cells are unable to settle.
Your beer is cloudy, perhaps drinkable, but decidedly bitter. You can also get over pronounced esters, creating fruity aromas and candy-like aftertaste- but in the worst way.
There could also be rubbery or sulfuric compounds, detracting from the taste and aroma of the final product.
Method 7: A Beautiful Infection
Deliberate infection
With lucky number 7 we conclude our discussion on a positive note.
Sometimes a deliberate infection can be your friend.
By this I mean brewing a sour or Lambic-style beer.
In a few places in the world wild yeast can make beer, and not vinegar.
One of these places is around the Brussels, Belgium area.
Over many centuries there, Belgian brewers have mastered the art of what nature gives them and made the best of it.
Lambic beer can be very sour, but with the addition of fruit and aging (2-4 years), it is a unique and sought after beer.
When I made Lambic-style or sour beer at home, I would wait to introduce the commercial wild yeast – Brettanomyces Bruxellensis – until secondary fermentation, or blend it with an ordinary ale yeast, like a Belgian Abbey yeast.
Real Lambic utilizes dozens of wild airborne yeasts which inoculate (infect) the beer as it cools overnight in wide shallow vessels, called coolships.
Ordinarily, as discussed in method 4, we want to cool our beer quickly.
Not so for the Belgian Lambic brewers.
This is a method called spontaneous fermentation; a method used and unchanged for hundreds of years.
If you are adventurous, explore these styles.
The Accidental Opportunity
Suppose for a moment you executed a successful brew day, fermentation begins by bedtime, and after 3-5 days the beer has calmed and entered secondary fermentation.
Everything goes well until you draw a sample to test the gravity.
Attenuation is at 70%, and still going.
However, there is an unmistakable sourness to the beer, bitter, acidic and astringent.
This is called acetobacter, and is the chemical by-product of lacto-bacillus, Pediococcus or some other wild yeast having snuck in.
Maybe, just maybe this is an opportunity. It is a malty beer, say a strong ale. Also, it has a moderate hop profile, enough to stabilize the flavor.
Go straight to the market, buy 5-7 lbs. of fresh berries, peaches or any fruit that looks good. Wash it lightly or not, cut it up and put it in a secondary fermenter. Rack your infected beer on top of it.
You may need to reattach a large blow-off hose if you use glass. You still have your original ale yeast; you have the wild yeast and now some natural yeasts from the fruits themselves. Then wait. This secondary stage will reawaken the yeasts with all the new fructose (fruit sugar) you introduced. Remember, you are only one week into the brew. There is still plenty of healthy active yeast in suspension, floating in the beer.
Wait a month, taste it. If it is totally like vinegar, well, you tried.
Maybe, just maybe, the fruit added a new dimension, some sweetness, and though sour, the beer tastes like beer.
One final note- Lambic and sour beers are usually aged for 2-4 years. It can take this long for the strongest flavors to subside. I would suggest racking it off of the fruit after one month and letting it condition for one more month. Then bottle it, and taste one bottle a month until it seems ready.
In Conclusion
There are many things that can go wrong in brewing.
Despite your preparation, one of them will happen to you.
Do not let it bother you or discourage you from moving forward.
Experience will make you better and you will appreciate your victories all the more.
[email-subscribers-form id=”2″]