
Mashing is the key that unlocks real beer. When you make the jump from extract to all-grain brewing you have made a fundamental jump in skill and awareness. In no way will I detract from the efforts and fine beer made from extract. For beer hobbyists, it is a fine realm to dwell within.
Mashing makes a pure product as it extracts sugar directly from the barley malt itself. The key to successful mashing is the temperature.
You hit a specific temperature and keep it for a specified time, say 90 minutes. What if you miss it, is the beer ruined? Let’s explore this idea.
Target single-infusion mash temperatures are 148-158° F (64-70° C). Sometimes we miss and go too high. Enzymes can die quickly, but there is a short window to save your beer. You may add cold water sparingly, and also, stir, stir, stir. Act quickly and decisively. The mash is forgiving, to a point.
The Mash Process in Homebrewing Explained
Successful mashing begins a successful brewing session.
It is an advanced method of brewing beer, but one you can begin within just a few months of beginning your homebrew journey.
You will need 1-1.25 quarts of water per pound of grist, heated to between 168-172º F (75-77° C).
Add ¼- ½ teaspoon of gypsum (CaSO4).
Your desired mash temperature will be between 149-158º F (65-70° C).
The water needs to be at least 18°F (10°C) higher than this when you strike (begin your mash).
In my experience, I usually went higher, say 22-24ºF (12-13°C) higher.
It will depend on the vessel you use.
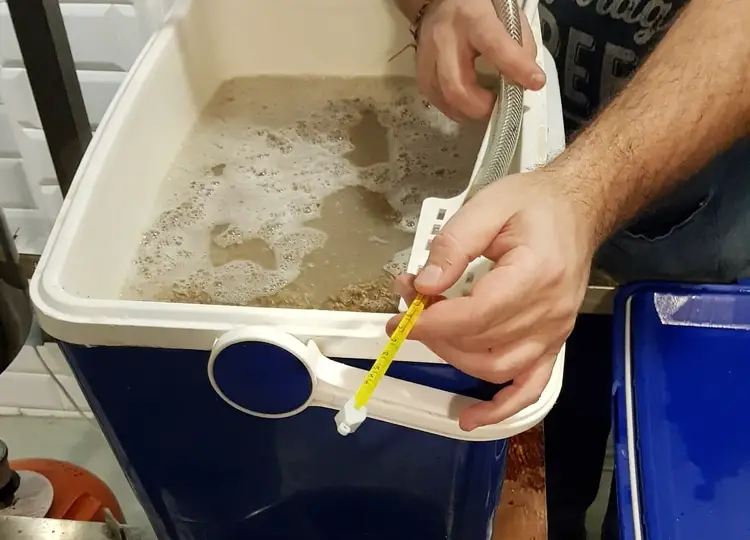
I used a 54-quart drink cooler like this one found on Amazon.
Coolers maintain temperature, cold as well as hot!
Important! If you start mashing in a cooler, I recommend using it for beer making only.
Do not picnic in it, nor sit in it. Keep its seal and integrity as perfect as you can.
And I used a 15 bbl. double-jacketed insulated Mash- Lauter at the brewery.
You will have to see what works for you. It had a single-walled domed lid with water ports and a manway. The insulated walls and steel top worked nearly identically to the insulated plastic cooler.
The Parameters of Mash Process
To mash well means to hit the correct strike temperature. This is the temperature to which you heat the water to mix with the malt.
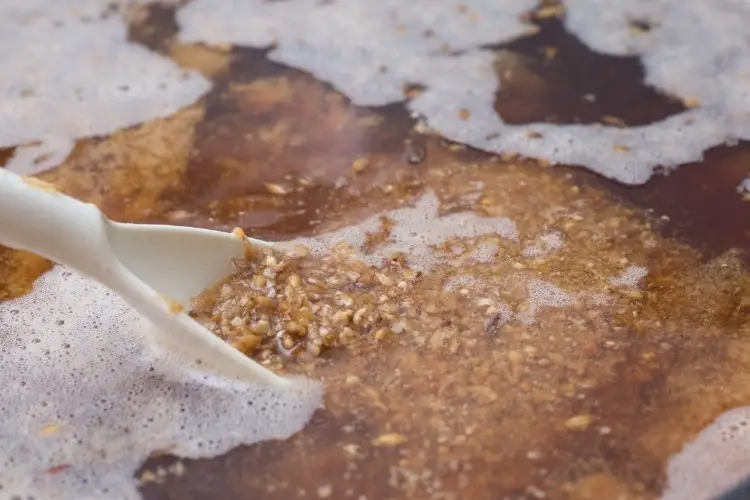
Stir and handle the grain conservatively.
It is like a cake, the more you beat it, the less body it will have.
As the grain is fully hydrated, gypsum added, you should have a mash; about 4-6 minutes have passed.
I added all of the water first and then added the malt.
Some brewers add both at the same time; this was just my process.
I found the grain was easier to mix.
10 Minutes to Set a Mash
If too hot, 2-3 degrees, stir it aggressively to knock off the heat.
You may also add some cold water, but only a little, ½ pint or less.
Stir well, let it sit 90 seconds with the lid closed check the temperature again.
Try to be done with all mashing and adjustments within 10 minutes, this is your optimal window. This is called setting your mash.
If it takes longer OK…if it takes only 6 minutes great.
Ten minutes or less is what you shoot for.
Once you get it set, take a break. Listen to some tunes, have nice beer, as you just accomplished something that very few people can do.
The Crisis – Too High Mash Temp
A good benchmark to keep in mind, is that your strike temp needs to be about 18-20° F (10° C) hotter than your mash temp.
Now this varies depending on materials, ambient temperature, and the stasis of the water temp, is it still rising or falling?
In summer brewing you can strike at 168-169°F (75°C) and in winter 170-172°F (77°C).
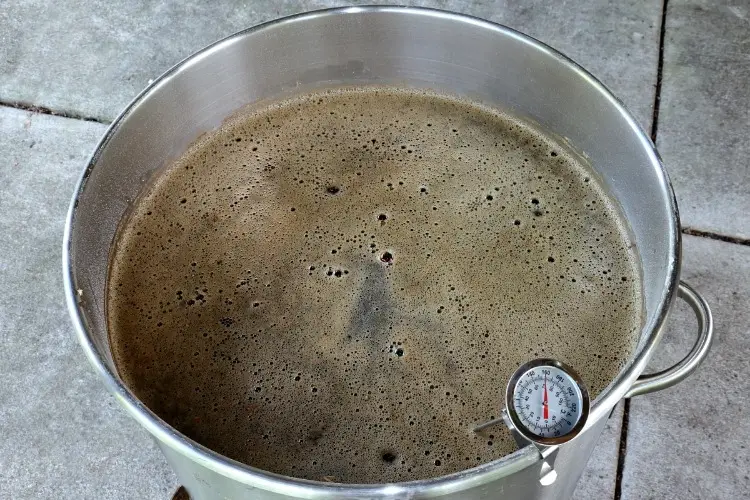
Also keep in mind your kettle or hot liquor tank. Heat your water and reach strike temperature yet be aware of how long it sits.
For the first 5-10 minutes the kettle temp will rise a little as the water absorbs the heat from the steel.
Let the water temperature stabilize before mixing with the malt.
Over time you will determine when your water reaches stasis, for those few moments neither rising nor falling in temperature.
This is the optimum time to mash-in.
Overcoming the Missed Strike Temp – Too Hot
It is easier to cool a mash down than to heat it up, so start a little high if necessary, but get the temp down quickly.
If you miss it and it is too hot, like 162º F (72° C), add a few ounces, not cups, of cold water, not too much.
Problems come when your mash reaches 162-166° F (72-74° C).
It is hard to cool down quickly, within our ten-minute window.
You will need to add more water, maybe a quart or more. Add it slowly, in small amounts at a time, ½ pint, then 1 pint. Stir quickly, wait 90 seconds and measure.
You could have some mineralized mash water in the fridge, ready for such an emergency.
I never did, just offering an option.
I don’t advise on this method either way. It is too easy to knock it down too far in the opposite direction- below 148° F (64° C) and make it too cold.
Problems Arise
I have cooked mashes, killing off enzymes at 162-165° F (72-73° C) and disabling the bulk of their mashing capacity.
There is good news. Some enzymes – alpha amylase – will work into the high 160’s (above 71°C), not efficiently, not for long, nor optimally.
So, set your mash between 148-158°F (64-70° C) and hold it for 90 minutes to reap the benefits of the malt’s sugar content.
The mash becomes overly liquefied when you add too much water, hot or cold. Our malt to water ratio is 1-1.25 quarts per pound.
If it is diluted more than this, it will affect the efficiency of conversion.
In the end, if you miss your strike, and the mash goes north of 160°F (71°C), stir, stir, stir, add cold water deliberately and keep the thermometer in the mash, constantly checking.
What to Do if the Mash is Too Cool?
Add your mercury thermometer, close the lid and wait 90 seconds. Pull it out and check it.
If you are too cold, add a little extra hot water, not too much, perhaps one pint (for 5 gallons).
Unfortunately, if you strike too cold, it is difficult to correct. Your mash will become watered down and lose its maximum efficiency.
It is exceedingly hard to heat a mash up once in the mash-tun.
You can pour the mash itself into the kettle and try to heat it a bit; messy and risky.
If you overheat, you can leach tannins (astringent compounds in the husk) or you kill all the enzymes!
Also, your grain consistency may become soupy and lose firmness, destroying the integrity of your filter bed and making it hard to sparge smoothly.
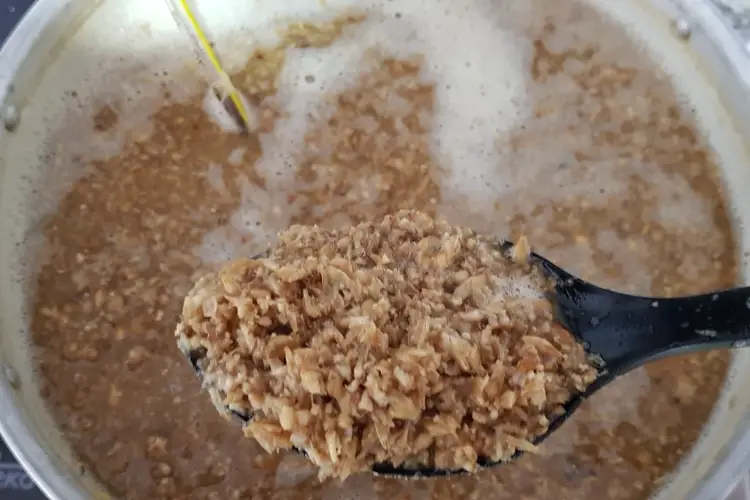
Understanding the Mash
Barley malt holds carbohydrates, complex sugar chains not accessible for fermentation. In mashing, the enzymes break down the complex carb chains into shorter pieces, making maltose.
This breaking down process happens under high, constant temperatures.
After a prolonged rest at a temp from about 148-158º F (64-70° C), the process is complete, and you have the wort (converted sugars from raw malted barley) you need to make proper beer.
There are two primary enzymes to aid you in your quest for authentic beer.
The first is Alpha-Amylase and the second is Beta Amylase.
They both do different jobs and sometimes work together.
Beta works best at about 146-152º F (63-66° C).
It munches the sugar molecule chains from the ends.
It makes a dryer beer, with a slightly thinner mouthfeel.
Alpha-amylase works best at about 153-158º F (67-70° C).
It breaks the chains in half, eating from the middle.
It gives you a fuller bodied beer, leaving behind dextrins, leftover starch molecules that make a sweeter, possibly thicker taste.
Getting the Perfect Strike Temp Everytime
With repetition and adversity, you will become a master masher; and in the very least an accomplished journeyman!
6, 12, 24, 48 mashes later, it will be like making a cup of coffee or the perfect pancake on Sunday, so joyful, well-earned and natural perfection.
There is a shortcut I will share; a little pricey but worth knowing about.
I didn’t use these electric kettles in my time but it is an option for you.
Now available are stainless steel Mash / Lauter / Kettles. You can set your strike temp exactly with an electric coil and the help of an LED readout.
Those 2 are some of the most liked by homebrewers at the moment.
No products found.
With varying degrees of hardware, you have a complete brewing system where you can accurately control your environment and have early and sustained success.
Be warned, technology is not a cure all for problems. It is an efficient refined tool. The rules for mashing are exactly the same and MUST be followed.
Follow the brewing road using the equipment that is comfortable for you and feels right.
In Conclusion
In the end, if you miss your strike, and the mash goes north of 160° F (71° C), stir, stir, stir, add cold water deliberately and keep the thermometer in the mash, constantly checking.
Try to set the mash within ten minutes. If it goes longer, 20 minutes, then so be it.
You will convert, just not optimally.
There are 6-12 other enzymes at work in your mash. They will back you up, so to speak.
Beta and alpha amylase have broader temperature parameters then widely known, so you have a 146° or 165° F (63-73° C) mash, it really will be OK. You will convert, just not perfectly.
Pay attention to the variables of your system and take good notes.
It is easy to mash yet takes years to master. Brew fearlessly and when adversity strikes, adjust.
With exacting methods and attention to detail, the beer will be forgiving, and you can overcome setbacks on brew day.
[email-subscribers-form id=”2″]
Last update on 2026-06-27 / Affiliate links / Images from Amazon Product Advertising API