
I have always used a bottling bucket to transfer my beer more easily to bottles. It was an old converted plastic fermenter fitted with a spigot and made priming and packaging more streamlined. Some people prefer minimalist set-ups, so the question remains: do we really need the bottling bucket?
Bottling buckets are an easy to use, efficient tool to help us prime and package beer. They assist in clarifying and adequately distributing priming sugar evenly. They are not an absolute necessity but the benefits far outweigh the monetary expense and time investment.
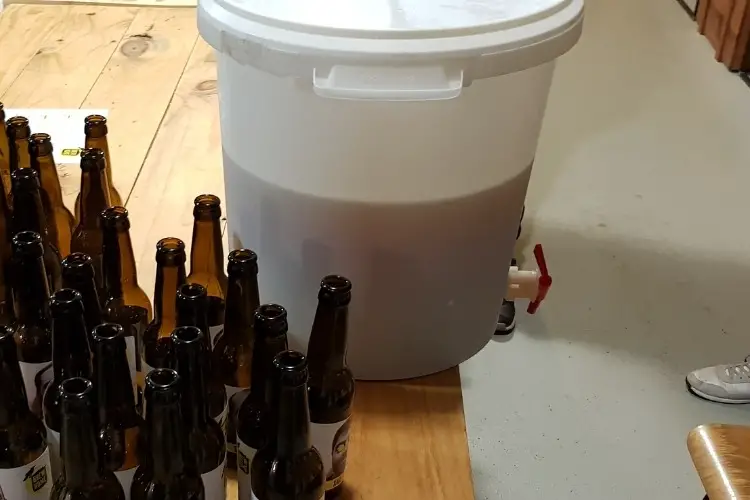
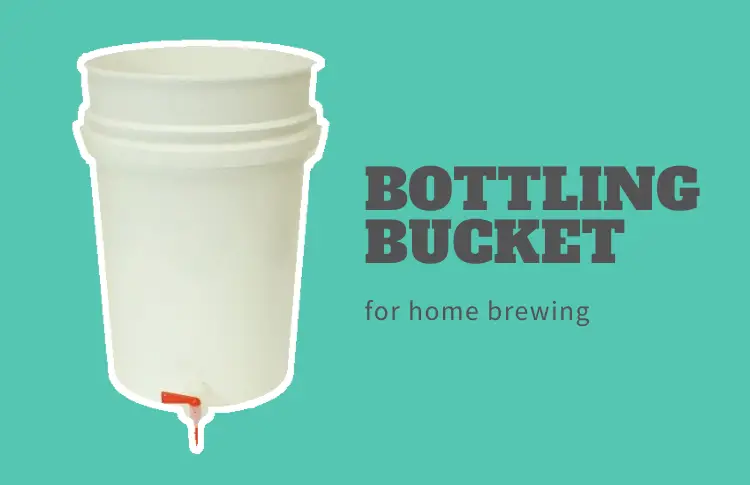
A bottling bucket is usually a 7 gallon food-grade bucket. It should have a plastic spigot installed about ½ inch from the bottom. Attach a sanitary plastic tube to this spigot and easily and cleanly fill your bottles, from the bottom up. Add your priming sugar, dissolved in water, to the bottling bucket.
Why a bottling bucket, exactly?
Homebrew beer is unfiltered which overall is positive.
Homebrew, especially when it’s fresh is quite cloudy. It has a lot of yeast in suspension which takes time to settle out.
One way to speed up this process is to rack (transfer) the beer off of the yeast.
During primary fermentation, beer yeast cells multiply by the millions as they process the maltose.
When it is finished it settles to the bottom. Over time, 2-4 weeks, yeast cells begin to die, having run their lifecycle.
If left too long or pitched too heavy, they also autolyze, that is break apart, rupturing their cell walls.
The main drivers for racking are clarity and keeping the healthiest yeast present through each stage of fermentation and conditioning.
When you rack, be sure to calmly transfer.
Splashing the beer is a sure way to oxidize it.
With sanitary hoses and extensions, always fill vessels from the bottom up, once fermentation has begun.
The exception is when you transfer fresh wort to your fermenter for the first time. Oxygen is your friend and you can never have too much.
No products found.
Secondary fermentation
After about one week, your beer has likely completed 75-80% of its fermentation, primary fermentation.
There is little to no foam and while yeast is still in suspension, gently floating or traveling up and down from top to bottom and back.
You have replaced your blow-off tube with an airlock. The airlock will likely bubble about once per second.
At this point, I recommend transferring to a secondary fermenter.
A glass carboy is best.
It is easier to sanitize and has minimal headspace, so limited contact with O2.
No products found.
The yeast in the bottom of your primary will be 1-2 inches thick, some of it very alive and well, but also, hops, protein, dead yeast, and fermentation by-products form what is called trub (troob).
If left on the trub too long it can cause off-flavors.
This is the main reason to rack the beer from the primary.
If you don’t use a bottling bucket
A bottling budget is not essential, even if recommended.
If you skip it, you risk cloudier beer.
Normally, if you rack into secondary and then a bottling bucket, the yeast sediment in the bottle will be one millimeter or less.
If you skip secondary, it will add a millimeter to the sediment and if you skip the bottling bucket 1-2 millimeters more.
This will make decanting essential.
In the end you could leave up to 2 ounces of beer in the bottle.
At this point it is a matter of dollars and cents. Three ounces times fifty bottles is 100 ounces, hence about eight bottles per batch left behind!
But if you don’t mind a cloudy, fresh beer, it’s really ok.
I’m emphasizing a bit more of a refined approach here.
Danger Zone in not Racking
As discussed before and in my article How Do I Fix Cloudy Homemade Beer, beer left too long on the yeast can produce off-flavors.
Dead yeast can affect the flavor and cells with broken walls (autolysis) will certainly risk poor or disrupted metabolism.
Off flavors can include astringency, mossy/ grassy flavors, and even deli-meat, seriously, yummmmm.
Racking also buys you time. Beer making is a hobby to most and some have busy schedules.
Beer should almost never stay on primary yeast for more than two weeks.
If you rack it into secondary, it will be stable for 2-4 weeks more, until you have time to bottle.
In the end, short of the physical impossibility of using a secondary fermenter due to money or physical space, rack your beer for cleanliness, efficient fermentation and clarity.
Alternatives to Bottling Buckets
Two proactive reasons for a bottling bucket is clarity and effective distribution of priming sugar.
I suggest mixing your sugar with ½ pint of sanitary hot water, (for 5 gallons) and pour it into the bottling bucket and stir it every eight bottles.
This gives consistent distribution of priming.
You do have two options to prime your beer besides priming in the bottling bucket.
1) Use carbonation drops (also called fizz drops)
Carbonation drops (available on Amazon) are little balls of rock candy and ultra-convenient.
Add one drop per bottle and fill the bottle to about one inch from the top.
Carbonation drops are expensive compared to other options – about $6 for 60 drops.
They vary in size, can stick together and there is a risk of inconsistent carbonation, be aware.
2) Put sugar (dextrose) directly into the bottles
It is about 1/8 tsp. of dextrose (also called corn sugar and available on Amazon) per bottle, but I DO NOT RECOMMEND IT.
It is unsanitary, inconsistent, dangerous, messy and will lead to explosions in your beer closet.
This does take away one reason for the bottling bucket, priming and even sugar distribution.
This is a very old-fashioned method and best left to brewers in the 70’s and 80’s who followed the directions on the Malt cans- inexplicably very poor brewing instructions!!??
On the same topic: Carbonation Drops vs Priming Sugar: What’s Best For Homebrewers
The beer style may determine your course
Using a bottling bucket can depend on what your goals are.
An 8% Imperial Stout is more forgiving.
A blonde American Ale cannot hide any deficiencies.
Do you want to drink your beer in 16 days, or are you prepared to wait 4-6 weeks?
If you want to drink quickly, bottle in 10 days directly from the fermenter and you will get immediate carbonation as the yeast is still working.
You will complete secondary carbonation in the bottle.
It may be a little cloudy but tasty.
For a strong Stout or Wee Heavy style, you may prefer it to be cloudy, sometimes a mild yeast flavor is a desirable profile.
Either way, these beers take a little more aging, 4-6 weeks.
You certainly want to get them out of primary fermentation, but you can bottle directly from the fermenter. You will get your rich hearty hazy brew and bypass any off-flavors from prolonged exposure to trub.
Final thoughts
In the end, all things come together, and a river runs through it…Oh sorry, wrong article!
Kidding aside, a bottling bucket promotes beer clarity, sanitary priming practices, and good priming sugar distribution.
A key to successful brewing is a thorough and strict adherence to process.
As a devoted brewer, home and professional, a bottling bucket is a vital part of brewing, as a bright tank (for carbonation and packaging) is to the commercial brewer.
Skip it if you must, you will make it through.
It will be a slightly more medieval or colonial American way of brewing, a lot of yeast, perhaps mild infection, extra bitterness, and higher alcohol.
Bottling bucket or not, the brewer’s path is still rewarding, beer is fun to make and enjoyable to drink.
[email-subscribers-form id=”2″]
Last update on 2026-06-27 / Affiliate links / Images from Amazon Product Advertising API