

Grain bags are used on two levels: beginner/ intermediate and advanced brewing. Brewing with grain bags is often the first step to upping your brewing game.
The Brew-in-a-Bag (BIAB) method, wherein all-grain brewers place all of their mash in a bag, mash, sparge and boil in one vessel, eliminates the need for mash-tuns, lauters and any fancy equipment.
Once done, can you squeeze the bag? After all, a pound of malt absorbs up to one pint of water (almost 40% of mash liquid). Are there benefits or disadvantages to squeezing your grain bag?
If grain bags are used for adjunct flavor and color, as in extract brewing, squeeze away. If used for BIAB brewing squeezing is less practical. Overall, in both cases, squeezing is fine, as necessary.
First Use of Grain Bags
Brewing is easy to do and difficult to master, something I often repeat.
Having brewed your first few batches from kits, you’ve begun to add your own hops as well as specialty (adjunct malts).
In professional terminology, adjunct refers to rice, corn or another grain besides barley, but in strictly homebrew terms, coloring and flavoring malts are adjunct malts.
I recommend using a light liquid extract and coloring and flavoring up from there.
For a Pale ale crack ½ pound of Caramel 60, 1 ounce of chocolate and perhaps ¼ – ½ pound of biscuit malt.
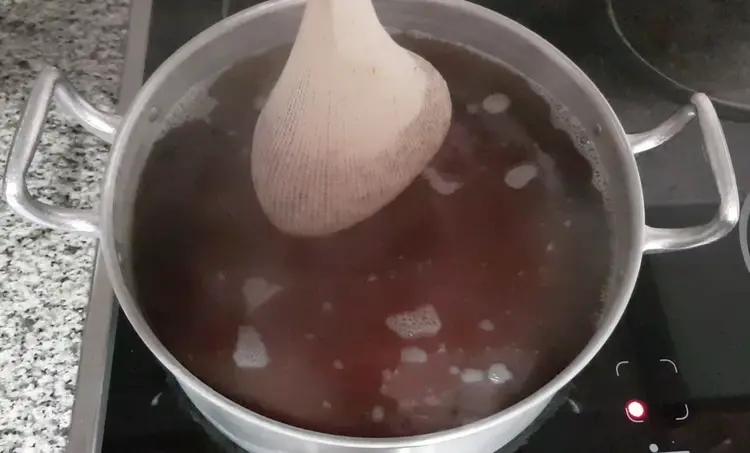
Steep in the kettle while you wait for the boil, perhaps 15 – 20 minutes.
Once you get your first shimmer of simmering bubbles around the pot’s edge, pull it out!
With a pair of BBQ tongs, squeeze away, get every last bit of color and juice you can.
Most of your color, distinct malt flavor and modest fermentables will come out.
Most adjuncts have no sugar but Caramel (Crystal) malt is partially mashed and dried malt, hence the deep red color and caramel color and flavor.
You will get some sugar from it.
BIAB – Can I Squeeze This Out Too?
I’ll tell you straight up, I’m a traditional brewer, mash/ lauter tun, vorlauf (recirculation), sparge (washing) and kettle boil all the way.
Nevertheless, brew in a bag makes brewing possible for many without the resources and physical space for traditional brewing.
I believe that BIAB is most appropriate for 1-2-gallon batches.
The malt volume is small and manageable, and it is easier to extract the sweet wort from it.
A one-gallon batch may only mash 2-3 pounds of grain mixed with 3-4 quarts of water.
Sparge through the bag the best you can using a colander or home-made sprinkler of some sort.
The bag will weigh about 8-10 pounds.
5-Gallon Batches
Rather than reviewing the pros and cons, I will review and explicate technique.
My main concern with BIAB brewing is that the wort is not properly clarified nor sparged.
I will add every tip I can to maximize the result.
This is the part where it gets figuratively sticky.
You have a large plastic or muslin bag with ten pounds of malt, and you add about 1.25 quarts per pound for mashing – about 3 gallons of water.
You heat this amount on the stovetop and when it reaches 168-170° F (75-76° C) you add your grain bag.
Must-Dos in BIAB
1. Stabilize the mash water temperature
- Cooking with gas is best, it is consistent
- Once your water reaches temp it could gain a few degrees and then of course lose it quickly, unless your kettle is double walled or insulated.
- Keep on ultra-low heat during the mash to maintain temp.
2. Add the grain and hydrate well
- Some are tempted to simply throw in the bag and close the lid to save precious heat. In theory OK, but you would likely get dry grain pockets within.
- Poke, mash and prod the bag. Make sure it is big enough for the grain to swell and move around for full hydration.
3. Keep the mash temp consistent
- Again, unless insulated, you must add heat during the mash.
- Add it slow and steadily. If you try to heat quickly, you’ll form hot patches and kill off swathes of enzymes in portions of the mash.
- Once hydrated and stabilized, leave it alone for 90 minutes.
- If mashing at 158° F (70° C), it may be done in 45-60 minutes.
- If mashing at 148-152° F (64-66° C) it can go on for 2 hours.
- I’m old school, I mashed for 90 minutes 99% of the time, no matter the temp.
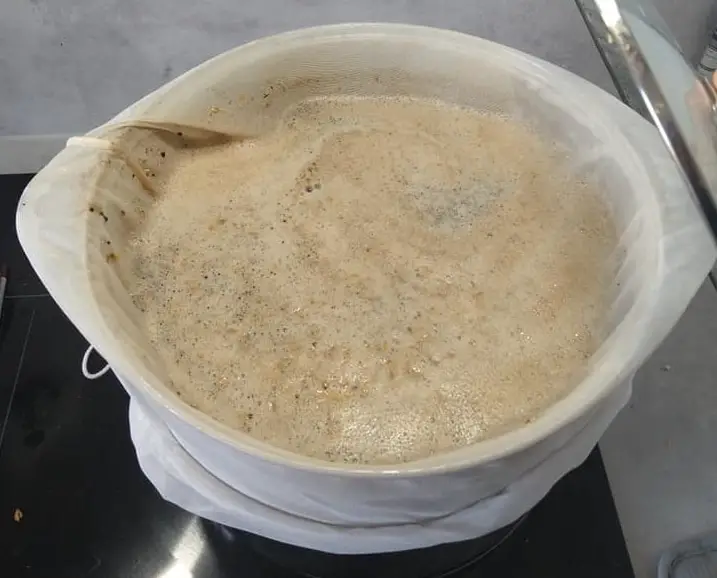
At this point you must remove the grain bag from the kettle and prepare to sparge, bringing your kettle up to boil volume. Assuming a 5 gallon yield:
Warning! The grain bag could weigh 30-40 pounds, extremely hot and unwieldy.
Make sure you have space to lift it and allow it to hover above your kettle.
The physics of physically making this happen could be challenging.
One good solution is to find a strong plastic or steel strainer that will rest above your pot without the mash bag hanging over the edge.
4. The vorlauf
This is the part that worries me.
- To vorlauf (an action and a thing) is to recirculate the wort and clarify it. It uses the grain bed itself as a filter for the extra proteins and husks you don’t need in your kettle.
- If the kettle has a bottom valve, you can catch it in a cup and gently pour it back through the mash bag.
- I highly recommend this to clarify and capture solids that leach through the bag.
5. The sparge
This does concern me so take extra care to adapt your system to maximize this process.
- Sparging is essential as it washes ALL of the sweet sugars from the grain, essential to a successful brew.
- As recommended above, try to fashion a flat, pan-shaped strainer to rest over your kettle. A typical bowl shaped is ok, but less ideal.
- Buy, design or fashion a sprinkler system to evenly wash the grain. The water must be a consistent 168-170° F (75-76° C)
- As mentioned in a previous article – Is Topping off Wort with a lot of Water a Good Idea – sparge water should not drop below 1.010 in Original Gravity as it begins to leach tannins.
At this point, squeezing the bag is irrelevant.
You have gotten all that you need to boil.
Remember, you will get a 5-7% boil off of volume, so for a 5-gallon yield boil about 5.3-5.5 gallons.
There will be a cold break (when the beer cools, the solids will fall to the bottom, including hop residue and proteins) left in the kettle so expect to also leave behind a quart or so.
Is Squeezing the Mash Bag Necessary?
If you can figure out how to sparge your mash semi-correctly without a lauter, then squeezing is unnecessary.
That’s it!
If you have a big ball of malt hanging above your kettle and want to brew fast, low-tech, and with minimal equipment– wham-bam-thank you ma’am! – then add 10-20% extra malt to the mash as you will not get a thorough and adequate extraction, trying to wash a big ball of malt.
In this case, squeeze away.
Use 2 very thick rubber gloves and squeeze between your hands as hard as you can.
You could also use a large carpenter’s C-clamp and with two pieces of clean wood or hard plastic.
Final Thoughts
Recirculation and sparging in my view are essential to successful mashing, large or small batches, home or commercial brewing.
BIAB is fine if space is truly limited.
In the end, you are substituting one group of contraptions for another.
As always, do what feels right for you, pay attention to detail, and enjoy the process, that is the real journey.
[email-subscribers-form id=”2″]