The main reason that people start making beer at home is usually a hobby. Home brewers claim beers taste the same as the ones you buy, if not better. And making your beer is an enjoyable and satisfying pastime. It also takes less time than you might think.
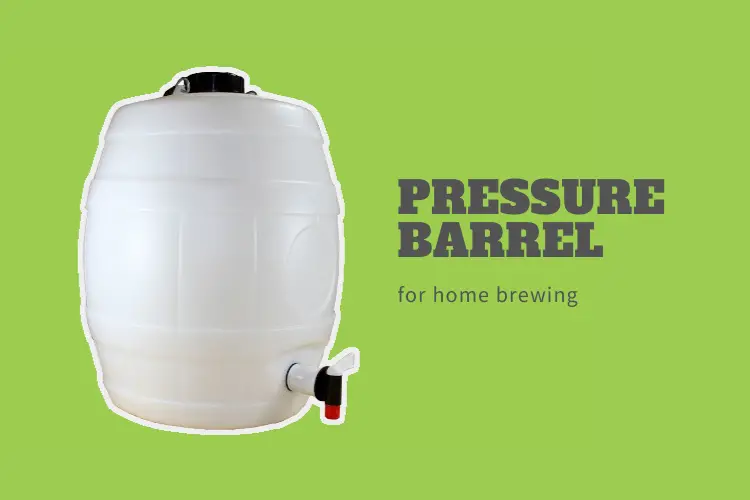
Pressure barrels are incredibly useful during the storing and bottling process of homebrewing as it helps mature and dispenses the beer easily.
Below lists the necessary information of utilizing pressure barrels in your beer-making process.
Pressure barrels are incredibly useful and will help to make your beer-making experience easier while giving the best results of your final product.
Homebrewing with the Pressure Barrels
Once you have passed the fermentation process, a pressure barrel is one way to store your beer.
A pressure barrel can store a beer for about a year.
However, you must ensure that the barrel is kept away from direct sunlight or any warm temperature areas.
Pressure barrels need to be stored in an area where its cooler in temperature, ideally 12° Celsius.
Some places to store are:
- Garage
- Shed
- Cellar
- Fridge/Freezer
Pressure barrels are simple to handle as they can be cleaned and sterilized easily.
Therefore, it’s crucial that you clean and sterilizes your barrel properly before using.
Furthermore, beers stored in the pressure barrels can be syphoned straight from the fermenter into the barrel.
Syphon the beer to the barrel gently to avoid additional air getting into the beer.
The extra air will cause the beer to oxidize and go stale quickly, making the final product unpleasant to drink.
When syphoning the beer to the barrel, make sure to add sugar into the pressure barrel.
Dissolve the sugar in some boiling water and allow to it to cool.
Afterwards, add this to the barrel.
This allows the beer to prime, giving the beer some light carbonation.
It is also recommended to apply some Vaseline around the seal on the inside of the cap of the barrel.
This ensures that the back nut of the valve is tight to avoid any pressure escaping from the barrel.
Afterwards, close the barrel and tighten the cap up.
It is important to leave the barrel at room temperature for at least a week to allow the priming sugar to ferment.
Then move the pressure barrel to somewhere cool for storage.
Avoid moving the pressure barrel once it is stored.
This avoids disruption of the barrel, specifically the sediment in the bottom which may make the beer cloudy.
If this happens leave the barrel to settle again which takes another week or two.
Four Main Stages of Homebrewing Beer
Before going straight into using the pressure barrel, you must understand the basic steps in brewing your homemade beer.
Brewing can be categorized into a four-stage process which is:
- Making the Wort
- Fermentation
- Store and/or bottle
- Maturity Process
The first step is to make a wort.
The wort essentially the mix of natural ingredients from which you brew your beer.
If you purchase a beer-making kit, then you would empty the contents of the can into a plastic container and add 1kg of sugar.
Stir in roughly four pints of boiling water with the mixture until all the ingredients have dissolved.
Afterwards, add the rest of the water which is roughly 36-pints for a 40-pint kit, or 26 pints for a 30-pint kit, depending which kit you purchase.
Temperature is important throughout the whole process.
Everything should cool down at this point so that you have a lukewarm solution. The temperature should be around 65° to 75°F (18° to 24°C).
The second process is to allow fermentation.
Sprinkle the yeast onto the mixture and stir.
Cover the mix and allow it to ferment at room temperature.
Fermentation time is about a week but will take longer in cold weather or depending on the beer you’re brewing.
The third process is to store the fermented mix and let it sit.
Taking an example of using a 5-gallon pressure barrel, the procedure includes:
- Put 21/2 oz of sugar for a 40-pint kit
- Dissolve about a pint of your beer
- Siphon the remainder into the pressure barrel
Finally, let your beer mature by letting it sit.
Store the pressure barrel at room temperature for at least 3 to 4 days.
Afterwards, put the pressure barrel in a cooler temperature area for at least a few weeks.
The beer will continue to improve throughout those time, so patience will be rewarded at the end.
Types of Pressure Barrels
Pressure barrels, as the name suggests, function by using pressure built up within the barrel.
The pressure within the barrel allows you to dispense your homebrew beer.
Most pressure barrels have around a 25-liter capacity.
Pressure barrels come in multiple types:
- Standard Barrel
- King Kegs Barrel
- Hambelton Bard Roto-Keg
- Cornelius Keg
Using one of these options are quite easy.
Simply syphon your homebrew and seal the lid.
As mentioned before, it is a good habit to lubricate the seals with Vaseline.
In addition, replace the O-rings every year to maintain pressure barrel quality.
Afterwards, wait a few weeks for natural carbonation or inject with CO² through the pressure barrel valves and wait a week or so.
1. Standard Pressure Barrel
The standard plastic pressure barrel is fitted with a 2-inch neck and a pressure vent cap.
This particular design allows any excess pressure produced during the secondary fermentation process to safely escape; avoiding issues such as tap leaks or the barrel to bulge.
The standard pressure barrel has a single handle.
For some standard pressure barrel owners, the single handle makes it a little bit difficult to lift onto a platform or service location.
Especially if the particular platform is high off the ground to allow you to place a glass under the tap for dispensing beer.
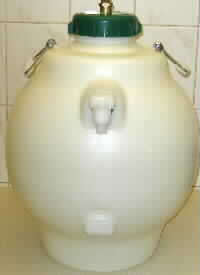
2. King Kegs Barrels
The King Kegs barrel is more expensive compared to the standard plastic barrel.
The King Kegs are much tougher and, unlike the standard pressure barrel, comes with two handles.
The two handles make a difference in the world as it makes it significantly easier to handle the 25kg weight of a filled barrel when lifting them into their serving location or platform.
The King Kegs also have a 4-inch neck that is wide enough to fit your arm inside.
Therefore, this feature makes it significantly easier to clean the insides compared to the standard plastic barrels which only has a 2-inch neck.
The King Kegs are pre-fitted with a gas injection lid.
This allows King Kegs owner to add extra gas if your pressure drops by using CO2 canisters.
Aside from the bottom tap the, top tap version is also available.
Most King Kegs are fitted with a float system into the back of the tap, which sits on the surface of the beer.
This system is incredibly useful if you have limited storage space or are unable to lift a full barrel of beer to a high service platform.
The float system at the top allows you to sit the King Keg on the floor and still be able to dispense beer to serve.
The downside of the float system is that because the beer clears from the top to down, the float always sits in clear beer.
Therefore, you would be dispensing the fresh brew before it has had sufficient time to mature properly.
In addition, you would most likely need additional pressure to dispense the beer as the beer level is most likely to be below the level of the tap.
You would then most likely need to inject extra CO2 canisters into a top tap keg than the bottom tap keg.
No products found.
3. Hambleton Bard Roto-Keg
Just like the Kings Keg, the Hambleton Bard Roto-Keg also has a top tap. However, it has a slightly larger capacity of (6-gallons as oppose to 5-gallons) than a King Keg and also has much more circular shape.
The Hambleton Bard Roto-Keg is also fitted with a moulding point that allows you to attach a drip tray. This particular feature is often used by All-grain brewers because of its larger capacity. Also, the Roto-Keg allows you to produce and store larger batches for the same amount of work.
4. Cornelius Keg
Cornelius Kegs, or also known as “cornies” is usually a reconditioned, stainless steel container that has previously been used to store syrup concentrate. They are usually used to create draught fizzy drinks in places such as:
- Bars & Pubs
- Clubs
- Restaurants
Unlike the standard plastic barrels, cornies are designed to work at a much higher gas pressure.
While plastic pressure barrels operate around 8 – 12 PSI, cornies go up to 100 PSI. Therefore, cornies require a different gas injection system.
However, some cornies have been converted to work with a regular pin valve or S30-type valve.
Like the King Kegs, Cornies has a 4-inch, oval-shaped neck that allows access for cleaning.
However, Cornies do need a separate “in” and “out” line fitted to it to inject gas; taking the homebrew beer to tap or dispensing system.
Cornies are compact enough; quite easy to be chilled by placing the Cornies in a bucket of iced water or fridge.
However, Cornies are more expensive to set up than a standard pressure barrel.
This is due to the additional connectors and specialist pieces of equipment that a standard pressure barrel does not have.
Through the regular process, the beer is brewed and then transferred to a secondary fermenter for a few weeks.
During this process, you let your home brew beer:
- Sit for a few weeks
- Maturity Process
- Sediments dropdown to the bottom of the barrel
With a standard pressure barrel, you would prime the beer when adding it.
With Cornies, you would usually use it to store and dispense clear, virtually dead beer within high pressure.
Therefore, it is more common to carbonate the beer artificially rather than with the natural process.
If you decide to prime your beer in the Cornies, use the “out” tube attached to the tap which is at the bottom of the keg and would constantly suck up any sediments formed.
Carbon Dioxide for the Pressure Barrels
Pressure barrels that can input artificial carbonation will require CO2 to be added on a later point.
The input point will be in the form of valves.
As beer is dispensed from the barrel, a void will start to occur since no air can get into the barrel.
The beer will continue to give off some CO2, filling the void.
However, if the beer is dispensed faster than it can produce CO2, then a vacuum will occur and the pressure inside the barrel will begin to dissipate.
If the pressure inside the barrel starts to drop, you need to add CO2 to fill the void within the barrel and maintain pressure.
A lot of factors play into how much CO2 you will need to fill the barrel.
However, the general idea is that you need around 2 to 3 CO2 canisters to top up a 40-pint batch.
There are two ways that CO2 can be added into your pressure barrel. This includes:
- S30 Valve
- Regular Pin Valve
S30 Valve
The S30 valve system uses the larger size CO2 canisters which have a deposit included on the pricing.
You can return the empty canisters to any homebrew retail store who sells the S30 CO2 canisters and purchase a refill for a lesser price.
The brew retail store will give you a new canister for the refill, but your deposit is still there, and the canisters are much cheaper from the first purchase.
The S30 canisters are quite simple to use.
You add the CO2 by screwing the bottle onto the S30 valve until the valve opens up and adds the CO2 as quick as 1 to 2 seconds.
Afterwards, unscrew and remove the CO2 canisters.
Continue and repeat the process if your pressure barrel requires more CO2.
Pin Valve
The Pin valve system uses the smaller size 8g CO2 bulbs compared to the S30 canisters.
The CO2 bulbs are dispensed into the pressure barrel by using a plastic bulb holder and then screwing the bulbs onto the valve.
The CO2 bulbs can be thrown away after usage and more bulbs can be added if the barrel requires more pressure.
Unlike the S30 canisters, there are no refill systems to take advantage of.
Therefore, there are no deposits on the bulbs, which makes them more suitable for brewers who don’t want to return the bottles for refills.
Which Valve to Pick?
Either of the two options essentially produces the same results.
It is more of a preference than a necessary option.
Some homebrewers prefer using CO2 bulbs because they do not use them very often.
The reason behind it is that many homebrewers prime their barrels with sugar, which builds up CO2 naturally already.
However, by the time you get to the end of the barrel, or if you have more than 2 – 3 pints in a row to dispense, then you will need an extra source of CO² on standby.
Alternative Option: The Beer Casks
Another option of storing your homebrewed beers in a pressure barrel is storing them in a beer cask.
Professional breweries often choose to store their beer in casks.
These beer casks are generally around 9 Gallon, which is 80 pints.
Beer casks function by connecting to a tap.
When ready to dispense the beer, the shive is pushed into the cask.
This allows air to enter the cask as the beer is dispensed, which means no form of CO2 is required.
The disadvantage of using a beer cask is that as the beer comes into contact with the air, the beer quickly deteriorates.
Afterwards, acetic acids start to produce by the airborne bacteria which quickly makes the beer:
- Sour
- Unpleasant
- Undrinkable
Beer stored in beer casks needs to be consumed with around 4 – 5 days after the final process.
Great for bar owners who sell their home brews fairly quick.
However, beer casks are unpopular among most homebrewers.
One popular version of the beer cask is a new product called the Easy Keg.
The Easy Keg, which is also considered a mini cask, functions exactly like the full-size beer casks.
However, it only stores 5 liters, so it is usually consumed by the home brewer before it reaches the 4 to 5-day mark where beer begins to deteriorate.
The Easy Keg also contains an integrated tap for dispensing and serving the beer.
The Easy Kegs are:
- Small
- Compact
- Portable
Making it the perfect storage unit to take to parties, private events, and so forth.
However, you need to be extremely careful in moving the kegs to avoid disturbing any sediments.
And just like the pressure barrel, the Easy Kegs require sugar for priming.
Easy Kegs are not designed for reuse.
However, if you take great attention and care when removing the bung and use non-chlorine-based cleaners, they can be used more than once.
Last update on 2026-06-24 / Affiliate links / Images from Amazon Product Advertising API