
Like most homebrewers, I got started with a kit.
In my case, it was a 1 gallon IPA extract (LME) kit from Northern Brewer.
I didn’t really know the difference between extract or all-grain at that time so really I didn’t mind.
I just wanted to make beer of my own.
I’ve reviewed this kit already and I can reaffirm that I was quite happy about it.
I say I was happy about the kit, but not about my resulting beer!
To be honest, it wasn’t that bad, but let’s say that maybe I had high expectations.
Others may have had a better experience than I did, so this is based solely on my subjective experience.
Disclaimer: I was myself a beginner and by no means am I trying to give lessons to anyone here. I’m just sharing my experience as I was learning, and if it can help someone facing similar problems, then mission accomplished!
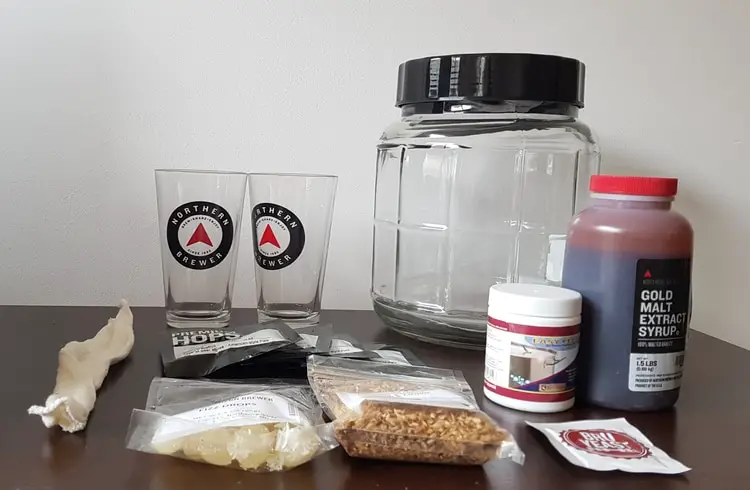
The kit
I picked a 1-gallon kit because I live in a relatively small flat in a big city, Barcelona, Spain.
For me, smaller is better, and a good way to get started as well, slow and steady.
If I failed with the batch it wouldn’t be too heartbreaking to throw it out. It’s barely a 12 pack after all.
Before buying the kit, I considered a Mr Beer kit for a while but finally thought that the Northern Brewer equipment was better (carboy fermenter and glass bottles as opposed as plastic opaque fermenter and PET bottles) and that I’d be able to reuse it multiple times.
On that, I wasn’t wrong.
I’ve now reused the 1.4 glass carboy, the hoses and the bottle capper multiple times. You’ll see them everywhere in my pictures.
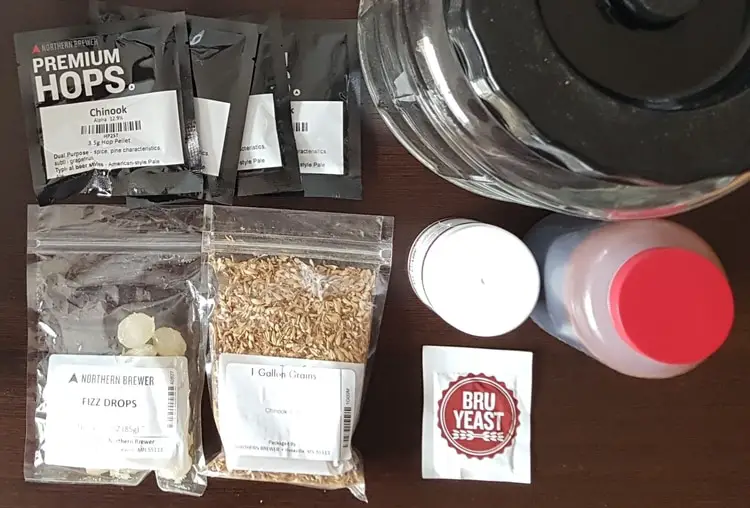
The only thing about this kit is you don’t actually know what ingredients you’re getting. At first, this was fine, but later bugged me a bit.
A grain bag. Ok. But what’s in it? I had no idea.
But to be fair, at that time it didn’t bother me too much.
I just wanted to make an IPA. Since I discovered the IPAs during my stay in New Zealand in 2014, I was hooked. So an IPA was a logical choice.
Same thing with the package of yeast. I had no clue what yeast strain it was exactly. The package just showed Brewer’s yeast. No kidding!
But again, I wasn’t too worried about this at that time.
The ingredients
- The malt extract (1.5 LBS / 0.68kg)
- The steeping grains
- 4 bags of Chinook hops Alpha 12.9% (17 grams)
- the yeast
And no more than that.
Easy peasy.
Brew Day
Looking back, the instructions were fairly easy, but for somebody that had never brewed in his life, it looked a little daunting.
There was a nice laminated A4 document with photos and a copy in simple black and white paper.
The two were redundant, so it was a bit intriguing.
Lucky me, I didn’t go straight all-grain!
They were quite a few steps to follow, from steeping the grain bag, to boiling, adding hops at different times, cleaning and sanitizing, and finally pitching the yeast.
Brew Day went by quite fast in the end it took maybe 2 – 3 hours
I’m not sure if I pitched the yeast at the right temperature. I didn’t have a thermometer to check it out at that time.
I didn’t think that temperatures mattered that much anyway. Oh boy…I was to learn!
One thing I do remember were the boil overs.
Ha! I had a couple and it made a total mess on my stove.
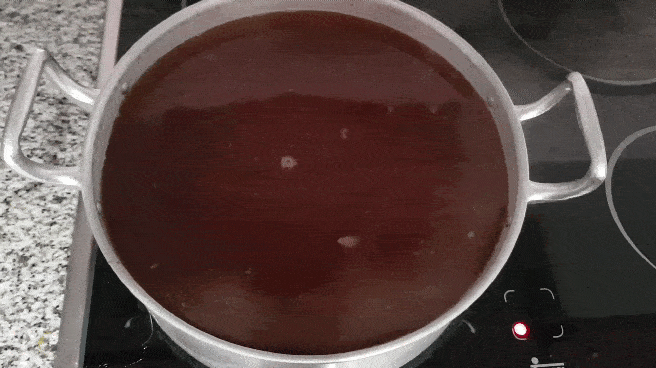
I used a fairly big pot but surely it wasn’t big enough…
The main issue I had was that I ended up with less beer in the fermenter than expected.
Roughly about 2.6 litres (0,68 gallons).
That’s barely 8 bottles. And the kit comes with 12…
Did anything go wrong? A better question is maybe, what didn’t?
Lots of effort for not much beer.
Sigh.

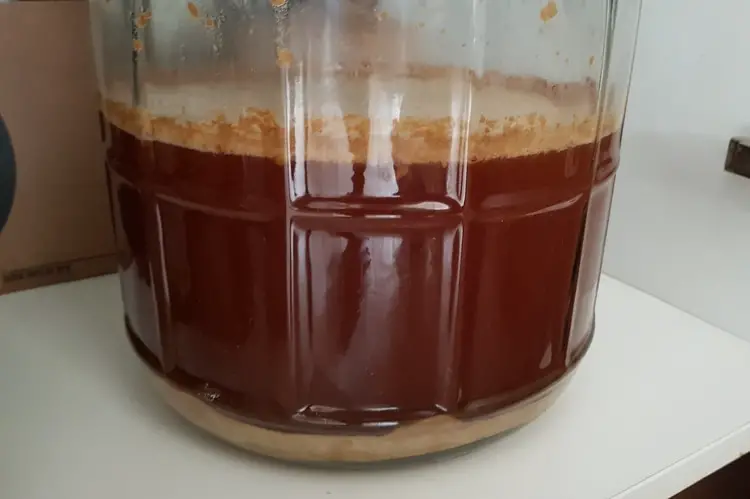
Fermentation
I let the beer sit for 2 weeks in a dark cupboard in my kitchen.
I didn’t touch the fermenter.
I did observe a krausen and a few bubbles in the airlock.
I didn’t measure it, but the temperature must have been fine because it was the month of February. So I’m guessing around 20°C (68° F).
Bottling
I waited 2 weeks for bottling.
I sanitized everything, struggled with the broken auto-siphon again and dropped the “fizz drops” inside each bottle for re-fermentation.

The result
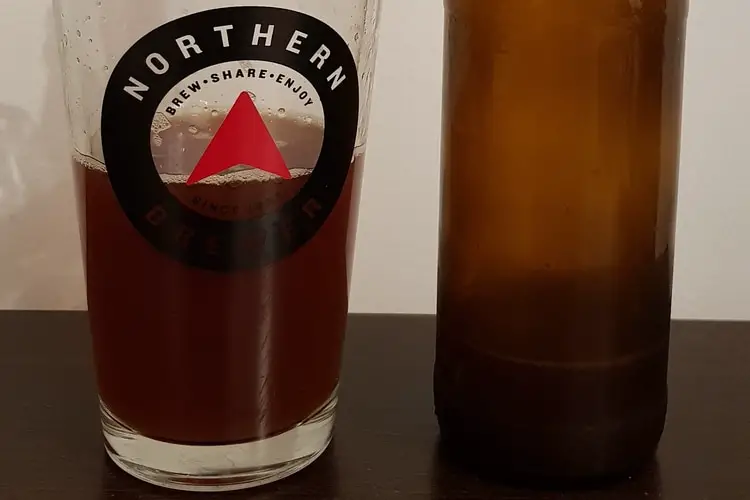
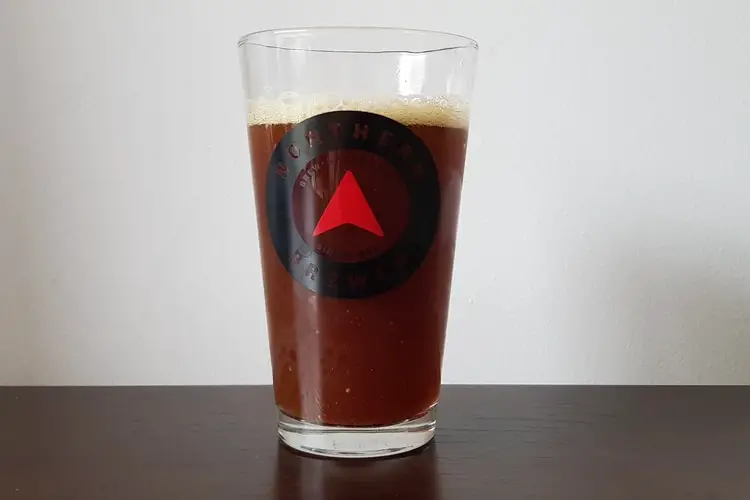
The beer was dark red, even brown (did I brew an Irish Red by mistake?). It tasted a bit sweet. Like caramel. Due to my scorching the malt extract I’m guessing.
Overall taste was ok but not what I had in mind.
Not hoppy whatsoever.
A pity for an IPA.
But I don’t blame the recipe kit. I blame myself.
Other people using the same kit seem to find success with it, so I must have done something wrong.
But to be fair, after it aged for a couple of months, it actually tasted a bit better.
Lucky me, I only had 8 bottles to force down.
But this didn’t discourage me.
Hell no, I was motivated!
What did go wrong?
- The recipe kit called for 1.25 gallons of water and I didn’t really measure. I poured roughly and probably underestimated the proper quantity of water and didn’t account for evaporation. And boil overs! My pot was just too small.
- I unnecessarily moved the cooled wort to the fermenter with the auto-siphon which wasn’t working. That’s what the instructions called for, but I didn’t understand why.
- The wort needs to be aerated at this point, so if it was to do again, I’d just skip that and pour the cool wort straight into the fermenter.
- I pitched the yeast without rehydrating it. But I’m not to blame, they don’t tell you to.
- Now that I see my photos and that I have a few more brews under my belt, I see that there was still a bit of krausen and activity in the fermenter the day I bottled. I probably should have waited longer. But the kit doesn’t provide you with a hydrometer to check specific gravity. So I just blindly followed the recipe. Was the yeast old and my fermentation sluggish? Quite likely.
- The beer was probably brownish because of what they call the Maillard effect. I probably scorched the wort during the boil. Hence the brown color and the caramel taste.
Starting with extract is good for beginners
It’s possible to execute a perfectly good beer for your first batch, should you decide to go all-grain. Getting started with extract is just easier and shorter.
It’s also less of a risk.
When brewing for the first time, I’ve seen some people coming very prepared. They’ve read 3 homebrewing books, watched a thousand videos on Youtube and have checked multiple forum threads and Facebook groups for a year.
That surely wasn’t the case with me.
I didn’t know what I was doing.
I didn’t know what were the important things that can make good beer.
Overall, even if it seems like it’s not as rewarding because you don’t start from the grain, it’s a good initiation to this hobby.
It gives you an overview of the whole brewing process. Don’t worry yet about mashing as that’s a thing on its own.

This will be partially subjective as Dorian is a partner and friend in beer. Nevertheless, I’ll try.He experienced nearly everything a 1st time brewer will. As recounted in my narrative Starlight in a Glass, I had an almost identical experience, from not understanding the ingredients, the boil overs, and barely understanding the process. And that is just fine.
He may have indeed scorched the extract a bit, adding to the caramel flavor. As long as it wasn’t too harsh, no big deal. The beer likely under-attenuated as we don’t know how old that yeast was, so it ended up sweet.
Finally, his bitterness left him as the wort boiled over and the hops ended up on his stove-top.
If it was drinkable, he’s one up on me.
[email-subscribers-form id=”3″]