
Fermentation is the essential facet within the transformation of sugar to beer. It’s perhaps the most mysterious process for beginning brewers.
The fermentation vessels and environment must be clean – correction – ultra-clean, meaning sanitary. No contaminants nor microorganisms must be present or introduced to the fermenter.
The lid of a fermenter may be open but only for some specific reasons: taking a gravity reading, racking to secondary fermentation, and hop / fruit additions. Otherwise, it’s better to leave the fermentor alone. There is an ever-present risk of contamination or oxidation.
Fermentation – The Ground Rules – as you consider a quick look
- Keep your vessels fastidiously clean inside and out.
- Post-boil, anything that touches the beer must be sanitary.
- Provide the proper temperature for fermentation to be successful: 60 – 66° F (15 – 19° C).
- Pitch the correct amount of healthy yeast.
- Take a gravity reading when bubbling has slowed dramatically or ceased
-
- This will show when the beer is finished.
- It indicates the best time for bottling.
- It tells when to rack your beer into secondary fermentation (the slow, aging and rest portion).
- There are 3 reasons only to open your fermenter: sampling, hopping (other additions), or racking.
As indicated by point 5 above, one must take a gravity reading.
To do this the fermenter must be opened.
As a beginner, a plastic bucket / vessel of some sort is the fermenter or choice.
Like this ones:
No products found.
Five gallons is the standard size and possibly smaller; 1-3 gallons.
I moved to glass on my second brew, so the neck of the bottle was only 1.5”.
This made it considerably less risky to open it.
Even so, if one must open the fermenter, be careful, clean, and meticulous.
Examples of glass fermenters:
No products found.
Do I need to open the fermenter?
No, thank you for reading.
Kidding! Yes, sometimes we do.
The main reason is to take a gravity reading.
Knowing the gravity of the beer helps decide when to bottle.
One can also just watch it.
After fermentation, 7 – 14 days, the bubbling in the airlock will settle down to 1 every 1 to 3 seconds or perhaps halt activity altogether.
At this stage, the beer may be packaged or racked (transferred) to a glass carboy for aging.
Siphon gently into the second vessel with no splashing. This is where oxygen could slip in.
Taking a gravity reading
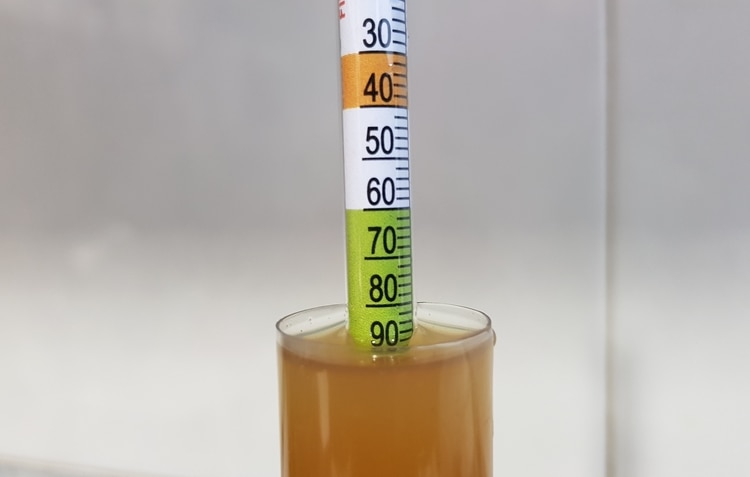
They are streamlined brewing devices especially for taking samples out of fermenters, such as a refractometer (like this basic one in Amazon).
If you have the budget and desire, it’s a nifty gadget.
I used a turkey baster.
Yes, the white-tapered tube with the Dijon mustard yellow rubber bulb stuck on the end, available in every American grocery store in existence.
These ubiquitous items are ideal in their capacity to pooft forth the juices while roasting.
Here it is:
No products found.
- Clean it well, no abrasions! Soak in sanitizer for 2-3 minutes or at the recommendation of your sanitizer of choice.
Be aware, bleach is good, though takes 20 minutes to work and must be rinsed. - Lie a towel beside your fermenter for drippage.
- Gently lift the lid of your bucket, squeeze the bulb fully and gingerly dip the tip into the beer.
- Release the bulb drawing your sample. This should be enough for your hydrometer flask.
- Close the lid and wipe with a sanitary cloth.
Brewing in glass
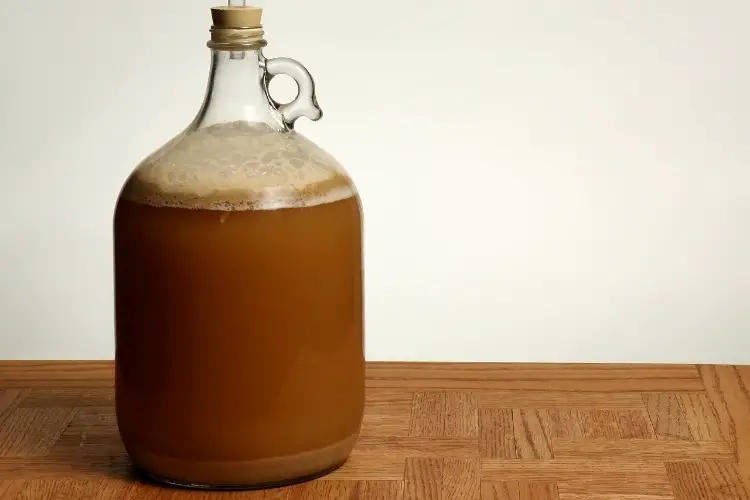
Glass is a better brewing vessel as the exposure to possible contaminants is minimized.
In commercial breweries, we keep spray bottles of sanitizer hanging around to spray fixtures before we use them.
Spray or wipe the airlock and bottle mouth, remove the stopper and take the sample as described above.
Spray the stopper with sanitizer and replace it.
Even better, have a clean sanitized airlock and stopper to replace it.
What happens if I am not careful?
“I want to see”
If you brew in opaque or white buckets, beginning brewers are tempted to have a peek.
You can…however, unless you suspect fermentation problems, sluggish, rapid decline, or none at all, just leave it alone.
It smells like olives
Do you like olives?
I like them a lot.
In pizza, in salad, and just to accompany a nice cheese plate. I eat the nice ones mind you, either stuffed with garlic or fetta, still unpitted. I don’t touch the quart jugs you can buy at the local grocery.
Now imagine all that gourmet flavor in your beer.
This is a true story of my first batch of beer.
I was told by my brother and brewing mentor, Sam WM, “If it smells like black olives, you have a problem.”
I thought that was strange at the time, but OK. I rolled with it.
I really wanted to start brewing but wasn’t the type to take notes and exhaustively study.
The olive thing sounded pretty crazy to me, yet I proceeded on my way.
I’d used the yeast that came with the brewing kit- under the lid in the top of the can, mistake!
Fermentation was sluggish, so needing to take a sample, no faucets, hoses or contraptions to help me, I dipped the flask and my hand, into the beer.
My fingers, my dirty fingernails, soap residue, the kitchen towel microflora, all that stuff got right in there so I could get four ounces of beer out.
Two weeks later, I cracked the first bottle, slight gas release, poured it into a mug, a few bubbles, large and soapy looking but promising, and stuck my nose into the glass, so excited – smelled like black olives.
Taste?
Just forget it.
Extreme?
Yes!
Keep fingers out of the beer.
The Fermentation Stages
Primary fermentation
During primary fermentation (early: 1st 3 -5 days), if you are fortunate to observe this through glass or clear plastic, it is quite the spectacle.
At this stage, the yeast does the bulk of its heavy lifting.
About 90% of the active fermentation is completed within this window.
Use a healthy yeast and keep a stable temperature environment and things will finish satisfactorily.
Secondary fermentation
Secondary fermentation is the stage where the beer finishes its last 10% or so of sugar conversion.
This stage can take 7 -14 days.
I recommend patience.
There are 14 days ales, even 10-day ales if you are in a hurry.
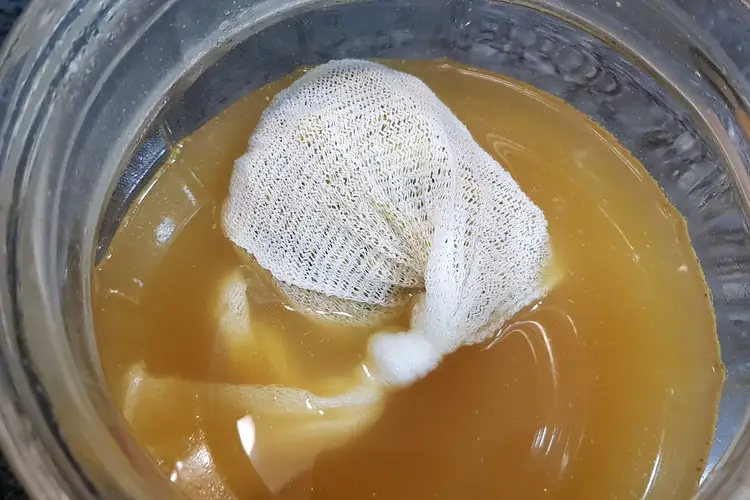
Hops, fruit and other additions
Do rack your beer for clarity and to get your beer off of dead yeast cells and extra kettle protein.
Secondary can be a favorable time to add more flavor.
Dry hopping
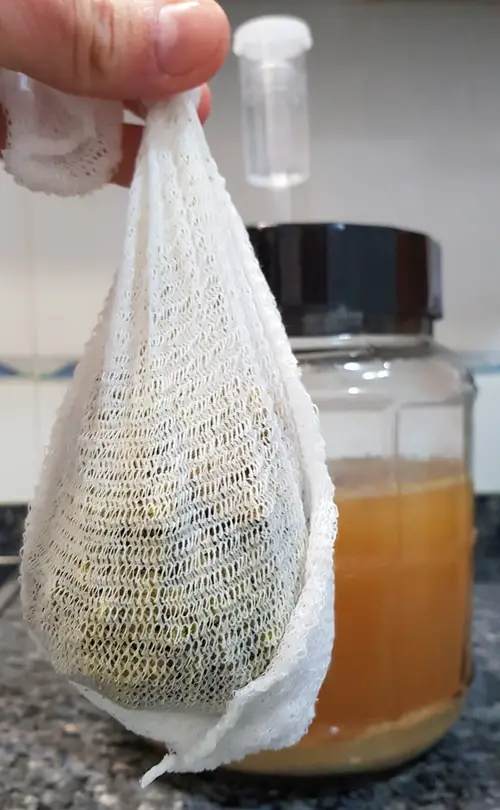
Another good reason to open-fermented beer is to add a 1 – 3 ounces of leaf hops to the secondary, known as dry hopping.
A dry hop addition gives the most potent hop aroma to aging beer.
Use only pre-sealed packages. This minimizes risk of contamination.
Fruit addition
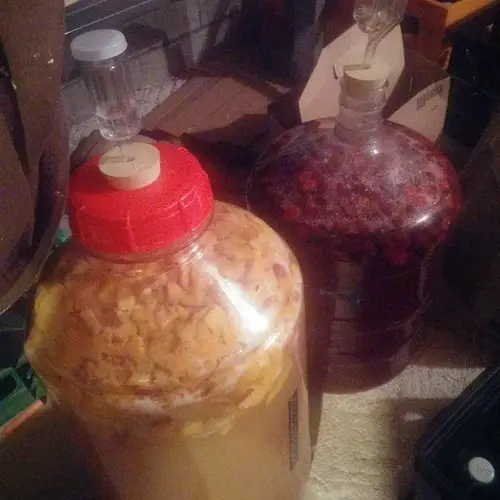
There are a few methods for adding fruit, all quite suitable for experimentation.
- One is to pour it into the kettle immediately after boiling.
The hot beer sanitizes it and leaches the sweet flavoring juices and sugar content.
The juice remains in the wort.
The pulp stays in the kettle. - Another is to rinse the fruit with cool water and toss it into the primary fermenter and let it ferment with the malt.
At French Broad brewery back in 2003, I had blended some young beer (2 weeks) and aged beer (3 months), pitched with Belgian Abbey yeast, fermented and aged for 8 weeks.
At this point I added a brettanomyces (sour) yeast strain to sour it. Additionally, I dumped in 20 liters of macerated blueberry slurry, through a port in the top of the tank. The beer entered a tertiary fermentation stage after four months it was kegged and aged an additional 12 months.
All of these methods have given me good results.
It depends on the beer, timing and where your skill level is at.
Final readings
Within just a few batches the process will run smoothly, and fermentation will take care of itself.
Define and keep the proper temperature parameters, keep all post-boil beer handing meticulously clean, and there will be few to no problems.
Open the fermenter out of necessity. Don’t make it a habit.
[email-subscribers-form id=”2″]
Last update on 2026-05-26 / Affiliate links / Images from Amazon Product Advertising API