
Strike temp refers to the heated hot water to begin a mash. This is largely the domain of advanced to intermediate brewers, however, this foundational information will make extract and partial mash experiments run smoother.
Heat strike water accurately, with a 1 – 2° F (1° C) differential at most. A mash temperature is set within 10 minutes. Most enzymatic activity is defined during this window. This window determines the character of the beer.
Water is important as it is roughly 86-96% of your beers’ content. Strike when it is hot, but not too hot.
What is Strike Temp?
We strike a mash at a very specific temperature to get a successful starch-to-sugar conversion to match our style.
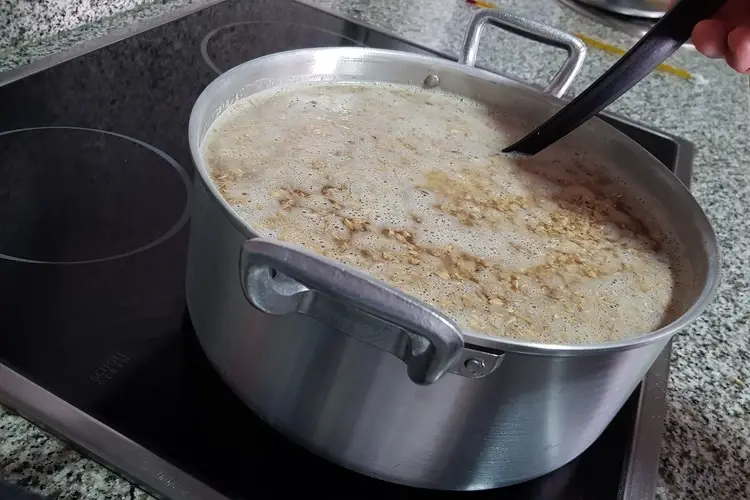
When mashing, we mix water with the cracked malt and maintain a constant temperature for 60 – 90 minutes.
Some brewers prefer shorter times, testing with iodine for full conversion.
I am not one of them.
I am a 90-minute man.
As the malt is heated it breaks down large complex carbohydrate chains into simple sugars (maltose).
The key to success is hitting a very specific temperature and holding it.
Most mashing occurs at 149 – 158˚F (65-70° C).
In order to reach the optimum mash temperature, add the strike water to the malt, stir and quickly stabilize.
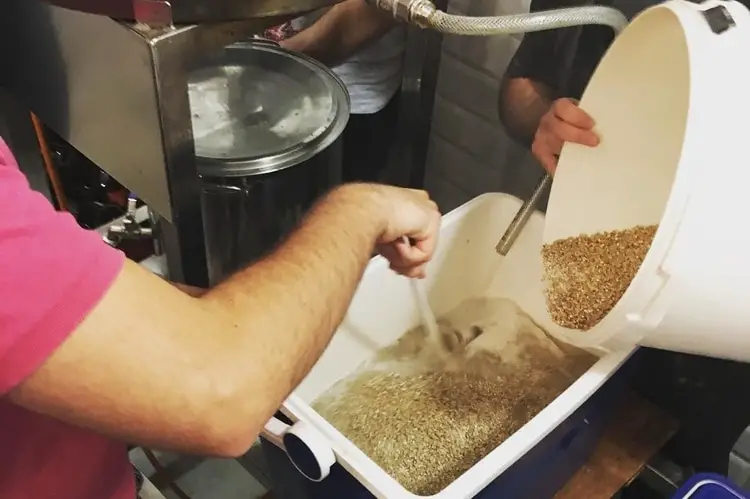
Mash Method 1: pour all the water, then add the malt
When the grain is properly cracked, the husk well broken, still partially intact, it is time to begin the mash.
Use 1 – 1.25 quarts of water per pound of malt.
I pour all the water in the mash-tun (I used a cooler) first, then add the malt.
It is possible that some enzymes could get scorched; the initial 10% of the malt could heat up and deactivate before adding the remainder of the grist.
I found this not to be the case.
In fact, enzymes can work up to 165˚ F (74° C), and within 1 – 2 minutes there is a window of safety.
I mixed this way as it was easier to get an even mash consistency.
I used this method at home and commercially.
Mash Method 2: add water and malt at the same time
Many brewers I know add the water and the malt at the same time.
2 gallons of water, 8 lbs. of malt, and continue until the mash is set and fully hydrated.
Try both ways and see which works best for you.
I preferred the remaining water not sit in the kettle cooling as I mixed the grain little by little.
If I added the water en masse, the water temp as a thermal unit remained constant.
What about your mash water itself?
I brewed with well water.
It was rather soft, other than the granite particles (yeah, not kidding. They floated to the bottom); 50- 75 ppm of minerals.
Soft water was nice as I could add anything I chose, CaSO4 (gypsum), CaCl (Calcium Chloride), MgSO4 (Epsom salt), or even NaCl (sodium chloride), yes even table salt.
At home, I added ¼ – ½ tsp. of gypsum to my brew.
The recipes called for it, I did it.
I was aware that Belgian water was generally soft (light mineral content).
Sulfate specifically helps in starch and protein degradation within the mash. For extract brewers, it contributes to a crisp mouthfeel.
Burton-on-Trent is a region of Southern England which is famous for Pale Ales.
Their water was exceptionally hard, having perhaps 400-700 ppm of mineral content.
To mimic English Pale ales, utilize some of the minerals listed above.
Mineral content not only stabilizes pH and mimics beer style, it adds mouthfeel to beer and facilitates yeast metabolization.
Be conservative when tossing minerals in willy-nilly.
There are specific formulas to follow when adding minerals to a specific ppm.
Why does water temp matter to me, I’m a beginner?
Strike temp is important as that is where the process begins, and each subsequent action flows from it.
Even as a beginning ½ – ½ brewer, the beer can be made or broken on the success of the mash-in.
Should the water come in too hot, it will scorch the mash, say at 165˚ F (74° C).
There will still be conversion, but minimal.
The gravity will come in low.
Striking to equipment and environmental parameters
As an example: if the strike is correct, the mash stabilizes at 155˚ F (68° C), a high-end alpha-amylase mash.
Settle in for a nice stable mash of 90 minutes.
Get everything prepared, clean up, stage things just so…
I open the cooler to begin the vorlauf / sparging and realize the temp dropped to 140˚ F (60° C)!
The strike was correct, I hit the target mash temp, yet did not account for the fact that the mash cooler is ten years old with a weak seal.
After 15 minutes, most of the beta-amylase (148 -153˚ F or 64-67° C) enzymes had been fried.
As the temperature dropped, the alpha-amylase (154 – 158˚ F or 67-70° C) enzymes deactivated.
There was conversion, but only at a fraction of target range.
The strike was correct for temperature and intent, but not modified to meet the equipment.
By contrast, if the mash drops to 140˚ F (60° C) yet the mash temp was always below 153˚ F (67° C), the betas will remain viable.
At this point, the mash could be reheated to say 152˚ F (66° C) and conversion would commence.
Stove-top mashing
Some intermediate brewers mash in a pot on the stove with good effect.
I never did and doing it again would still be wary of it.
For reasons illustrated above, temperature of the mash may be struck accurately, yet maintaining it is a risky proposition.
Stainless-Steel conducts heat well but if uninsulated will lose temp quickly.
Adding heat, even slowly, from the bottom could be deactivating some enzymes while those at the top of the pot could be getting too cool, too soon, and also deactivating.
One possible hack: if there is a good quality oven, strike the mash in the pot, hitting 153˚ F (67° C) for example, then putting it inside the oven, set at 152˚ F (66° C), making sure the oven goes that low. There needs to be an internal thermometer there also.
Rising to the Journeyman – striking to style
Here are just a few notes about style and what one hopes to achieve in choosing a specific mash.
Scotch Wee-Heavy
For many years I brewed a Wee-Heavy Ale in Asheville at Green Man and French Broad.
Exceptionally malty, warm with alcohol and no bittering or flavor hops, it was unique.
I mashed at 1 quart to 1 pound of malt, quite thick.
I also struck at 172-3˚ F (77-78° C), quite hot, stabilizing the mash temp at 157 – 158˚ F (69-70° C) at the lowest.
Even though the beer came in at 7% alcohol, I wanted a big mouthfeel.
At 158˚ F (69° C) the mash produces dextrins, complex carbohydrate chains, longer than sugar and shorter than starch, that will give a slightly higher terminal gravity and give the chewiest body to the beer.
English ESB
This was a pale ale I brewed for many years.
I struck at about 168-170˚ F (75-76° C).
My best were at Green Man.
I specifically wanted to hit 150 – 152˚ F (65-66° C).
I used a converted milk tank and did have a steam jacket if it cooled, or I missed my mash target.
I wanted a lower temp to get maximum conversion and drier finish.
Cream Ale
This is a hybrid American style rarely heard of anymore.
I wanted to hit about 153 – 155˚ F (67-68° C).
Here I struck at 170 – 171˚ F (76-77° C).
I wanted to skate the narrow range of enzymes where the beta and alpha work together.
Beta shuts down at around 154˚ F (67° C) and alphas deactivate at about the same.
It was critical to hit this exact range within 10 minutes and maintain.
I steered a little on the low side, so if I hit 152˚ F (66° C), I could turn on the steam for about 1 minute.
I made sure to stabilize within 10 minutes and stuck to it.
Mash guidelines for style
*important note: these temps are what worked within the parameters of my equipment. a 54-quart Coleman, a 1960’s era 7-bbl. converted milk-tank, and a 15 bbl. factory-built Crivellar Mash-Lauter Tun.
| Style | Strike Temp |
Mash Temp | Desired Effect | Reasons | Alcohol % est. |
| Wee Heavy | 172-174°F (77-78° C) |
156-158°F (68-70° C) |
Big mouthfeel | The beer was 100% malt profile | 6 – 7.5% |
| Strong Stout | 172-174°F (77-78° C) |
156-158°F (68-70° C) |
Higher terminal gravity | Robust, flavorful, strong, can’t be too dry | 6.5 – 8% |
| ESB | 168-170°F (75-76° C) |
150-152°F (65-66° C) |
Long- strong conversion | Dry finish, balanced malt and hop character | 4.5 – 5% |
| Pilsner | 168-170°F (75-76° C) |
149-151°F (65-66° C) |
DRY finish: Beta enzymes only | Pure pale malt, floral spicy hop notes: North German profile | 4.5 – 5% |
| Cream Ale | 170-171°F (76-77° C) |
153-155°F (67-68° C) |
Beta and alpha enzymes working in tandem. | Drier conversion with betas and still dextrionous mouthfeel from alphas | 5 – 5.5% |
| Porter (English) | 170-171°F (76-77° C) |
153-155°F (67-68° C) |
Beta and alpha enzymes: it was full-bodied yet dry and flavorful | With black, chocolate and Caramel malt, the profile was rich, with hop character | 5 – 6% |
* When in doubt, mash 1 – 2°F (1° C) high. It is FAR easier to knock off a little temp than to add it.
Final temperature adjustment
Mash temps in reality are flexible, yet do not make this an excuse to be lax. Strike right, hit your temp, and be ready to adjust on the fly.
Know your equipment, its capability and more importantly know your own.
If you are not ready for mashing, wait a bit, experiment.
If you are ready, act ready, and dedicate yourself.
Easy to do, mixing water and grain. Yet transforming that hot cereal into liquid beauty, is assuredly a rewarding and elusive pursuit.
[email-subscribers-form id=”2″]