If you are embarking on a journey of homebrewing it’s likely that you’re going to want to consistently be improving on the last batch of beer that you created. The good news is that there are a number of tips that you will pick up in the homebrewing community after you have started to brew your first batches of beer.
Follow some of these top tips so that you can start brewing better beer at home and you may even find yourself winning some top competitions.
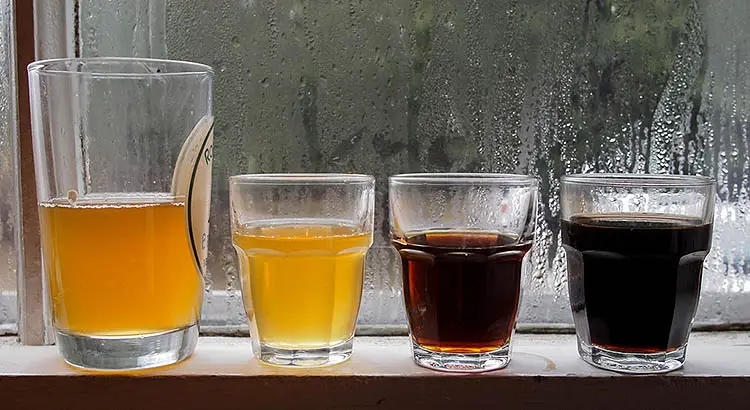
1) Go fresh
By looking for fresh ingredients you can end up with a much higher quality product. If you started some of your first home brews with the help of a malt extract kit for example, you can start by trying some other methods. If you prefer to use extract you might even want to look for some of the freshest extract on the market rather than trusting a can of it that has been on sale for several years. Find the type of liquid yeast that is fresh, keep grains and fresh hops on hand that can all be added into your beer. If it’s old throw it out or consider finding ways to preserve the shelf life of your fresh ingredients.
2) Experiment
Designing a good homebrew requires a bit of innovation. You know the rough flavor profiles that you like and the types of beers that you like. By speaking to some experts and changing up your brewing style you could potentially reach a consistency, color, flavor or other type of tasting note that you have wanted to capture in your beer for years. Of course there is the risk that comes with experimentation in your home brew but by adding and subtracting flavors through practice or in small brew fermentation, you can narrow down an ideal flavor for each batch of beer.
3) Focus on sterilization
Keeping things sterilize one of the biggest aspects of making a great tasting beer. Anything is going to actually be touching your beer needs to be properly sterilized beforehand. Use a brewers sterilization agent or even consider using bleach on any item that’s going to be touching your beer. The moment that your beer cools off is critical as bacteria and a variety of other infections can potentially get into the beer before the yeast is even started fermenting.
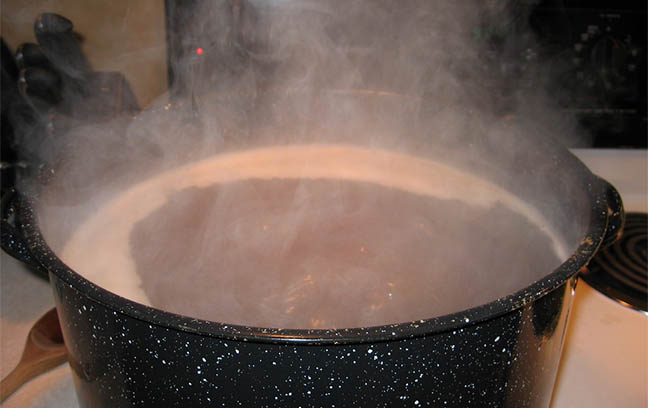
4) Boil beer long enough
Many people simply boil their beer until it reaches temperature and they want to get it in the fermentation as quickly as possible. Boiling your beer for between 60 to 90 min. in the wort stage will ensure that all grains, tannins and proteins are able to fall out and coagulate during the cooling process. Lighter style lagers should be boiled for at least 90 min before cooling.
5) Cool quickly
Finding a way to cool down the wort as quickly as possible will work to reduce the chances of bacteria and other dangers from breaking into your beer before it ferments. Immersion cooling is one of the best ways to cool down full batches of wort.
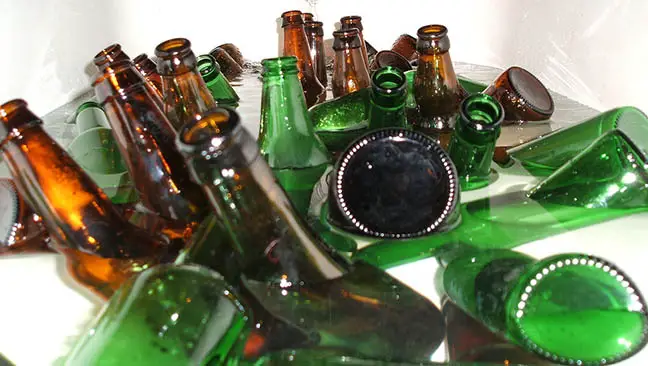
6) Switch to glass
Using a plastic Carboy can sometimes lead to problems with your beer and its flavors. Using stainless steel or glass fermenters can deliver some huge advantages over a plastic bucket. They’re much easier to sterilize and both of them can produce a 100% oxygen barrier where is plastic products can potentially leak oxygen over the entire fermentation process. With a poor seal around the bucket as well as constant leaking it can become much more difficult to determine when the beer has finished its fermentation process as well. Investing in the right materials will lead to better beer.
7) Try yeast starters
Using yeast out of the tube or package will often lead to fine results but with a yeast starter or dried malt extract, a quart of water, half an ounce of hops and your yeast pitched into the solution for 2 to 3 days before the brew is prepared, you can have your yeast well started and ready to ferment from the moment your beer is in the carboy. Putting a small airlock over it and placing it in a darkened cool location just as you would with your beer will make sure that you have active yeast that is ready for fermenting. This can not only cut off the amount of time your beer takes to brew but it reduces the chance of infection and bacteria growth.
8) Start investing
Buying a kit off the shelf can be a fantastic way that you can be up and running with all of the materials that you need to start homebrewing. The problem with many of these kits is that they only brew specific types of beer. A small one gallon carboy isn’t going to give you the option to brew large batches of beer and a 3 gallon stainless steel pot is going to make the process of preparing 5 gallons of beer a two stage effort. By investing in the right tools you can start to do things much more professionally. With a stainless or glass carboy as well as a large pot for starting your home brew, you can be constantly ready to brew larger batches of beer. Investing in items like a professional hydrometer will also help you to determine the best time to end fermentation with your beer. These types of professional tools will not only help you to produce better beer but they are investments that can last you over a long period of time for producing countless batches of great homebrew.
9) Do some reading
You might be amazed at the type of knowledge that you could capture joining a homebrew community. Even if you have picked up homebrewing as a hobby, doing a bit of extra reading and learning about new varieties of beer as well as how to brew them can help you with unlocking your next Eureka moment in homebrew.
Keep some of these top tips in mind for creating a much better homebrew in the future.