
If you’re a craft beer enthusiast, you may have wondered if you could brew beer in your own apartment. The answer is: you absolutely can! Whether you live in a tiny studio or a penthouse, you can be enjoying the satisfaction of a homebrewed beer in a few simple steps. This article will outline in detail everything necessary for creating a small batch of basic homebrew in your apartment.
Once you’ve found a recipe and acquired the equipment, you can start brewing. You’ll boil your grains in water, adding hops periodically depending on what type of beer you are making. After the beer has fermented, you bottle it, let it carbonate, then enjoy!
Brewing beer at home can be an exciting and satisfying process.
However, for those just starting out, the process may seem slightly overwhelming.
Luckily, beer brewing is actually fairly straightforward and if you can follow a basic cooking recipe, you can likely brew your own beer at home.
Brewing beer yourself lets you have total control over how the beer will taste, smell, and feel.
You don’t need an excessive amount of space and you only need a few specialized pieces of equipment to start.
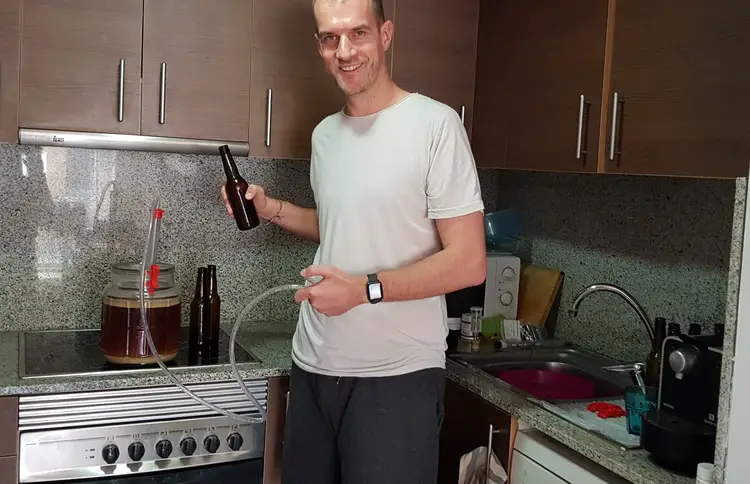
I myself brew in an apartment that is no more than 480 ft2 (45 m2) and I don’t have a backyard nor a garage.
If you want to be able to enjoy your own unique brews crafted in your apartment, read on for detailed instructions on how to make a basic batch of beer.
1. Acquire the equipment necessary for brewing
It may seem like there is a lot of equipment necessary for brewing your own beer, but luckily most of the items are small and inexpensive.
Even if you are in a tiny apartment, you will likely easily find room to store your beer brewing equipment.
Much of the equipment can fit inside the 6-gallon bin or bucket used for sanitization.
The basic essentials for brewing beer includes the following:
-
- A waterproof cooking thermometer
- A 3-5 gallon stockpot
- A 6-gallon plastic bin or bucket
- An airlock and stopper
- A large spoon
- A nylon or cheesecloth bag
- A siphon and racking cane
- Several feet of ⅜ inch beverage tubing
- Food grade sanitizer
- Hydrometer
- Bottle caps
- Bottles
- Bottle capper
- A 6-gallon carboy or fermentation bucket
Note: if really you don’t have much space in your apartment you can even make as little as 1 gallon of beer.
Most of this equipment is available through online retailers. If you don’t want to individually buy each element, many companies offer starter kits (5 gallons or 1 gallon) that include the necessary equipment as well as hops, grains, malt extract, and yeast.
Some homebrewers may tell you that it’s necessary to own a few additional pieces of equipment, such as a wort chiller, a hydrometer test jar, or an anti-splash funnel.
While these pieces of equipment are handy, they aren’t essential for making a batch of beer.
If you’re looking for the least amount of equipment to get the job done (which may be the case if you’re in an apartment and pressed for space,) the above list is compiled of just the essentials.
As far as essential equipment goes, you do have a few choices. For example, both carboys and fermentation buckets will work for brewing beer, but you may choose one over the other based on personal preference.
Buckets are usually more durable and easier to clean, with a wider mouth that makes it easy to pour wort into it.
Carboys are a little trickier to clean, but allow for less risk of oxidation and contamination and allow you to monitor the fermentation process.
2. Find a recipe for your desired brew or purchase a kit
If you are looking to start brewing beer in your apartment, one of the most essential things you will need is a beer recipe.
If you are looking to reproduce your favorite American pale ale, the types of hops and grains you use will be much different than if you’re trying to brew a hearty winter stout.
If you haven’t already decided, determine what sort of beer you would like to brew.
After you’ve decided, you can look for a recipe.
Online sites like the homebrewersassociation.org and beerandbrewing.com offer huge libraries of free beer recipes.
Some specialty beers may require more unique ingredients, such as fruit or milk, and may require extra steps to brew. Be sure to read the entire recipe carefully before deciding to brew.
Sometimes, starting from scratch can be intimidating when it comes to brewing beer.
If you’re a novice, terms like Final Gravity, Partial Mash, and SRM might be a little overwhelming.
Don’t worry!
Brewing beer at home doesn’t have to be complicated.
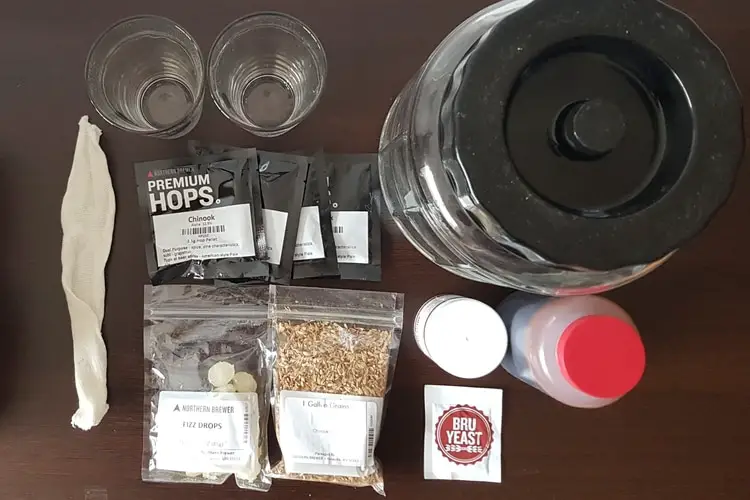
There are many companies that offer home brewing kits that come with all the necessary ingredients, already measured and portioned out so all you have to do is tear open a few bags and follow the provided recipe.
These kits will allow you to select a particular type of beer you would like to make, such as an IPA (I owned this one) or a pilsner.
Here’s a recipe provided by this Northern Brewer homebrew kit I own:
The downside of these prepackaged kits is that you might be limited in regards to what types of beer you can brew, but it can be a convenient option for anyone who is just starting to homebrew or someone who does not want to have to search the web for various recipes and ingredients.
3. Acquire the ingredients needed for your brew
Once you’ve selected a recipe, it’s time to assemble the necessary ingredients. If you are using a prepacked kit, you already have everything you need. However, if you are starting from scratch, you’ll need to buy your ingredients.
Beer is a fairly simple recipe.
There are only four main ingredients in beer: grains/malt extract, hops, yeast, and water.
The variations in flavors come from the types of grains, malt extracts, hops, and yeast used, as well as variations in the brewing method and the potential addition of various other flavoring elements.
If you are looking to buy hops, online retailers like hopsdirect.com and farmhousebrewingsupply.com offer hundreds of different strains. Some hop mixes are formulated to be clones of your favorite commercial brew, but you may also find your own preferred varieties and make completely unique homebrew.
Malt extract can also be purchased online, and the type of beer you are making may require a particular type of malt. Retailers like Midwest Supplies and More Beer offer many varieties, including both liquid and dry forms.
Grains (of malt) can also be found from these retailers. Different grains can drastically change the flavor of your homebrew, and most recipes will call for a specific type to be used.
The above-mentioned retailers also offer a multitude of yeast varieties. The type of yeast will determine what type of beer you create, and while many brewers used purified yeast strains that give exact results, some wild yeasts can give unique and potentially delicious side flavors and add a surprising, unpredictable element to homebrewing.
4. Clean and sanitize all your equipment and your brewing area
If you ask homebrewers what the single most important stage of the homebrewing process is in order to ensure a successful batch of beer, most of them will tell you sanitization.
Failure to properly clean all your equipment, as well as anything else your brew may come in contact with, is a sure way to get a contaminated beer. Contaminated beer will taste foul.
Keep in mind, cleaning and sanitizing are two different steps.
Sanitization alone is not enough to ensure properly sterile equipment.
You should first clean your equipment with soap and warm water, making sure to inspect for any stuck-on debris, especially if you are reusing equipment, before sanitizing.
So, before you start brewing anything, clean and disinfect all your equipment.
Before you bottle your homebrew, you’ll also need to clean and sanitize your bottles and the caps.
To sanitize, take a sanitizer such as this one and put it in your 6-gallon bin or bucket, diluting with water as per the sanitizer’s recommendations. Place all your equipment into the bucket and let soak for at least a minute.
Often, it is best to sanitize equipment right before you plan to use it.
The less time between sanitization and use, the less potential for the equipment to become contaminated. After removing equipment from the sanitization bucket, let it air dry on a clean surface, such as a table or countertop lined with paper towels.
5. Heat 2.5 gallons of water in a stockpot
Using a 3 to 5-gallon stockpot, heat 2.5 gallons of water.
If you’re aiming for 1 gallon then heat 1 gallon of water.
It is best to use filtered water.
Some homebrewers will use a brew kettle instead of a stockpot.
A brew kettle can be a good investment for anyone wishing to seriously homebrew, as they can allow for much bigger batches of beer to be brewed and better control of the temperature.
A stockpot, however, has the versatility to be used in other aspects of the kitchen and works perfectly well if you don’t want to make a large investment or if like me you don’t have room to store another piece of equipment in your apartment.
6. Place your grains in a nylon/Cheesecloth bag and steep in the heating water
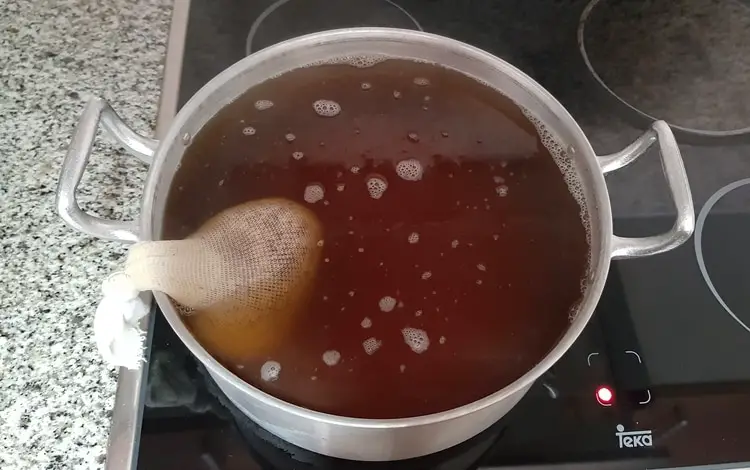
While your water is heating, place your grains into a mesh nylon or cheesecloth bag and tie the bag shut.
Be sure to tie the knot in a way that leaves room for the grains to be loose in the bag.
Place this bag into the water and let it steep while the water heats.
7. Bring the temperature of the water to between 150 and 170° F
Bring the temperature of the water up slowly, over medium to low heat. Between 150° and 170° F (65° – 76° C).
Avoid the temptation to put the pot on high heat in order to shorten the process, as this will be harder to control and you will likely overshoot your temperature range and not be able to remain within the ideal parameters.
Use the cooking thermometer to monitor the temperature closely.
8. Steep the grains for 20 minutes, then remove the bag without squeezing the excess liquid back into the pot
Once your water has reached a temperature between 150° and 170° F, maintain this temperature and let your sack or grains steeps for 20 minutes.
After 20 minutes, remove the bag of grains.
When removing the bag of grains, allow the water absorbed in the bag to drip back into the pot but do not squeeze or wring the excess water back into the pot.
Squeezing the bag runs the risk of introducing more tannins into the brew, which will lend an unfavorable bitter taste to your brew. Squeezing the bag can also result in a cloudy, turbid final product rather than a clean, clear beer.
9. Bring the liquid to a rolling boil
Once you have removed your bag of grains, bring the liquid to a rolling boil.
A rolling boil is defined as when a liquid reaches a temperature at which it boils turbulently and is not disrupted or stopped by stirring. It is a much more vigorous boil and a higher temperature than a simple simmer.
If in doubt of whether your boil is a rolling boil, try stirring the pot. If the boil dies down and takes several seconds to start up again, you are not yet at a rolling boil.
For a true rolling boil, stirring will not cause the boil to stop or die down.
At this point, it is important to avoid a boil-over. Monitor your pot carefully.
If the temperature gets too hot, the liquid will boil over and you will not only lose a good portion of your brew but you will also have a sticky mess to clean up once it cools.
At this point in the process, your liquid is now commonly referred to as wort.
However, in the technical world of beer making it is considered “sweet wort” since hops have not yet been added. Once hops are added, it is called hopped wort or bitter wort.
10. Once the liquid is boiling, immediately remove it from heat and mix in the malt extract and any hops called for
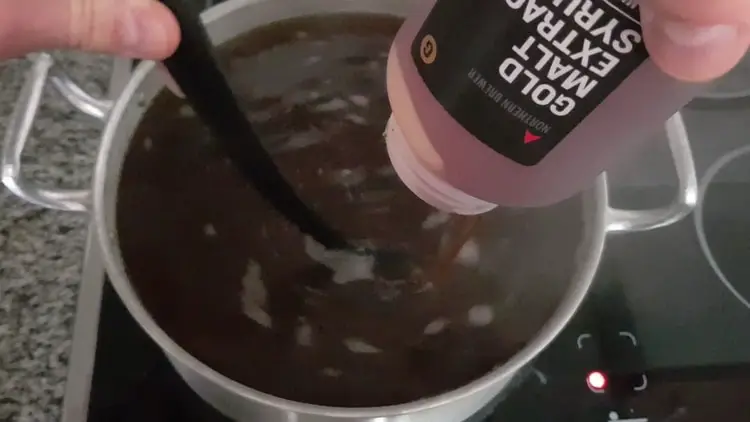
After you’ve achieved a rolling boil, remove the pot from heat.
At this point, you will want to mix in your malt extract and any hops the recipe calls to be added at this stage.
Often, bittering hops are mixed in at this stage.
Different recipes call for hop additions at different times, so make sure to read your recipe carefully to determine when to add which hops.
Make sure to mix the liquid, malt, and hops well at this point.
Any malt or hops that remain undissolved will settle to the bottom of the pot and burn, so you want to make certain they are thoroughly incorporated into the liquid before proceeding to the next step.
11. Return the wort to a boil
Once you are assured the malt and any hops are fully dissolved, return your wort to a low boil.
Once again, be careful to avoid any messy boilovers.
You will want to stir the pot frequently to keep this from occurring.
12. Let the liquid boil for the recommended time period for the recipe you are using
Most homebrew recipes will come with specific guidelines about how long to boil your sweet wort.
At various stages of this boiling period, the recipe may call for the addition of various hops.
Most recipes will recommend the wort remain at a low boil for at least a total time period of 60-minutes, but some recipes may require over 2 hours of boil time.
13. Add the aromatic hops; The liquid is now called “hopped wort”
As mentioned earlier, more likely than not your recipe will request the addition of various hops during the boiling period.
These hops are generally called aroma hops or aromatic hops, and they are added towards the end of the boiling process in order to give the beer flavor and aroma.
Unlike the hops added earlier in the process, these aromatic hops generally do not add bitterness to the brew.
They are generally added somewhere in the last 15 minutes of boiling.
Adding different hops are varying times during the boiling process can significantly change the flavor and aroma of the final beer.
14. Boil for an additional time determined by your hops, usually a few minutes, then remove from heat
Consult your recipe to determine how long you need to continue to boil your wort after the addition of aromatic hops. Different hops require different boil times, so make sure you keep a careful eye on the clock.
Once the boil time is complete, remove your wort from heat.
15. Cool the wort as quickly as possible to below 100°F / 37°C, either by placing the stockpot in an ice bath or using a wort chiller
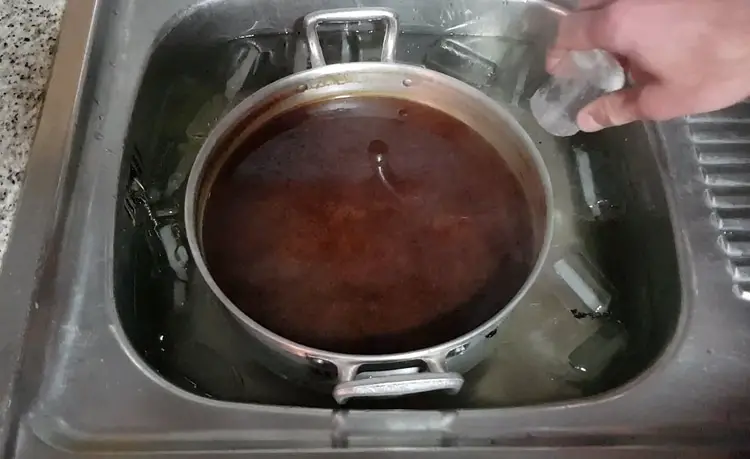
Once the boiling is complete, it is important to cool the wort as quickly as possible in order for the yeast to survive when it is added and to deter contaminants.
One of the easiest ways to do this is to take your stockpot and place it into an ice bath.
In order to avoid contamination risk, it is prudent to cover the pot before placing it in the ice bath.
To make an ice bath, you can either take a large bin or bucket, such as the one you used for sanitization, or a large kitchen sink and fill it with ice and cold water.
The more ice you can fit, the better, and you will likely need several pounds of ice. Submerge your pot in this icy bath and keep replacing the ice when it melts.
Some brewers use a wort chiller to quickly cool their wort.
These wort chillers are either submerged into your brew to chill it or are built as a plate you place your pot upon which cools your brew.
While these make the cooling process consistent and remove the need for several pounds of ice, they aren’t necessary for making homebrewed beer.
Once your brewing vessel is cool enough to touch, you should start monitoring its temperature with a sanitized food thermometer.
The temperature range you need to chill to will vary with the type of yeast you are using, but most yeasts will require a temperature below 100°F / 37°C.
Most ale yeasts will work in a temperature range between 68 to 72° F (20-22°C), while lager yeasts prefer a cooler 45 to 57° F (7-13°C). To determine the exact temperature range necessary, consult your recipe or base it on the type of yeast you are using.
16. Once the wort is cooled, pour it into the fermentation bucket or carboy
If you haven’t already cleaned and sanitized your fermentation vessel and additional equipment, now is the time to do so.
Pour your wort into the sanitized fermentation bucket or carboy.
If you are using a carboy, it may be easier to use a funnel since the opening may be quite narrow.
17. Add enough water to make 5 gallons of liquid
Your wort started as only 2.5 gallons of liquid, and over the course of the boiling period, some of this liquid was likely lost due to evaporation.
You will need to add cool, filtered water to the carboy or fermentation bucket in order to make the contents reach a total of 5 gallons.
18. Shake/Slosh the wort about in the vessel in order to introduce more oxygen
You will want to thoroughly mix together the wort and the cool water. At this point, it is also beneficial to aerate the wort, because this helps the yeast ferment.
The easiest way to do this is to pick up your carboy or fermentation bucket and shake it fairly vigorously for a minute or so.
You can also use a sanitized spoon to stir the liquid if you are unable to shake it.
19. Determine the Original Gravity
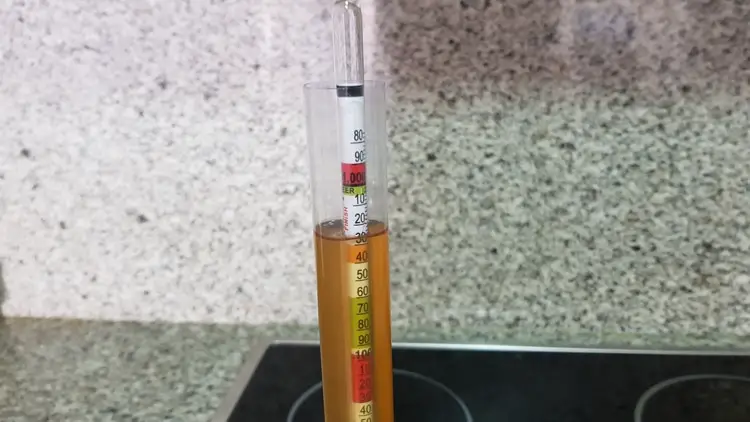
This step isn’t entirely necessary for the novice homebrewer using a pre-packaged kit, but if you are looking to be serious about your brews, determining the original gravity can help you perfect your batch.
Knowing the original gravity (OG) and the final gravity (FG) will help you determine the alcohol by volume (ABV) of your beer.
In order to determine the original gravity, use your hydrometer.
The original gravity of the wort will essentially tell you the amount of fermentable sugar present in your wort.
20. Add yeast
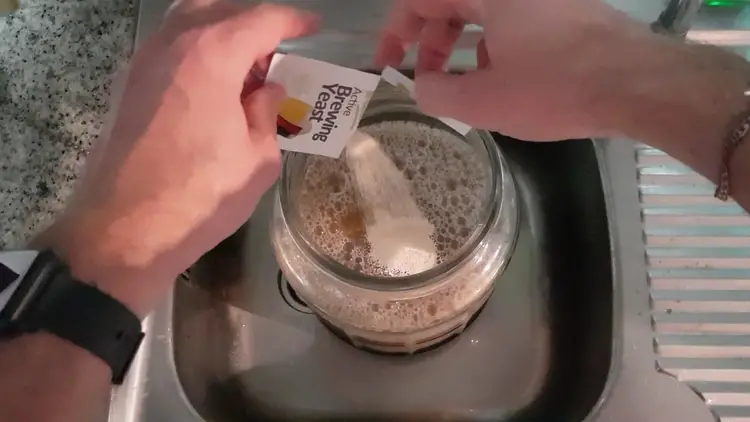
Yeast is an incredibly important component of beer.
It is responsible for kicking off the whole fermentation process.
The yeast will consume the malt sugars of your wort and produce alcohol and carbonation.
If your wort is too hot, it will kill the yeast and spoil your fermentation prospects.
Make sure to use your cooking thermometer to determine the wort is at an ideal temperature for adding the yeast.
Slosh the wort about to thoroughly incorporate the yeast.
21. Seal the fermentation vessel with an airlock and place in a cool, dark place until done fermenting
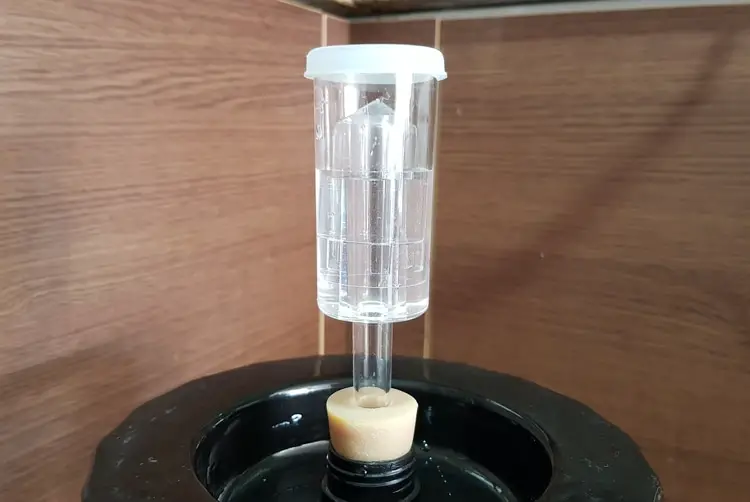
Once your yeast is pitched (added), you will want to seal your vessel with a stopper and airlock.
Make sure to fill the airlock with water.
The airlock is very important; you do not want to tightly seal off your brew with a cap or solid stopper.
The purpose of the airlock is to let carbon dioxide out of your fermentation vessel without letting any outside air in.
During the fermentation process, yeast will produce bubbles of carbon dioxide as it consumes the sugars within the wort. These bubbles of gas will accumulate and build up. If your vessel is completely sealed, there is nowhere for this gas to go and it can result in your vessel bursting.
Store your fermentation vessel somewhere relatively cool and out of direct sunlight.
You don’t want your brew to get too hot, as this will kill the yeast, but you also don’t want it to become too cold, as this can promote bacteria and mold.
Usually, it is best to keep the fermenting vessel somewhere between 65 to 70° F (18-21° C).
Let your fermentation rest for about two weeks.
Some particular types of brew may call for different lengths of time, so be sure to consult your recipe.
Once your brew is done fermenting, it’s time for bottling.
22. Add sugar to the beer (2 weeks later)
Once your brew has fermented for two weeks, you will need to add some sugar so that the beer can become carbonated while bottled.
This is called “priming sugar.”
If your recipe does not give specific directions for making priming sugar, it can be done fairly easily. To make priming sugar, simply boil two cups water and then add ⅔ cup cane sugar. Stir to thoroughly dissolve. Let this cool.
Once cooled, add your priming sugar to the fermented beer. This is sometimes done by transferring your beer into a separate container, such as a large pot or bucket, and then stirring in the priming sugar.
However, the priming sugar can also be carefully poured into the fermentation vessel and mixed in if you don’t want to transfer the beer to a new vessel.
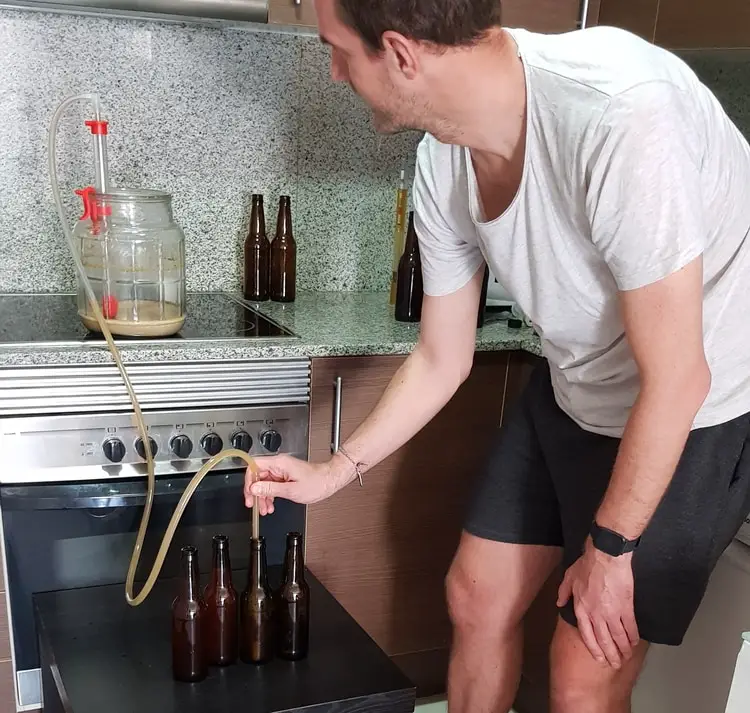
22. Bottle the beer
Bottling beer can be an exciting stage in the homebrew process because you are almost done!
It can feel very satisfying to hold a filled bottle in your hands and realize you made the contents all on your own.
However, bottling is still a critical stage in the beer’s development.
You need to make sure whatever bottles you are using are properly cleaned and sanitized. Bottle brushes can be helpful for cleaning out the hard to reach areas in bottles.
Some homebrewers choose to reuse commercial beer bottles and cap them.
This can be a cheap process if you have ready access to empty beer bottles and is a great way to recycle bottles. If you choose to use this method, you will need to invest in a bottle capper.
If you don’t want to purchase a bottle capper, you can instead use flip-top, also called swing cap, beer bottles. These bottles have a reusable stopper mechanism to close instead of a bottlecap and can be cleaned and used repeatedly for batch after batch of beer.
Using a racking cane, siphon, and beverage tubing makes transferring the beer to the bottles easy.
For detailed directions for how to use this equipment, check out this great tutorial.
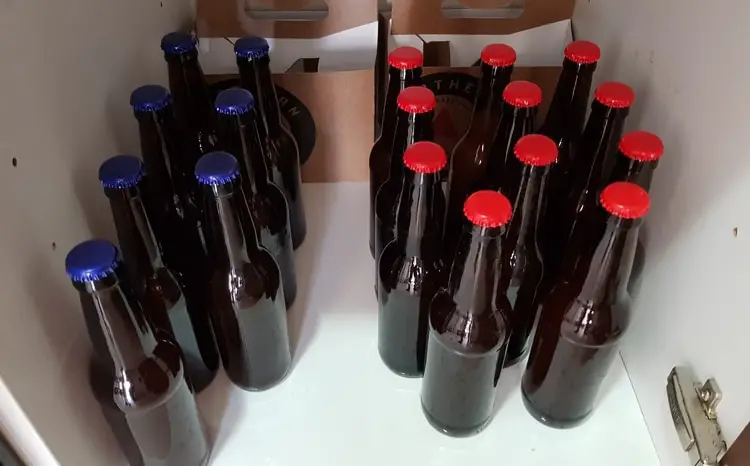
23. Store bottles at room temperature for another 2 weeks in order to develop carbonation
Once your brew is bottled, it may be tempting to start drinking it right away.
However, in order for the beer to become carbonated, you will need to let it rest for at least another two weeks.
This time period may vary slightly depending on the temperature of your apartment.
In warm environments, the carbonation may take much less time.
However, in cooler environments, it may take even longer than two weeks for the beer to become carbonated.
Be sure to store your bottles somewhere out of direct sunlight.
24. Enjoy your brew!
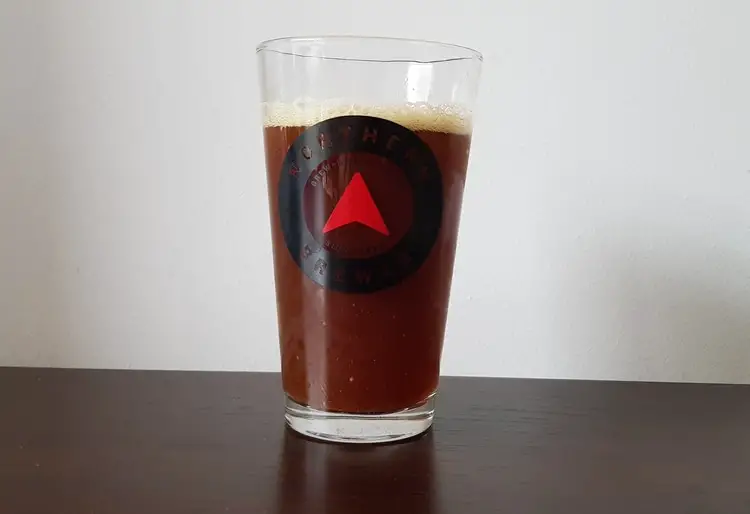
Once the two weeks have elapsed, you’ll be able to enjoy your own homebrew in the comfort of your apartment.
If you open a bottle and feel like the beer is not carbonated enough, you can leave the remaining bottles to rest for a few more days to try to develop more carbonation.
If your first bottle opened feels perfectly carbonated (or even too carbonated,) feel free to transfer the rest of your bottles to your fridge and prepare to enjoy your homebrew.
Even if your brew doesn’t taste exactly like a commercial beer, don’t despair! A lot of factors can influence the final result of your beer, and sometimes the perfect batch may take a little trial and error.
Whatever the case, there is a unique satisfaction and pride that comes with being able to offer friends and family a bottle of something you made yourself. Thanks to the increased availability of beer making supplies and ingredients, anyone can start brewing beer at home.