
The first major benchmark for a serious homebrewer is Journeyman status. Brewing is a multitude of things, art, science, process, a reason to kick it with friends. One thing is certain, the beer must be good for anyone to enjoy it. Not least of which is the brewer themself.
Mastering homebrewing takes many years, many successes and at least as many mistakes.
A Journeyman is a qualified, competent, and skilled craftsman. It will take 20 – 30 batches to reach this stage.
There are several steps within this range, and here are some tips to assure success.
Journeymen get it right, nearly every time. They make very good beer, and often excellent beer.
These steps are essential to achieve a level of creative excellence.
Tip 1: Knowing your hops
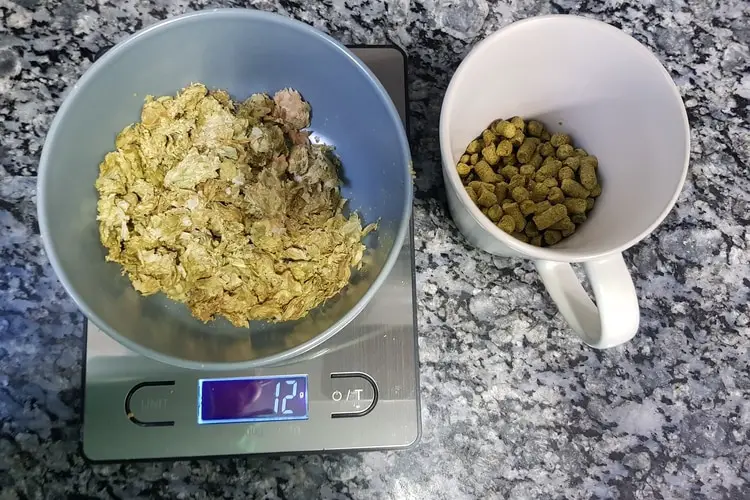
Hops are the spice of beer.
As brewers begin, they use hopped kits.
While these make drinkable beer, and are fun to make, the hop oils add little character other than bitterness and a subtle spicy flavor.
Even then, the flavor is likely to reside in your imagination.
The Journeyman’s target is 25 batches of beer, so play the odds for 3 – 4 batches and use hopped kits.
Get comfortable in the kitchen and boldly take a step forward. Use unhopped extract and hop your own beer.
Start out using the HBU utilization method, as recommended by Papazian, or IBU’s which are harder to calculate and get used to.
Reference this previous article for more on Hop Utilization.
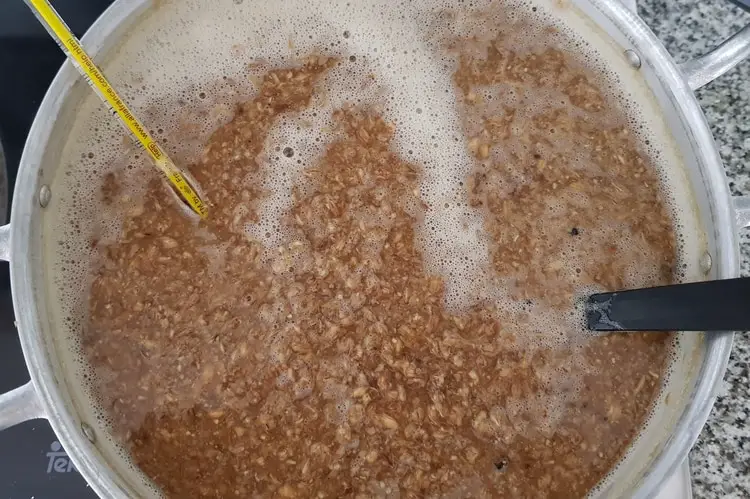
Extracting Hop Oils and Staging
Isomerization is the process by which the alpha acids and flavors oils are drawn out of the hops.
Add the hops in three or more distinct stages: assuming a 60-minute boil.
Stage 1 – During the last 50 min. of the boil, add bittering hops. IPAs can have more additions for bittering, last 60, 50 and 30.
Stage 2 – Add flavor hops the last 7 – 10 min. of the boil. This gives the spicey, herblike, vegetal flavors, the good kind.
Stage 3 – Aroma hops, last 3 minutes to burner off. This gives bouquet and floral flavor only. It can be subtle. Leaf hops or plugs generate the best results for this stage.
Tip 2: Fashioning your adjunct flavoring
Between batch 4 – 8, we now hop the beer using pellets or whole leaves and are ready to aggressively experiment with adjunct grains.
A good shop owner will get you started on these early. Using them is easy.
The key is learning the flavors and determining what flavors result when we create the mix.
- What flavors give a Porter its dryness and chocolatey finish?
- How is a Stout different from a Porter, and what is the key malt for a successful Pale Ale?
- What gives Pales their distinctive orange to red color and caramel finish.
Luckily, some of the answers are in the names themselves.
Chocolate malt is aptly named, as is Caramel (crystal) malt.
I explore this in detail in a previous article section Learning the flavors.
Experiment
Find a small set-up with 1-gallon cider jugs or a 2 to 3-gallon carboy.
Run some small experimental batches and learn the flavors one at a time.
In a perfect world one experiments changing only one variable at a time: 1 malt or 1 hop, setting a strict control.
I hadn’t the patience for this and would change 2 -3 ingredients simultaneously.
An American Brown, for example, would feature some Chocolate malt and Northern Brewer hops to bitter. You will already have some Caramel 60L as a baseline.
As you taste it, keep your palate focused on the source of bitterness, the dark malt character and quality of the lightly burnt taste.
Identify the characteristic and understand why. Even with this looser arrangement, one can identify the flavors and begin to anticipate the results.
Tip 3: Going liquid yeast
Batches 10-15 are well under way.
I think any brewer should use liquid from the get-go, but if not, it’s OK.
Start now.
Yeast vials are so easy to use now.
A pitchable amount of pure yeast slurry is just a few dollars more than quality dried yeast.
The difference between liquid and dried yeast is the difference between Sunbeam white bread and fresh baked whole-grain French loaves.
There is no comparison, and they exist in completely different realms of quality and nuance. Read at length about Dry v. Liquid Yeast here.
Each country produces its own unique yeast strain.
And while technically they are all the same species of ale yeast, Saccharomyces Cerevisiae, they are products of distinct environments, giving the beer its MOST distinct flavor, regardless of what malt or hops you use.
True, some yeasts are similar in character.
Yet American, Belgian, English or German, they hold their subtleties and unique characteristics.
In some cases, as with Belgian yeasts, the yeast is the major flavor characteristic of the beer itself, not so much the malt or hops.
All beers utilize similar malts and hops as the market produces.
Yet with good reason do breweries safeguard their proprietary yeast cultures.
Tip 4: Strict attention to fermentation, aging and packaging
Follow your beer’s fermentation habitually.
Early on, take a gravity reading every 3 days.
By batches 15-20, you need not take a gravity reading so often.
You will be brewing in glass so just look at it. Monitor and maintain temperature precisely.
Keep it cool enough or warm enough as the season requires.
Once primary fermentation is done, rack the beer off of the yeast.
No need to let it sit on dead autolyzed cells, old hops and cold break that snuck in from the kettle.
Depending on the beer, ale or lager, you may age it in the carboy, or bottle.
Bottle an ale after 3 weeks, and a lager you can keep for much longer, provided they are stored 40˚ F or below.
You may reuse liquid yeast slurry.
At the end of primary racking I used to jam the racking tube – no filtering tip included – deep into the slurry of the primary fermenter.
I would save about 3 – 5 ounces of creamy white slurry in an 8 oz. glass Coke bottle. I would then pull the tube back out of the yeast and put a few ounces of beer on top of the yeast.
I capped the bottle and stuck it in the bottom back of the fridge. Use the yeast within 2 weeks; within one week is better. There are many more fermentation details to ponder.
Please refer in detail to the article Primary and Secondary Fermentation in Beer.
Tip 5: Going ½ and ½: Extract – All-Grain
This is the big one, the step that brings us to the next level.
Extract brewing can make very fine beer. Can is the operative word.
If used recklessly or over-supplemented with sugar – 50/50 as some kits and shop owners recommend – extract beer makes cloyingly sweet, poorly attenuated, apple-cidery… swill!
That said, I have guided you through steps to avoid this and elements to be aware of to avoid it:
- use light liquid malts
- keep sugar additions to 10 – 15% of total weight
- create optimum fermentation environments for optimum attenuation
- If using dark malts, try to get more color and flavor from adjunct malt additions to pre-boil, rather than depending on prepackaged dark extract malts. (their melanoidin content is high- kettle browning leaving an undesirable residual sweetness)
Assembling Equipment
You likely have most of what you need for mashing.
You will need a few more implements, as follows:
- a small cooler, 6 – 12 pack size at the largest. (Make sure the lid is exceptionally tight and use it for nothing else, no picnicking, no beer even! – You want to keep the seal tight)
- A grain-mill. I still champion Corona, a cheap supermarket available mill found in the latino sections of many grocery stores and of course the local mercado (like this).
- Your homebrew shop keeper will likely grind for you, also.
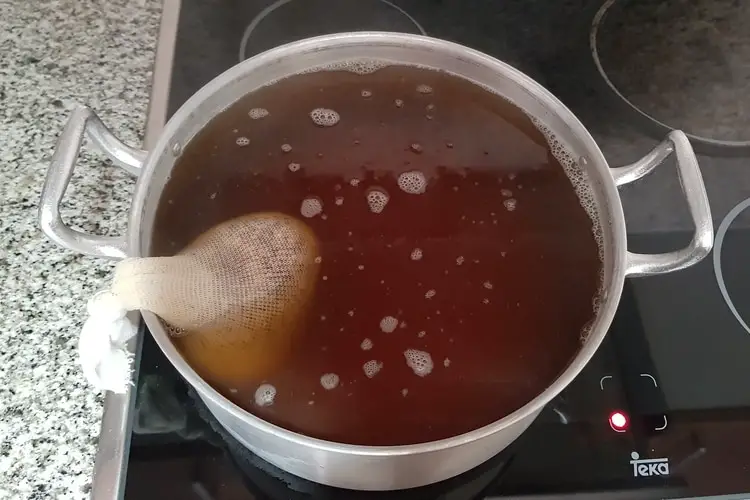
- A small lauter tun, or way to wash the grain. See the section the set-up for a vorlauf on how to make one.
- We use the large 5-gallon food-grade (pickle buckets I call them) to make a full-size lauter. You can source these in the 1 – 1.5 gallon size. install a faucet and you are off to the races.
- A device for sparging: a homemade sprinkler or commercial sparger.
- You could use the BIAB (brew in a bag) method. It has its benefits and drawbacks. The pros and cons are discussed at length here.
- A 5-gallon kettle, even for the stovetop.
- as you mash 5 pounds of malt for example, you will yield about 5 pints of raw wort from the mash.
- You will also yield about 5 quarts of water from the sparge. So, your foundation water will be at least 2.5 – 3 gallons.
- You will need plenty of head space for the boil.
Mashing in Brief
This can be a daunting step to make, yet don’t let it be.
This is why I recommend starting small.
I cover mashing at length in the section, the Mash Process in Homebrewing Explained, but we can briefly review here.
Heat your mash water to 170˚ F (76° C) and pour into your cooler.
Mix in the malt, stirring strongly as you pour.
Put the thermometer in and wait 3 m.
If too hot, open and stir for 3 minutes.
If too cold, cautiously add a tad off hotter water, stirring well.
Close the lids, wait 3 minutes, check your temp and if between 148 – 158˚ F (64 – 70° C), close the lid and do not disturb for 90 minutes.
What benefits the ½ – ½ method brings
Tip 2 of the article discusses using real malts for flavor and color.
The ½ – ½ method brings all of these benefits as well as authentic fermentable sugars extracted from raw barley malt.
This makes a dramatic difference in flavor quality, and profoundly elevates the quality and purity of your beer.
As your wort is 50% grain-based, its proper attenuation is virtually guaranteed – no more high terminal gravities.
There will no longer be the DME bite, or cloying sweetness left over from pure extract brews.
All flavors, chocolate, caramel, roasted or biscuit can come straight from the barley itself.
The malt flavor is pure and clearly defined in the taste profile.
For a 5 gallon batch, mash about 5 pounds of raw malted barley.
At this point you need only add 3 – 4 gallons of malt extract.
In this instance, source and acquire the lightest possible liquid extract available.
I have used 100% wheat extract and also extra-light liquid extract.
The reason for light extract is twofold.
All the malt coloring and flavor you need comes from the raw barley malt.
There is no need to use flavored or colored extract.
Also, the extract will likely only use the palest of malts, simple 2-row or 6-row barley.
The melanoidin content is much lower.
The extract is more of a sugar supplement than the primary ingredient.
I have achieved terminal gravities of 1.006 using this method!
One note you may or not want to follow.
I have used food-grade malt extract bought from local whole food stores, bought in bulk.
Technically, this malt is Grade B, used for cooking and baked goods. However, it is much cheaper and as it is a supplement, I simply needed the sugar, nothing else.
I could save about 35 – 40% on extract cost. Take the break where you can get it. It depends on one’s purist tendencies.
Last thoughts on ½ – ½
Somewhere between batch 16 and 22, take this step.
Partial mash brewing propels you to a new level of quality and connection to the process.
It makes many things crystal clear in the mind that were simply ideas before.
Mashing as a chemical reaction is realized.
Controlled attenuation is achieved. Malt flavor is delicately balanced and controlled.
Making choices between heavy, chewy beers and light crisp goldens is now an option.
This step puts you over the top.
Tip 6: Maintaining and replacing equipment preventatively
Proactively keep your equipment pristine and unblemished.
When your hoses start to yellow, or turn opaque, throw them away.
Vinyl hose is cheap.
If using plastic fermenters and they get scuffed, discolored, or outright scratches, trash them and move to glass.
I would recommend glass by batch 3 – 5 in any case.
Money is tight and it’s easy to think, “It’s just homebrew, it doesn’t matter so much if I do this…or this…it will turn out OK.”
Yes, perhaps for a while.
If you can see the abrasions or anything other than clear or white vinyl, change it.
This may be every 6 months for hoses, 6 – 12 months for larger equipment.
An exception is iodophor. This is an iodine-based cleaner used by professional brewers and will stain vinyl, light yellow or orange.
I used B-Brite back in the day.
It sanitized in 15 seconds or so, considered fast.
Star San is also fine.
ALERT: Sanitizer will not clean dirt. It kills bacteria on a clean surface.
In the Master’s footsteps
Brewers are loved for their generosity with friends.
They are the respected envy of their peers as they return home with accolades and ribbons from homebrewing tournaments.
Follow and adhere to the six points herein.
Skills are refined, techniques become second nature, and by this stage superlative beer is produced.
[email-subscribers-form id=”2″]